If you’re using the Wholesale Lead Capture plugin to streamline your wholesale customer onboarding process, you may want to customize the appearance and layout of your registration form. One of the most important customization features is the ability to rearrange the field order on your wholesale registration form. This not only enhances user experience but also ensures a smoother data collection process.
In this detailed tutorial, we’ll walk you through the step-by-step process of reordering fields using the plugin’s intuitive backend interface. Whether you’re new to WooCommerce or an experienced store manager, this guide will help you efficiently manage your registration form layout.
Step-by-Step Guide to Reordering Fields in the Wholesale Lead Capture Registration Form
Step 1: Log In to Your WordPress Admin Dashboard
To begin, you’ll need to access your WordPress site. Go to your login URL (typically yourwebsite.com/wp-admin) and sign in with your administrator credentials. This will take you to the WordPress admin dashboard, where all your site’s configuration settings are managed.
Step 2: Navigate to the Wholesale Lead Settings
Once inside the dashboard, look at the left-hand side menu. Scroll down until you find “Wholesale”, depending on how your plugin appears.
- Click on Wholesale > Settings > Lead Capture Settings.
- Next, select the “Registration Form” tab at the top of the settings panel.
This is where you’ll find all the options related to the wholesale registration form configuration.
Step 3: Locate the Registration Fields Section
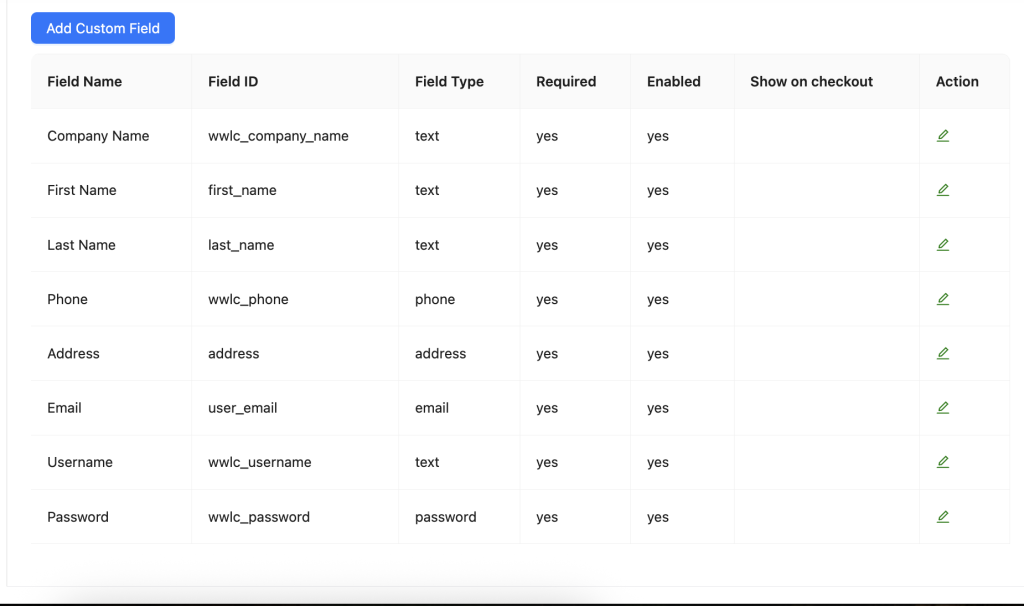
Within the Registration tab, scroll down to find the registration fields management area. This section allows you to enable, disable, customize, and reorder form fields displayed on your wholesale registration page.
Here, you will see a list of default fields, such as:
- First Name
- Last Name
- Company Name
- Email Address
- Phone Number
- Tax ID
- Custom Fields (if added)
Step 4: Adjust the Field Order
To change the field order:
- Hover over the field you want to move.
- You’ll notice a drag handle icon (usually represented by three lines or dots).
- Click and drag the field to your desired position within the list.
- Release the mouse button to place the field in its new position.
By dragging and dropping the fields, you can fully customize the order in which they appear to your wholesale customers during registration.
📝 Pro Tip: Consider placing the most critical fields like Company Name and Email Address at the top of the form for better conversion and data prioritization.
Step 5: Save Your Changes
After reorganizing your registration fields:
- Scroll to the bottom of the settings page.
- Click the “Save Changes” button to apply your new field order.
Failing to save the settings will result in your changes being lost, so this step is crucial.


