A major component of the WooCommerce Wholesale Lead Capture plugin is its ability to create a customized registration form specifically for wholesale customers. Unlike the standard WooCommerce registration form, which typically only asks for an email and password, this form collects more detailed information to better assess potential wholesale customer’s needs. This allows businesses to gather important data from their wholesale leads during the registration process, streamlining customer management.
Built-in Fields
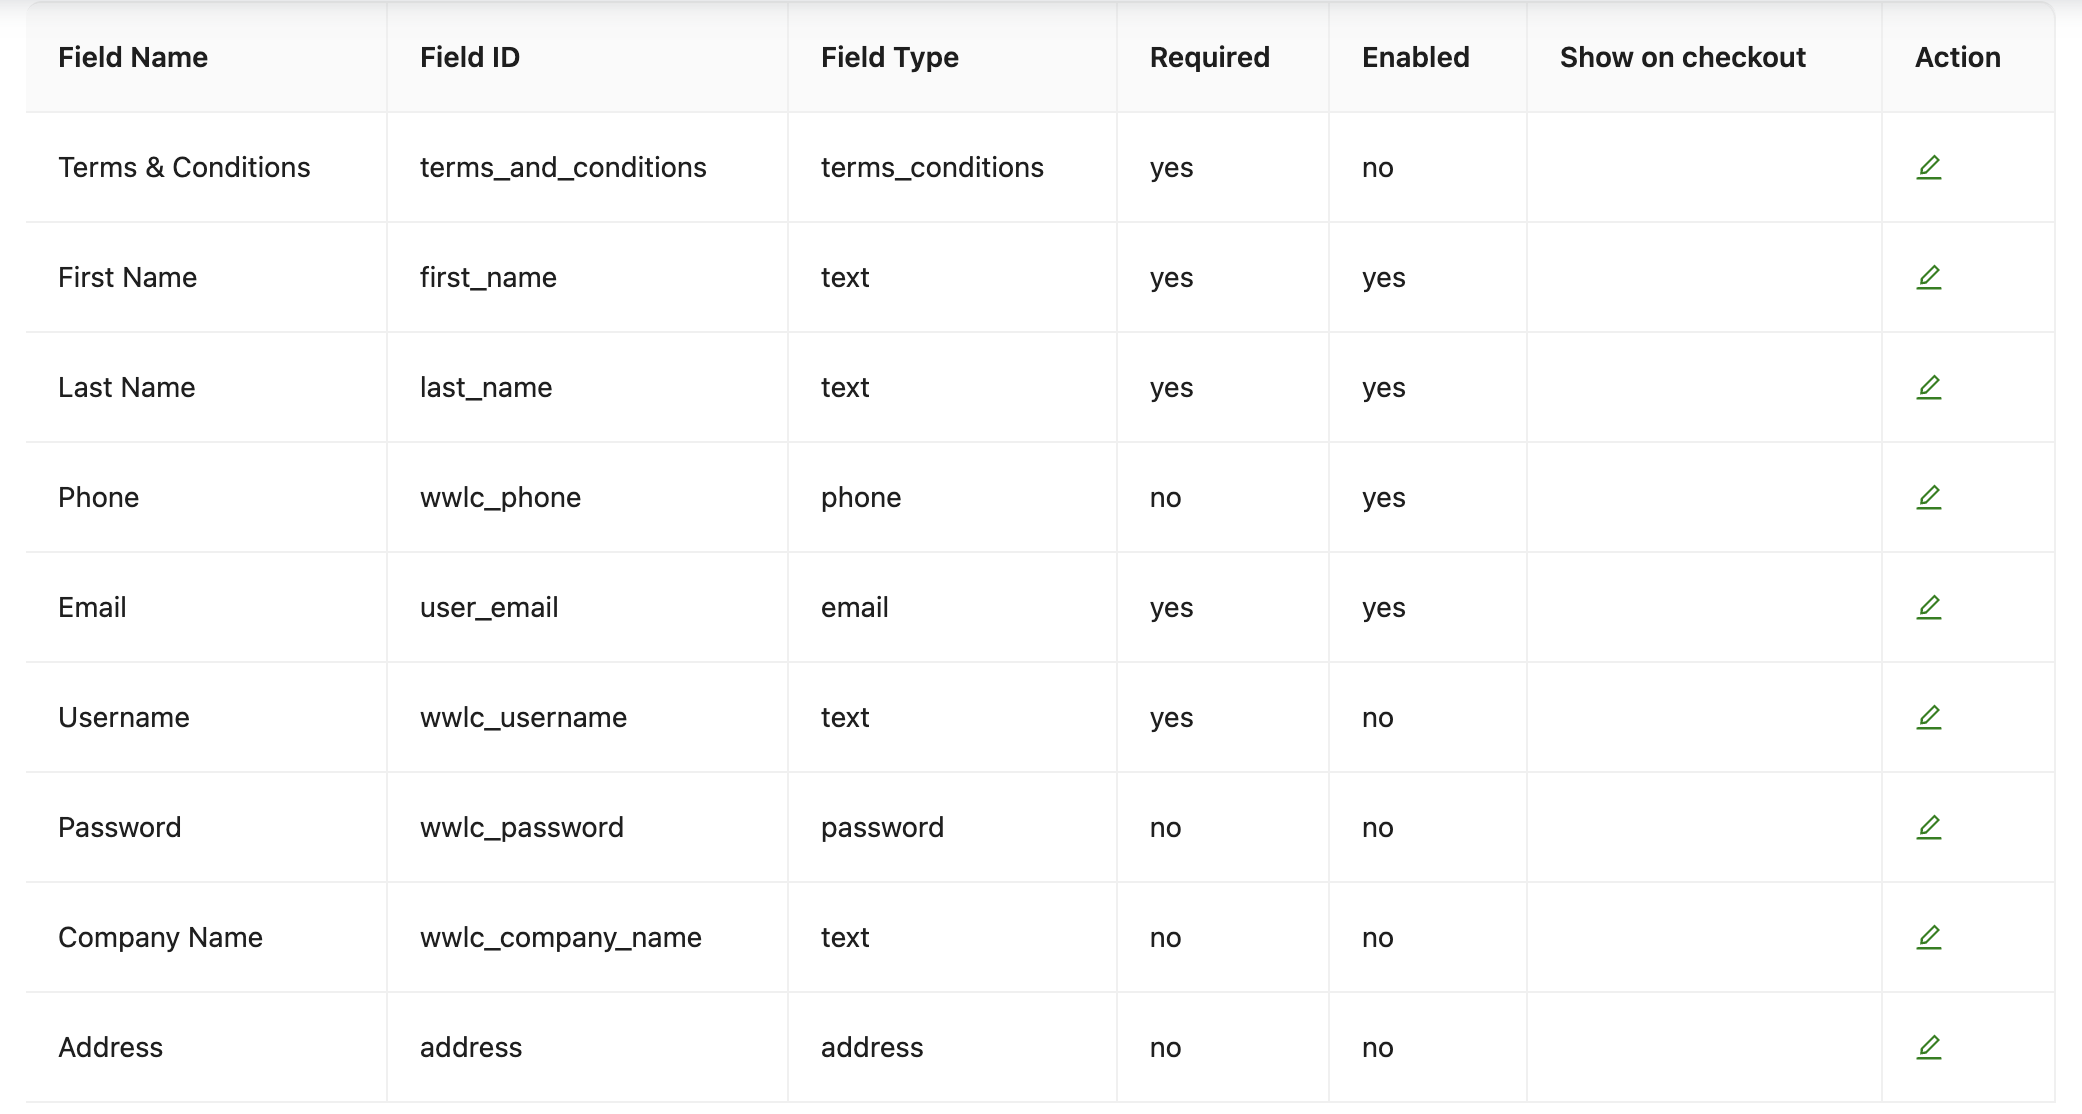
Default in-built fields on the registration form are:
- First Name (required)
- Last Name (required)
- Email (required)
- Username (optionally required)
- Password (optional) (optionally required)
- Phone (optionally required)
- Company Name (optional) (optionally required)
- Address (optional) (optionally required)
- Terms and Conditions (optionally required)
Editing The Form
You can customize the fields displayed on the registration form by going to Wholesale > Settings > Wholesale Lead Capture > Registration Form in your WordPress dashboard. There, you can adjust which fields appear and modify their display order by tweaking the field settings. This allows you to control the layout and the specific information you collect from your wholesale customers.
Custom Fields
The registration form is fully customizable. You can add custom fields in addition to the built-in ones, and the data will be recorded for future reference. This is especially useful when using the approvals system, as you can collect relevant data to help decide whether a user should be granted an account.
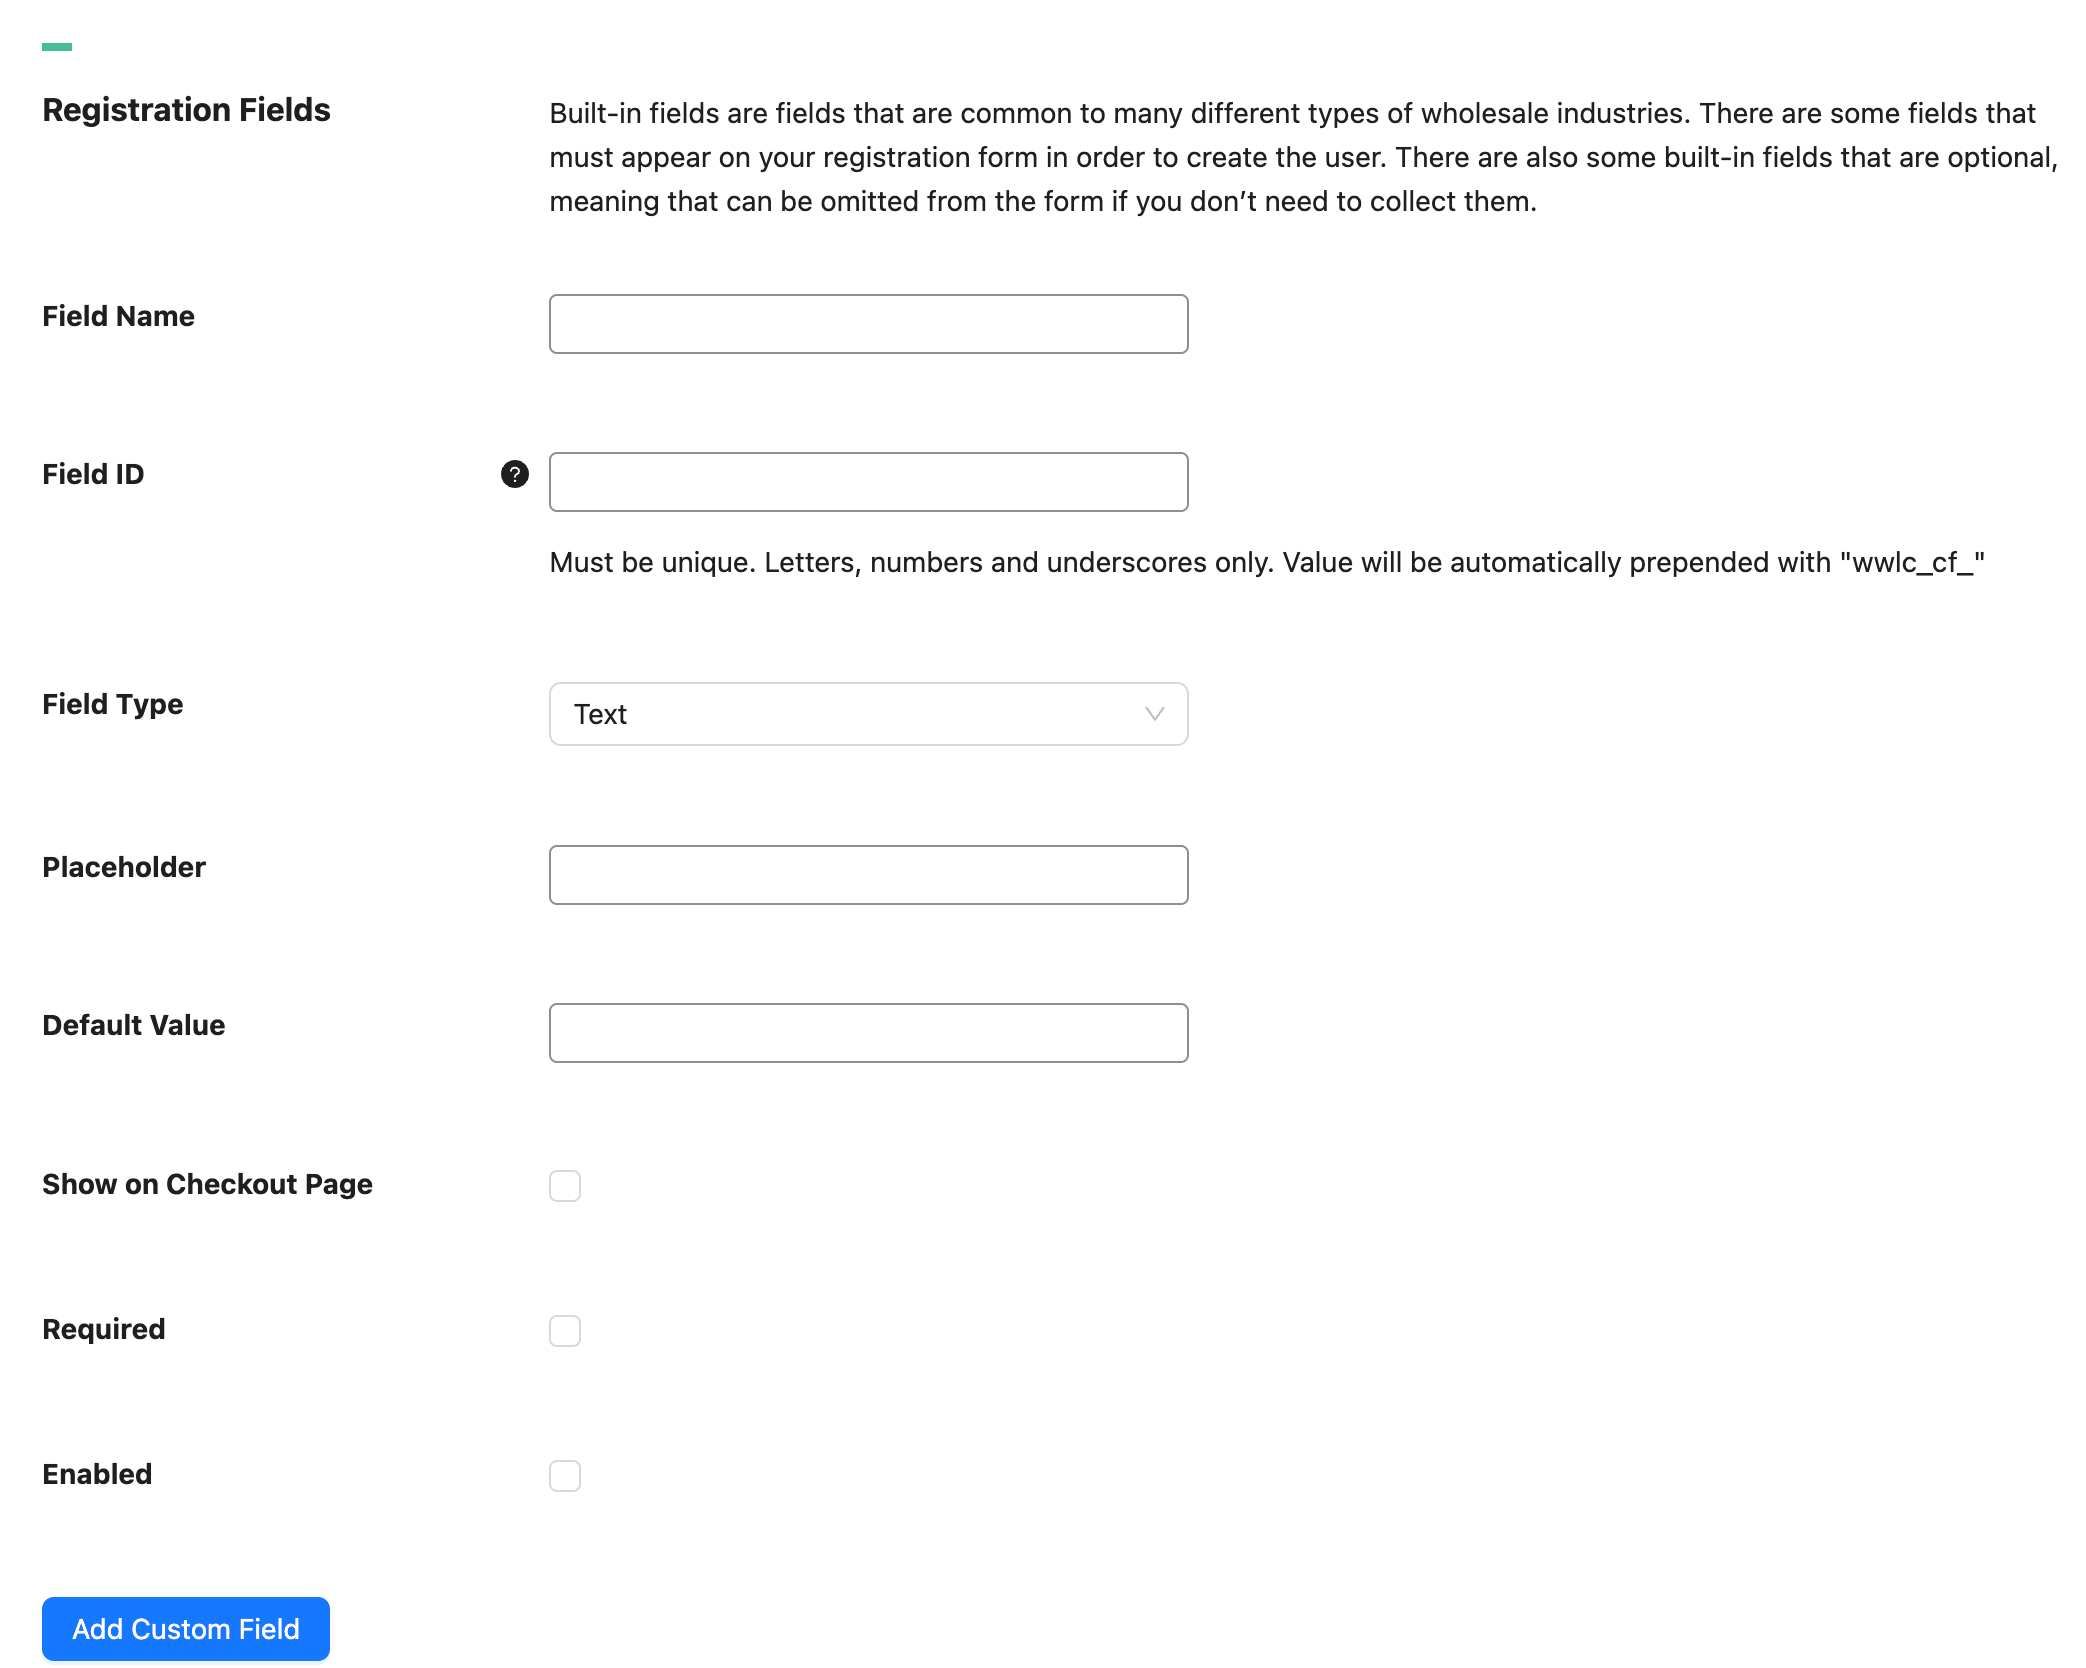
To add a custom field, you need to enter:
- Field Name (Displayed to the user)
- Field ID (The name of the user meta in the database. Must be unique. This is handy to know when exporting/importing users)
- Field Type (Currently supported types are: Text, Text Area, Number, Email, URL, Select, Radio, and Checkbox)
- Placeholder (sample text that a customer must input)
- Default Value (if the field has a default value or text)
- Show On Checkout Page (if the custom field will be available on the checkout page)
- Required (If the field should be required)
- Enabled (Enable the field to be included in the form on the front end)


