
Recruiting wholesale customers by email and spreadsheets gets messy fast. WooCommerce Wholesale Lead Capture gives you a wholesale registration form, a login page, an approval queue and the emails that go with them.
This guide walks you through the setup, from checking your wholesale pages to approving your first lead. When you finish, new wholesale applicants can register, wait for your approval, and get wholesale pricing once you say yes.
Prefer video? Watch the walkthrough below.
Requirements
- WooCommerce installed and active
- WooCommerce Wholesale Lead Capture installed and activated
- WooCommerce Wholesale Prices (free), which adds the Wholesale Customer role that approved leads get by default
- The setup checklist on the dashboard needs WooCommerce Wholesale Prices 2.3.0 or later. The Wholesale Lead Capture part of it needs Wholesale Lead Capture 2.0.7 or later.
- An Administrator or Shop Manager account
Step 1: Check your wholesale pages
When you activate the plugin, it creates three pages for you. You don’t need to build them yourself.
| Page | What it does | Shortcode |
|---|---|---|
| Wholesale Log In Page | The login page for wholesale customers | [wwlc_login_form] |
| Wholesale Registration Page | The page where new leads apply for a wholesale account | [wwlc_registration_form] |
| Wholesale Thank You Page | The page leads see right after they register | None |
To use the login or registration form on a different page, add its shortcode to that page.
- Go to Wholesale → Settings.
- Click the Wholesale Lead Capture tab, then the General sub-tab.
- Under Pages, check that Wholesale Login, Wholesale Registration and Wholesale Registration Thank You each point to a page.
- Optionally, pick a Login Redirect and a Logout Redirect page.
- Click Save Changes.
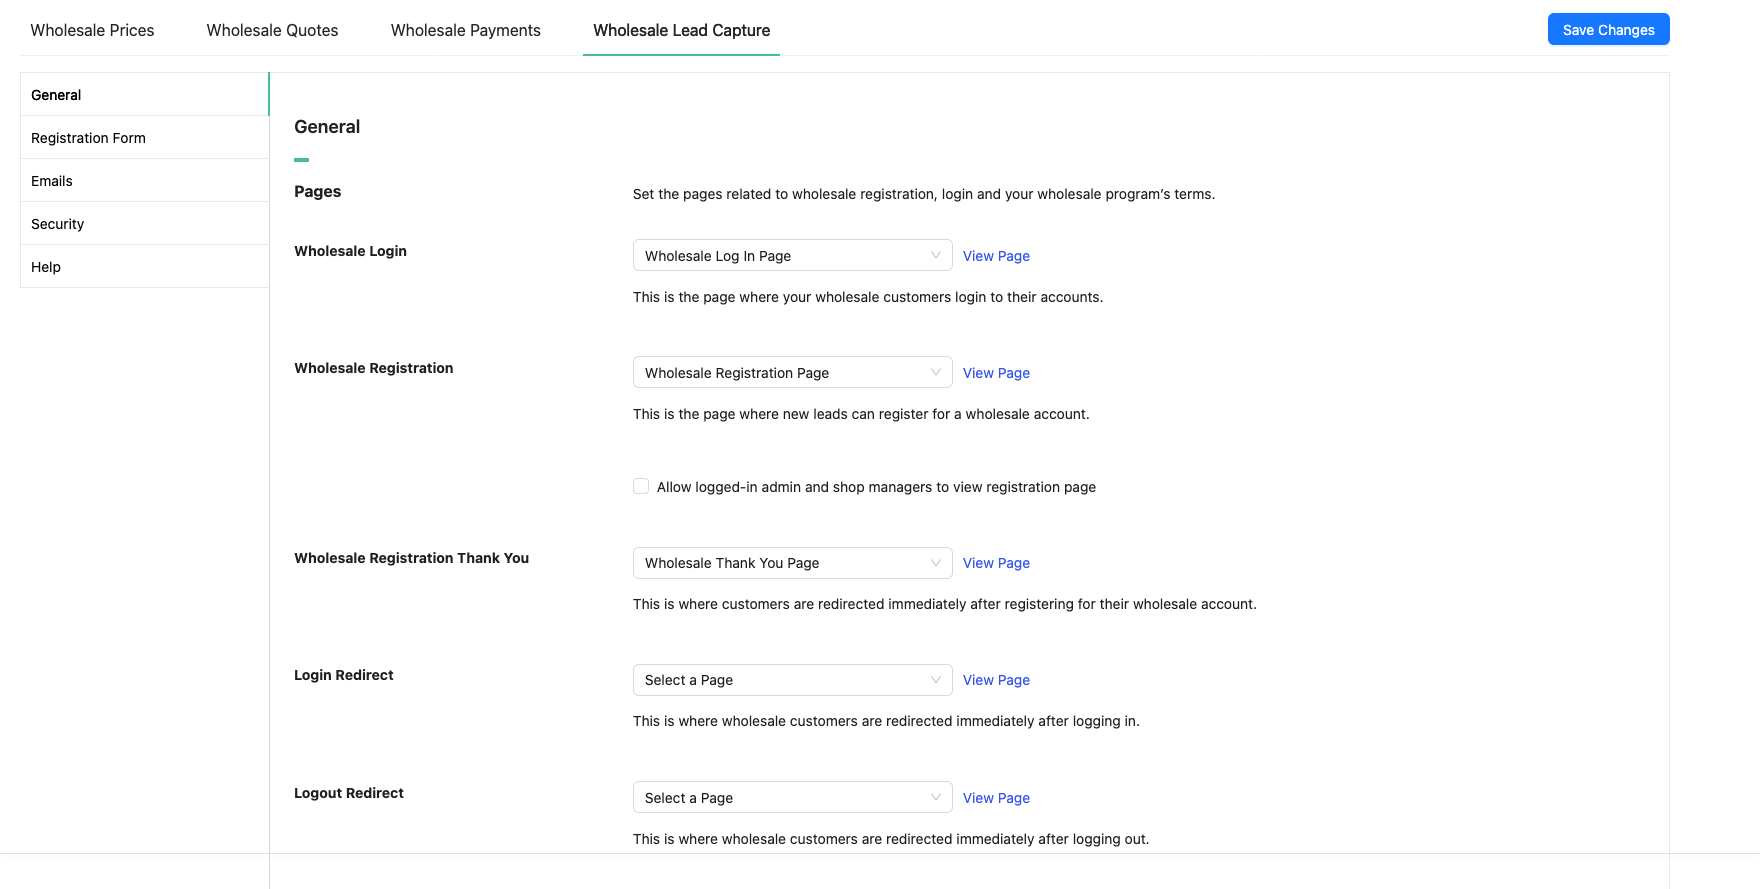
If you turn on Enable terms and condition on the same screen, the registration form shows your terms text. For more on these pages, see Do I need to create any pages for my plugins to work?.
Step 2: Set up your registration form
Collect everything you need to approve or reject a lead on the form itself. That saves you a round of emails with each applicant.
- Go to Wholesale → Settings.
- Click the Wholesale Lead Capture tab, then the Registration Form sub-tab.
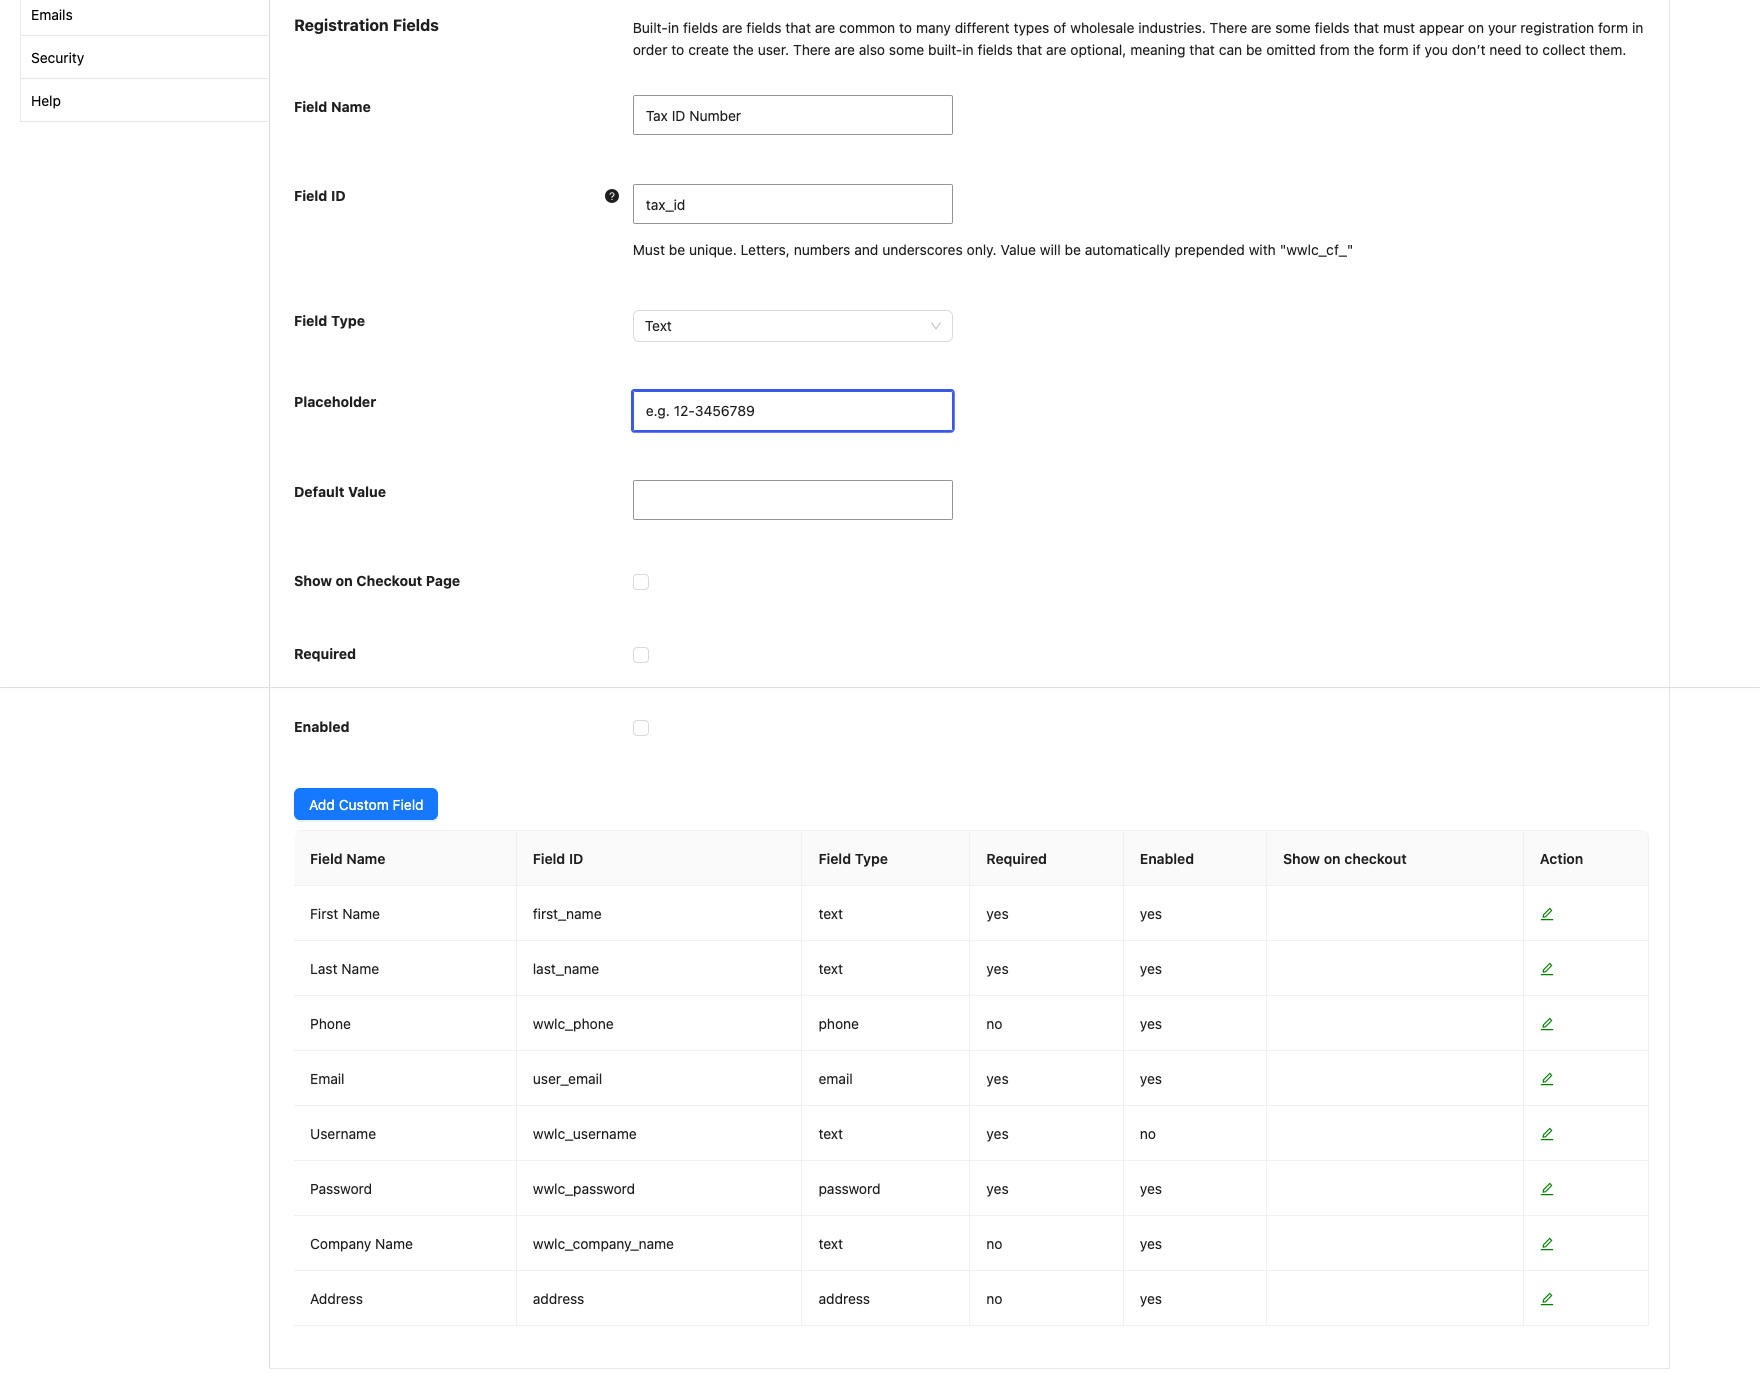
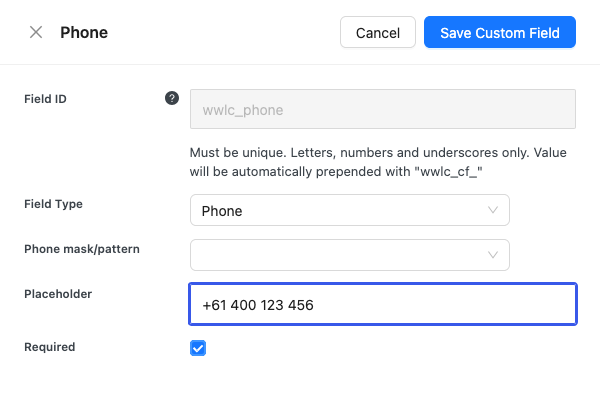
- To change a built-in field, click the edit (pencil) icon in its Action column.
- In the panel that opens, change the field. For example, tick Required to make Phone a required field.
- Click Save Custom Field.
- To collect extra details, fill in Field Name, Field ID and Field Type.
- Click Add Custom Field.
Built-in fields
The form comes with these built-in fields: First Name, Last Name, Phone, Email, Username, Password, Company Name and Address. Some of them are needed to create the user account, so they must stay on the form. You can turn the others on or off.
The plugin saves these details to the new customer’s account. That way, they don’t have to type them again at checkout on their first order.
Custom fields
Custom fields collect anything else you need, such as a tax or VAT number, a business registration document, or a website address. The Field Type dropdown has these types: Text, Text Area, Number, Email, Phone, Url, Select, Radio, Checkbox, Hidden, File, Content and Terms & Conditions.
Step 3: Choose how new leads are approved
You decide whether each lead waits for your approval or gets wholesale access straight away. New stores start with manual approval.
- Go to Wholesale → Settings.
- Click the Wholesale Lead Capture tab, then the General sub-tab.
- Under Lead Actions, set New Lead Role to the role approved leads should get, for example Wholesale Customer.
- Under Auto Approve New Leads, choose Manual Approval Required or Automatic Approval.
- Click Save Changes.

With Manual Approval Required, new registrations wait in the queue until an Administrator or Shop Manager approves them. With Automatic Approval, the lead is approved and logged in as soon as they submit the form, and can see wholesale prices right away.
To delete rejected applicants’ accounts automatically, turn on Auto Remove User After Rejection on the same screen.
Step 4: Approve your first lead
With manual approval, new registrations wait on the Wholesale Leads page until you approve them.
- Go to Wholesale → Leads.
- Click the Pending quick filter to show the leads that wait for approval.
- In the lead’s Action column, click the Approve User (check) icon.
- Click Ok to confirm.
The lead moves to Approved and gets the role you set in New Lead Role in Step 3. The plugin also sends them the Wholesale account approved email from Step 5, with their username and a login link.
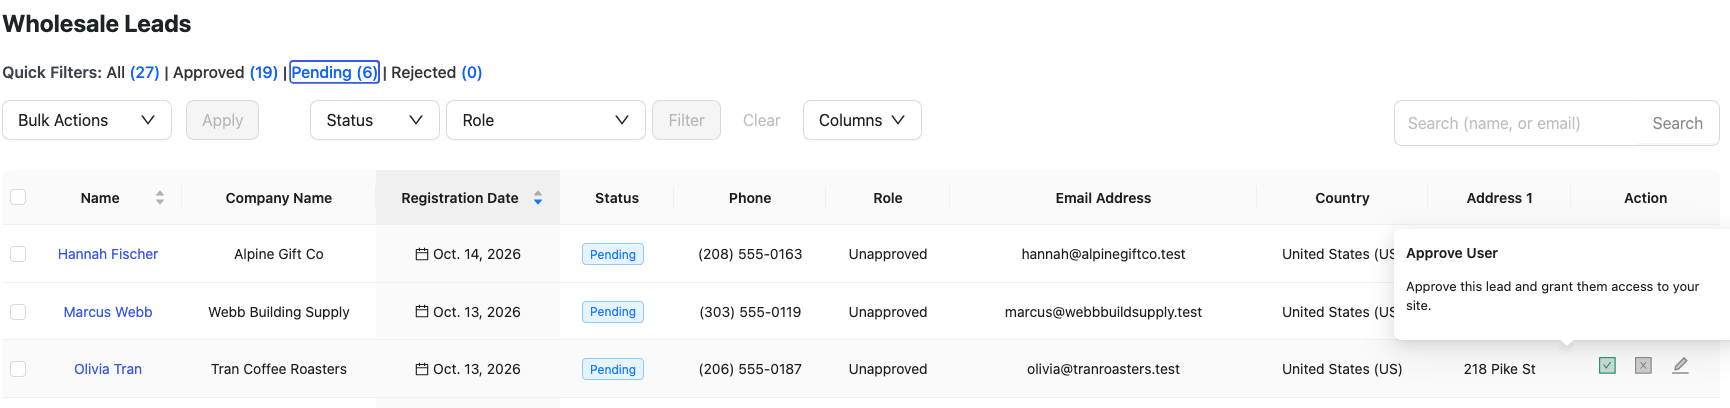
The same column has icons to reject or edit a lead. For bulk actions, filters and sorting, see How to approve and manage leads from the Wholesale Leads dashboard.
Step 5: Review the emails your leads receive
The plugin sends these emails during registration and approval:
| When | Recipient | |
|---|---|---|
| A lead registers and manual approval is on | New wholesale lead (Admin) | You |
| A lead registers and automatic approval is on | New wholesale lead auto approved (Admin) | You |
| A lead registers | Wholesale application received | The lead |
| A lead is approved, manually or automatically | Wholesale account approved, with their username and a login link | The lead |
| A lead is rejected | Wholesale account rejected | The lead |
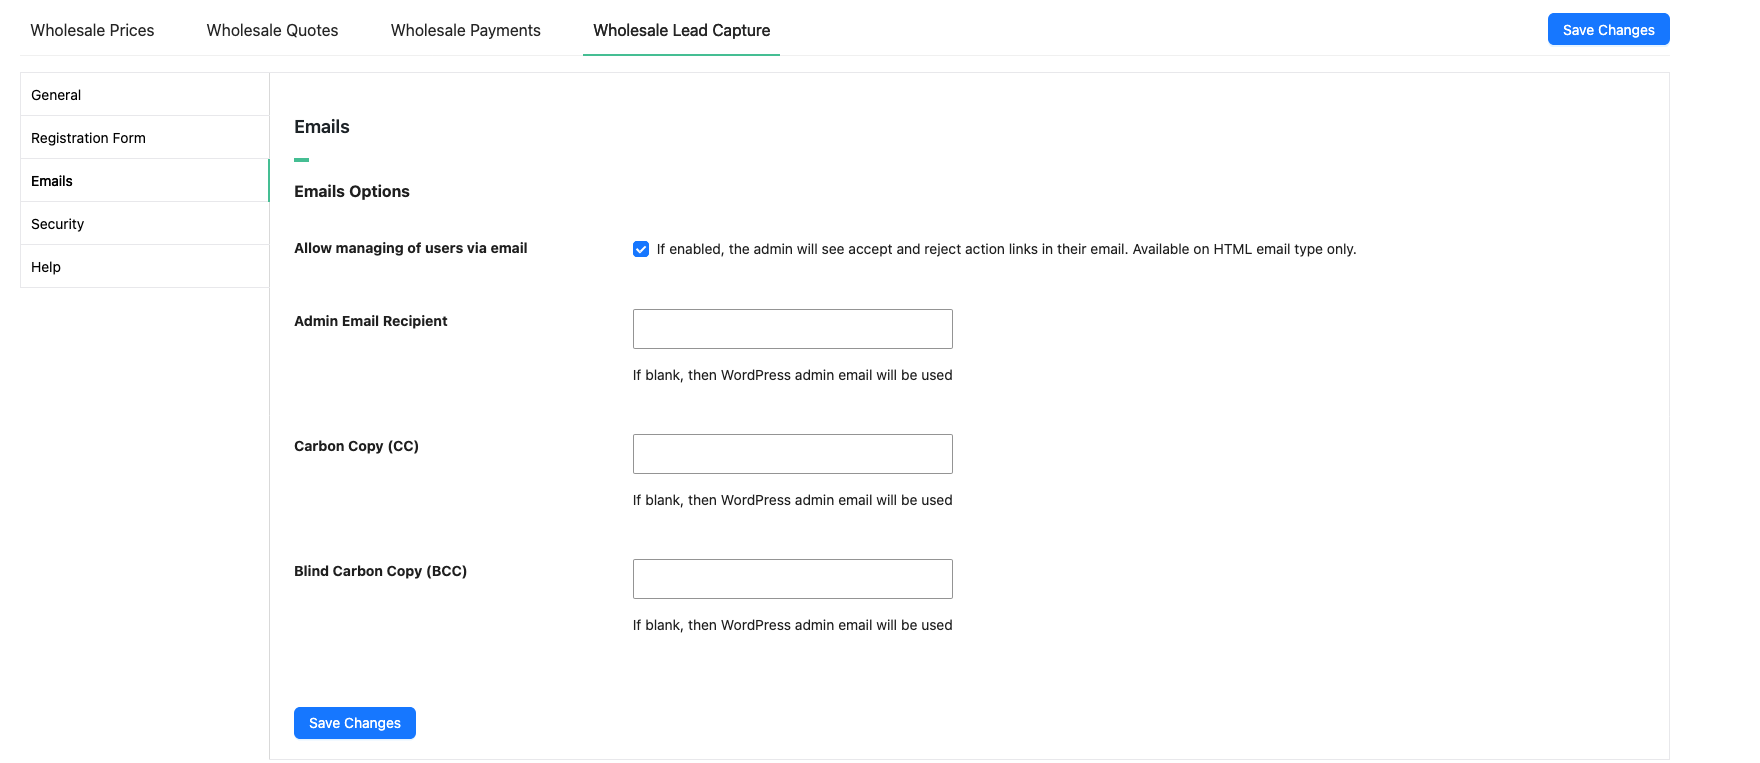
To change the subject, heading or text of an email, go to WooCommerce → Settings → Emails. To set who gets the admin emails, go to Wholesale → Settings → Wholesale Lead Capture → Emails and fill in Admin Email Recipient. For the full flow, see the user registration and approval emails workflow.
Step 6: Add spam protection
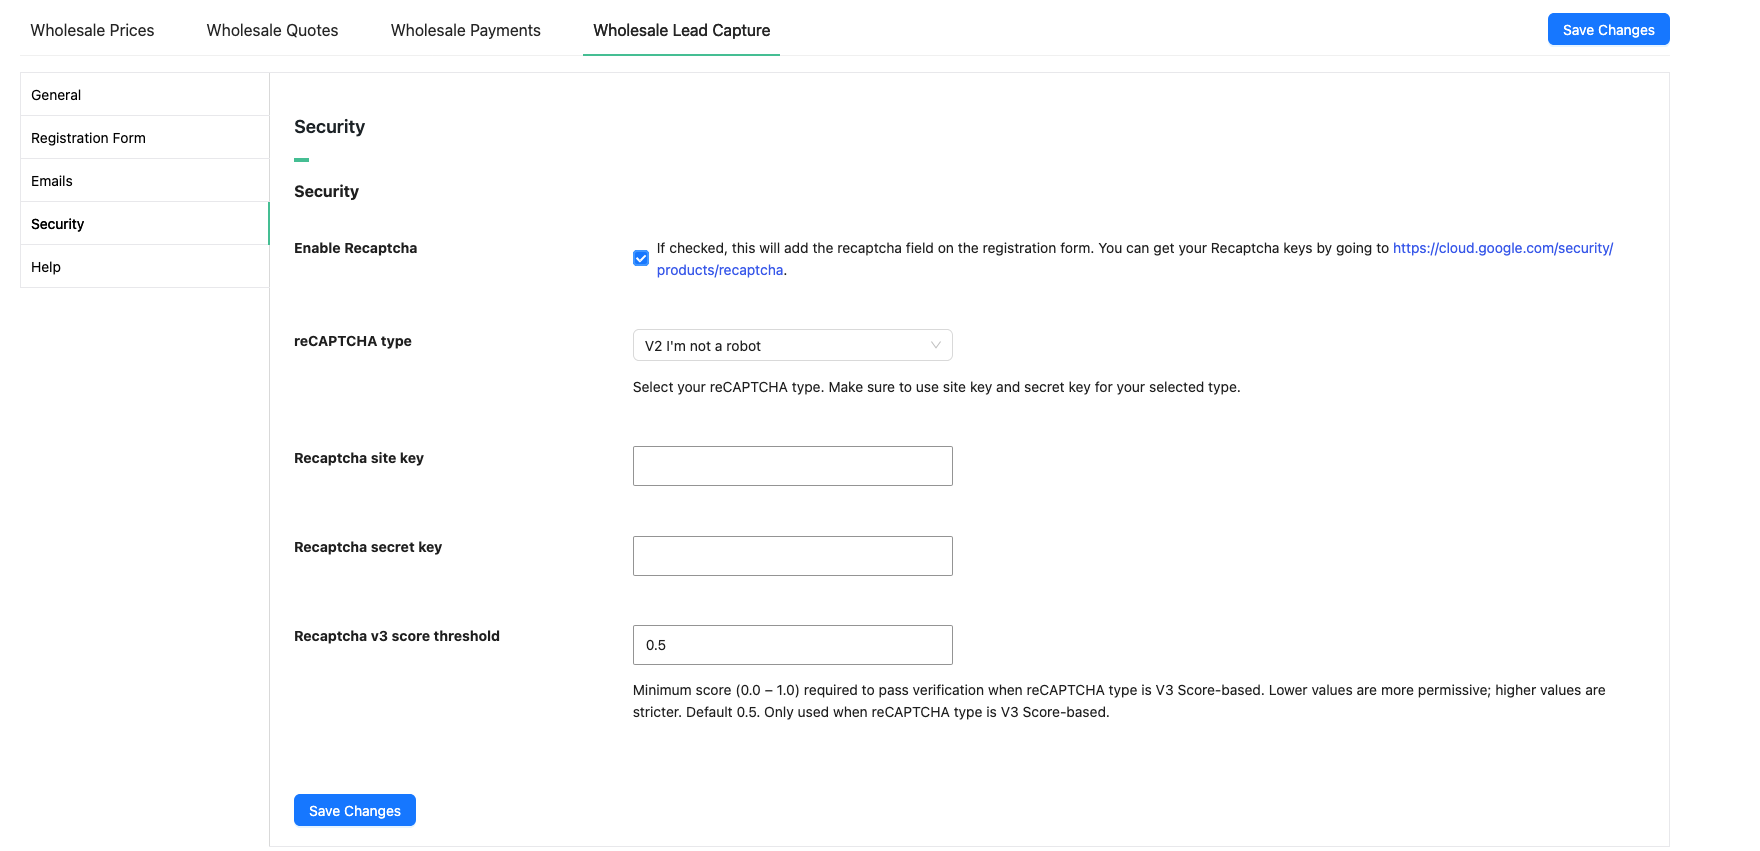
The registration form has a hidden honeypot field that blocks most spam bots, with nothing for you to set up. If spam still gets through, add Google reCAPTCHA.
- Get a reCAPTCHA site key and secret key from Google reCAPTCHA.
- Go to Wholesale → Settings.
- Click the Wholesale Lead Capture tab, then the Security sub-tab.
- Tick Enable Recaptcha.
- Choose your reCAPTCHA type, then enter your Recaptcha site key and Recaptcha secret key.
- Click Save Changes.
Step 7: Track your progress in the setup checklist
The Wholesale → Dashboard page shows a Get Started with Wholesale Prices checklist, with one section per Wholesale Suite plugin. The Wholesale Lead Capture section ticks its items for you when the event happens:
- First lead approved: ticks when you approve your first lead, either from the Leads screen or through automatic approval. This is the item that completes the section.
- First application received: ticks when someone submits your wholesale registration form. It sits in the optional group, marked not counted, so it doesn’t count toward the section.
Each item has a link to the Leads screen. When you approve your first lead, the section shows as done and WooCommerce sends you a Your wholesale pipeline is open email. If your store already had approved leads before you updated to version 2.0.7, this email isn’t sent. To turn it off, disable the Wholesale Lead Capture onboarding: pipeline open email under WooCommerce → Settings → Emails.
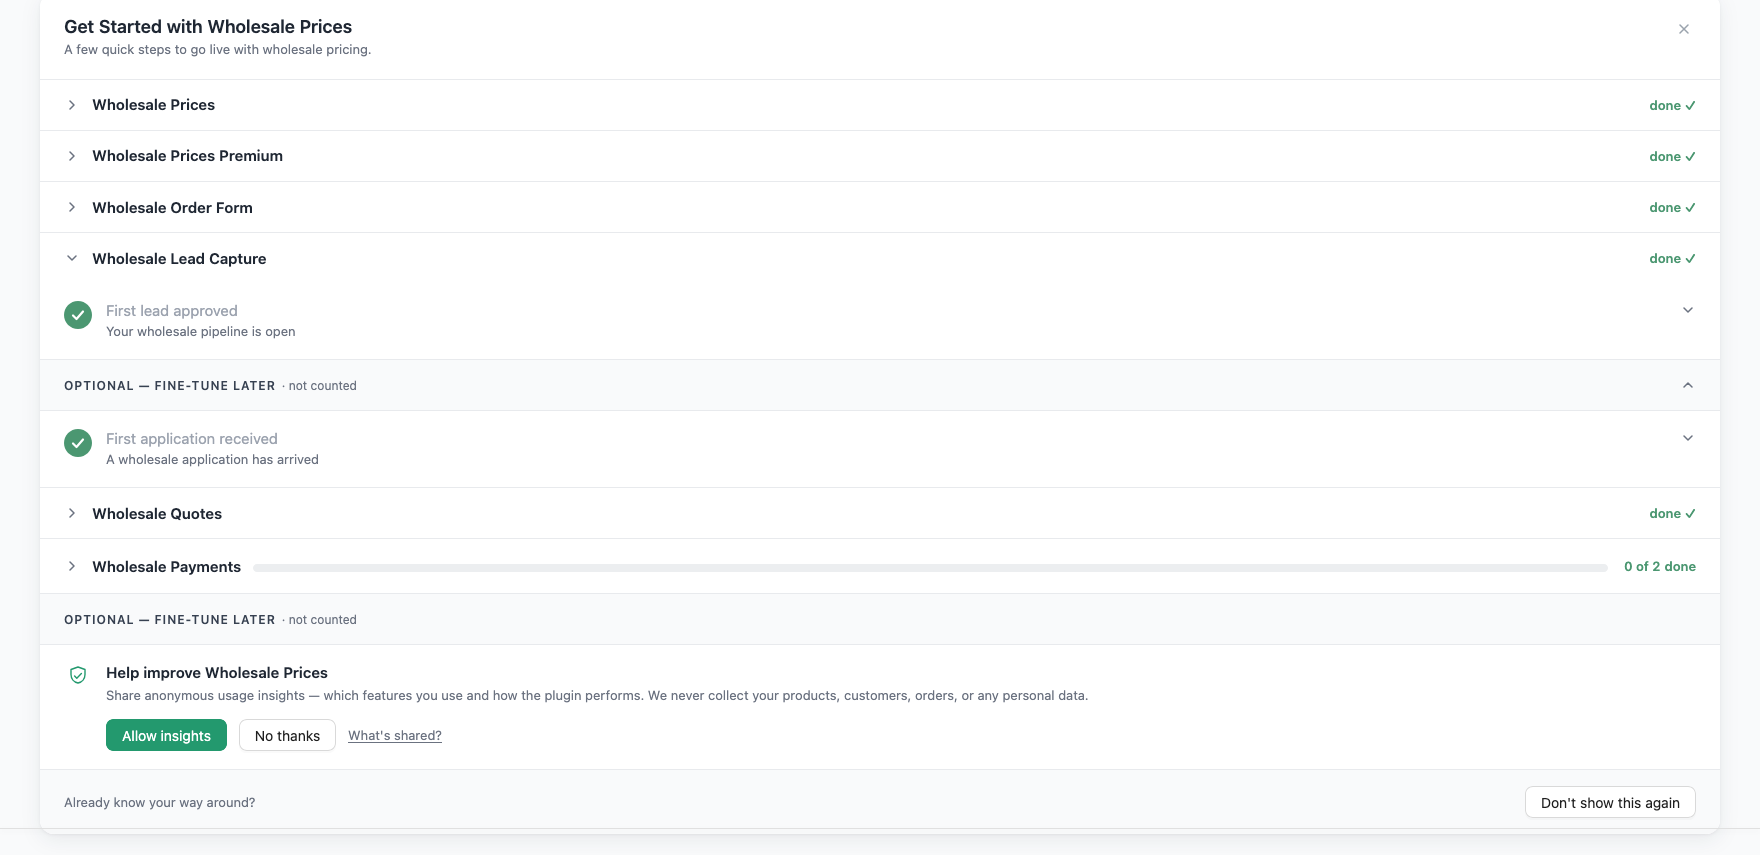
To hide the checklist for good, click Don’t show this again at the bottom of it.
What’s next
- Approve and manage leads from the Wholesale Leads dashboard
- Edit the emails sent to your leads
- Troubleshoot emails that are not sending
- WooCommerce Wholesale Prices Premium: add more wholesale roles, role tiers, tax exemption, shipping and payment gateway restrictions, and minimum order rules
- WooCommerce Wholesale Order Form: give approved customers a fast, searchable order form for bulk orders
Frequently asked questions
Do I need to approve every lead by hand?
No. Choose Automatic Approval under Auto Approve New Leads in Step 3, and every new registration is approved as soon as it comes in.
Which role does an approved lead get?
The role set in New Lead Role under Wholesale → Settings → Wholesale Lead Capture → General. If your registration form lets the lead pick a role, they get that role instead.
Can I put the registration form on my own page?
Yes. Add the [wwlc_registration_form] shortcode to any page, then select that page as Wholesale Registration in Step 1.
Need help?
If you have a question or run into any issues, we’re here to help.
- Premium users: Open a support ticket
- Free users: Visit our community forum