
If you want to customise the notifications your wholesale applicants receive, from the initial application confirmation to account approval or rejection, WooCommerce Wholesale Lead Capture gives you full control over those messages. This guide shows you how to find and edit each email, update subject lines and body copy, and use dynamic placeholders to personalise your notifications.
Prerequisites
- WooCommerce installed and active
- WooCommerce Wholesale Lead Capture installed and active
- WordPress admin access
Step 1: Open the email settings
- Go to WooCommerce > Settings > Emails.

From here you can manage the following wholesale notifications:
- New wholesale lead (Admin)
- New wholesale lead auto approved (Admin)
- Wholesale application received
- Wholesale account approved
- Wholesale account rejected
Step 2: Edit an email
- Click Manage next to the email you want to edit.
- Update the subject line, heading, and body content as needed.
- Click Save changes.

The design follows your WooCommerce email template settings, you don’t need to rebuild the layout, only update the text and placeholders inside it.
Step 3: Add dynamic placeholders
You can use dynamic placeholders to personalise each message. These tags pull in user and site data automatically, such as names, email addresses, and company details. Not every tag works on every email, so check the Available placeholders list on the email you are editing. It sits under the Message field, and behind the help icon on Subject and Email heading. That list is generated from your own site, so it’s always the definitive answer.
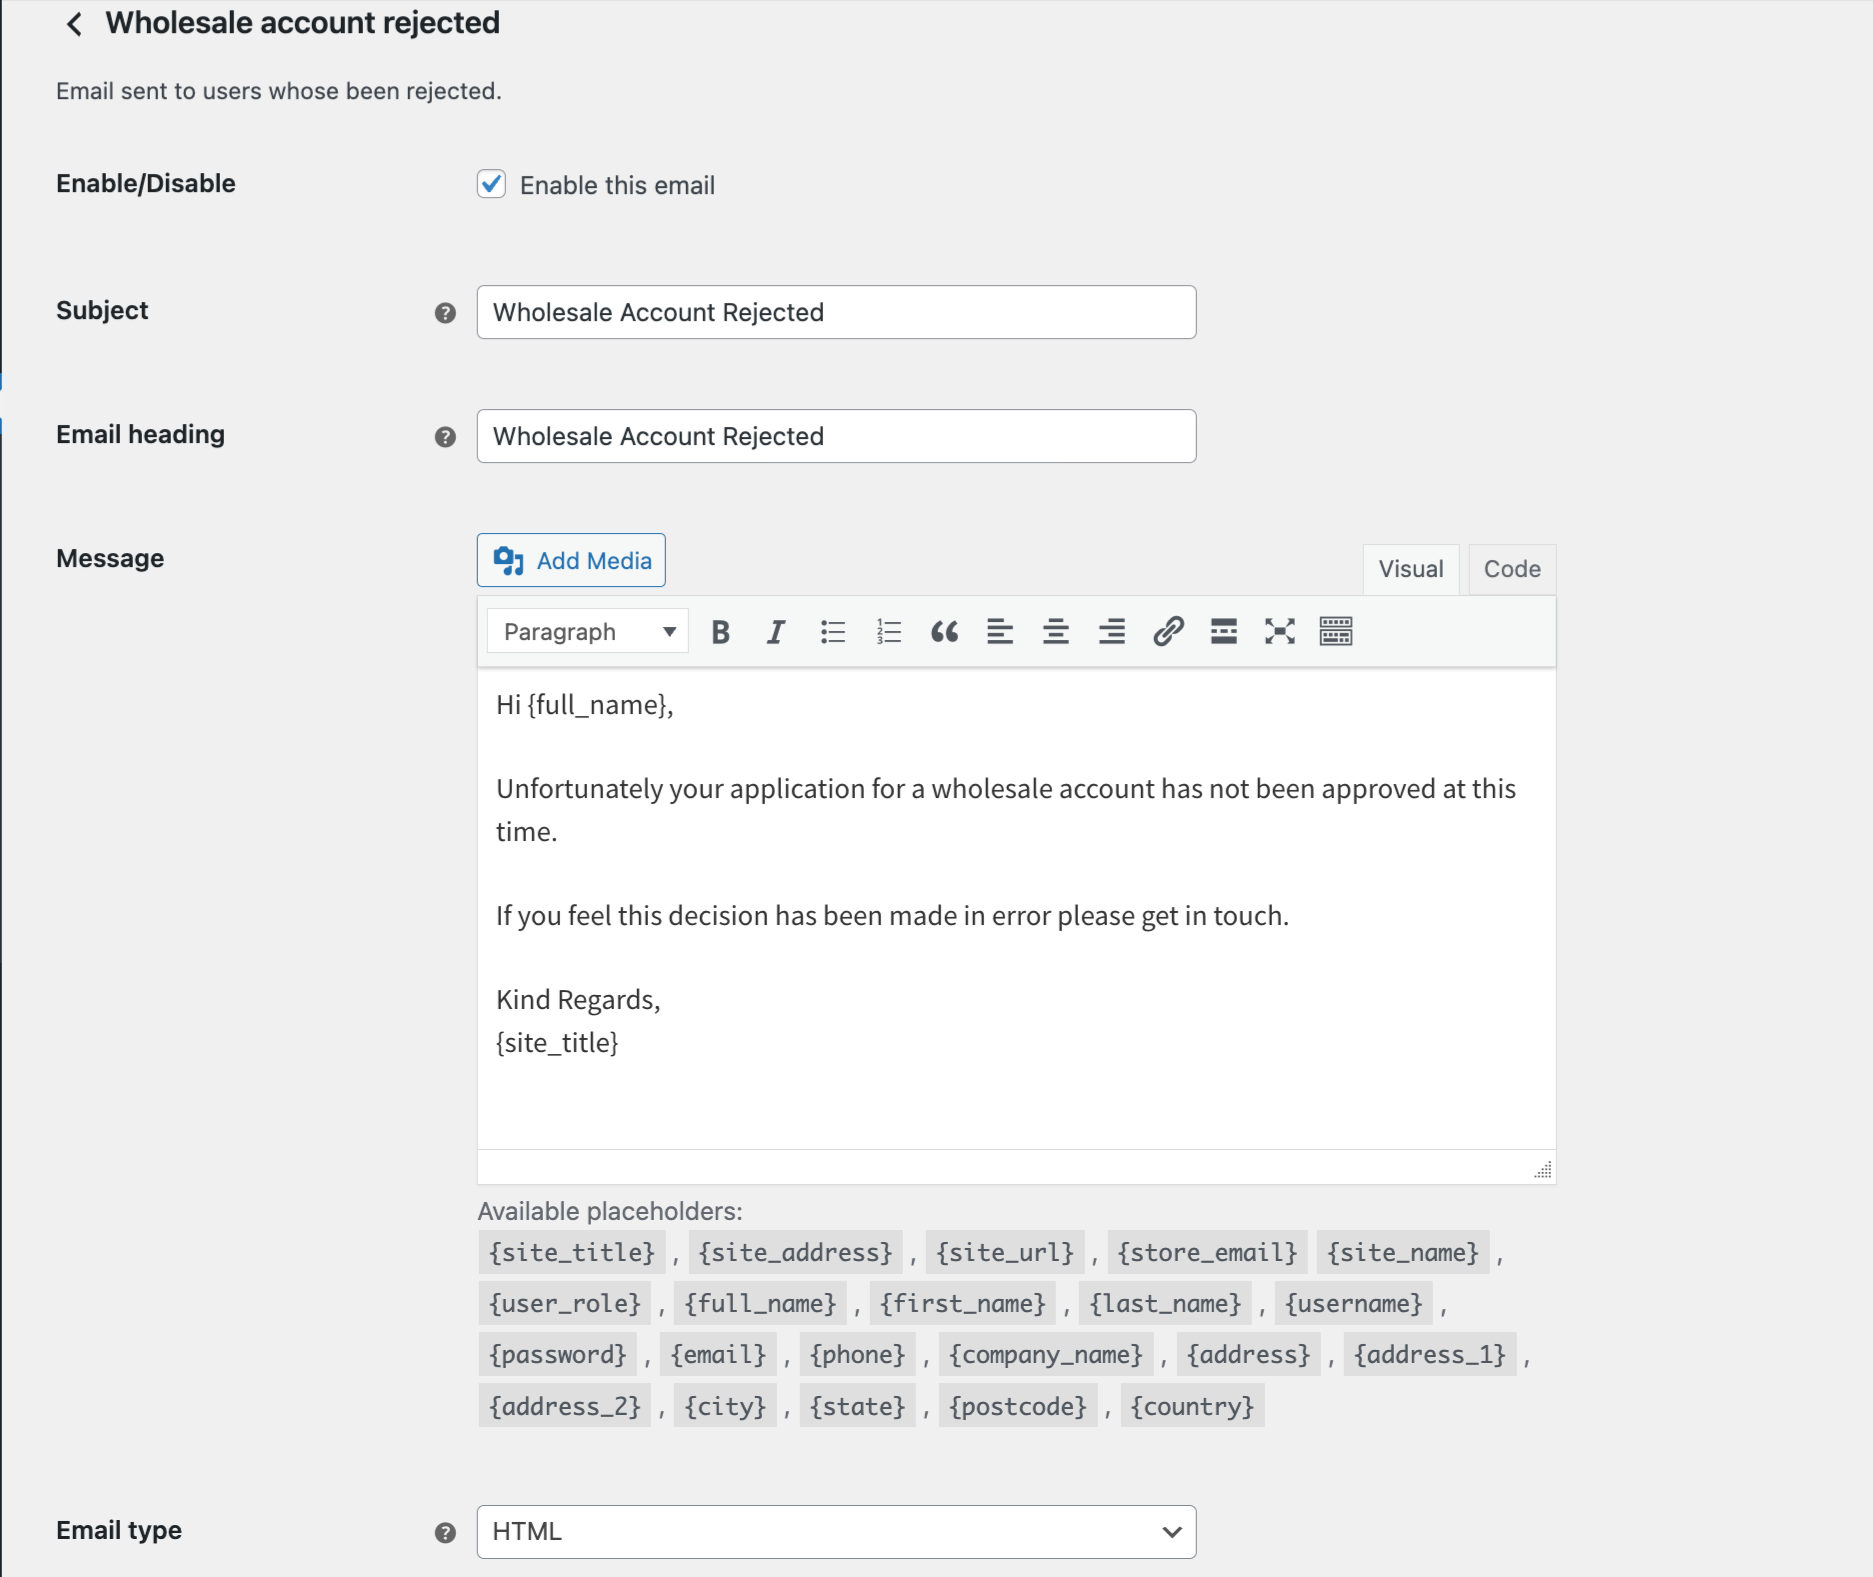
Available placeholders
| Placeholder | What it inserts |
|---|---|
{site_name} | Your site name. |
{site_title} | Your site title, from Settings > General. |
{site_address} | Your site domain. |
{site_url} | Your site domain. This returns the same value as {site_address}. |
{store_email} | The From address set in WooCommerce > Settings > Emails. |
{full_name} | The lead’s first and last name. |
{first_name} | The lead’s first name. |
{last_name} | The lead’s last name. |
{username} | The username on their account. |
{password} | A set-your-password link, or a short note about which password to use. It never prints the password itself. Not available on the two admin emails. |
{email} | The email address they registered with. |
{phone} | Their phone number. |
{company_name} | Their company name. |
{address} | Their full address as a formatted block, across several lines. |
{address_1} | Address line 1 on its own. |
{address_2} | Address line 2 on its own. |
{city} | Their city. |
{state} | Their state. |
{postcode} | Their postcode. |
{country} | Their country. |
{user_role} | The wholesale role the lead is set to receive, either their per-lead role or your New Lead Role setting. It does not read the role they hold right now. |
{user_wholesale_role} | The name of their wholesale role. Available on Wholesale account approved only. |
{wholesale_login_url} | A link to your wholesale login page. Not available on Wholesale account rejected. |
{user_management_url} | A link to your Wholesale Leads page. Admin emails only. |
{user_edit_profile_url} | A link to the lead’s user profile in WordPress. Admin emails only. |
Insert your custom registration fields
Any custom field you’ve added to your wholesale registration form can go into your emails too, so the admin notification arrives with the applicant’s answers already in it. Each custom field gets its own tag in this format:
{custom_field:wwlc_cf_your_field_id}To find the exact tag for one of your fields:
- Go to Wholesale > Settings > Wholesale Lead Capture > Registration Form.
- In the Registration Fields table, find your field and copy the value in the Field ID column. The table lists your built-in fields too, so look for the ones whose ID starts with
wwlc_cf_. - Drop that ID into the tag above, then paste the tag into your email body.
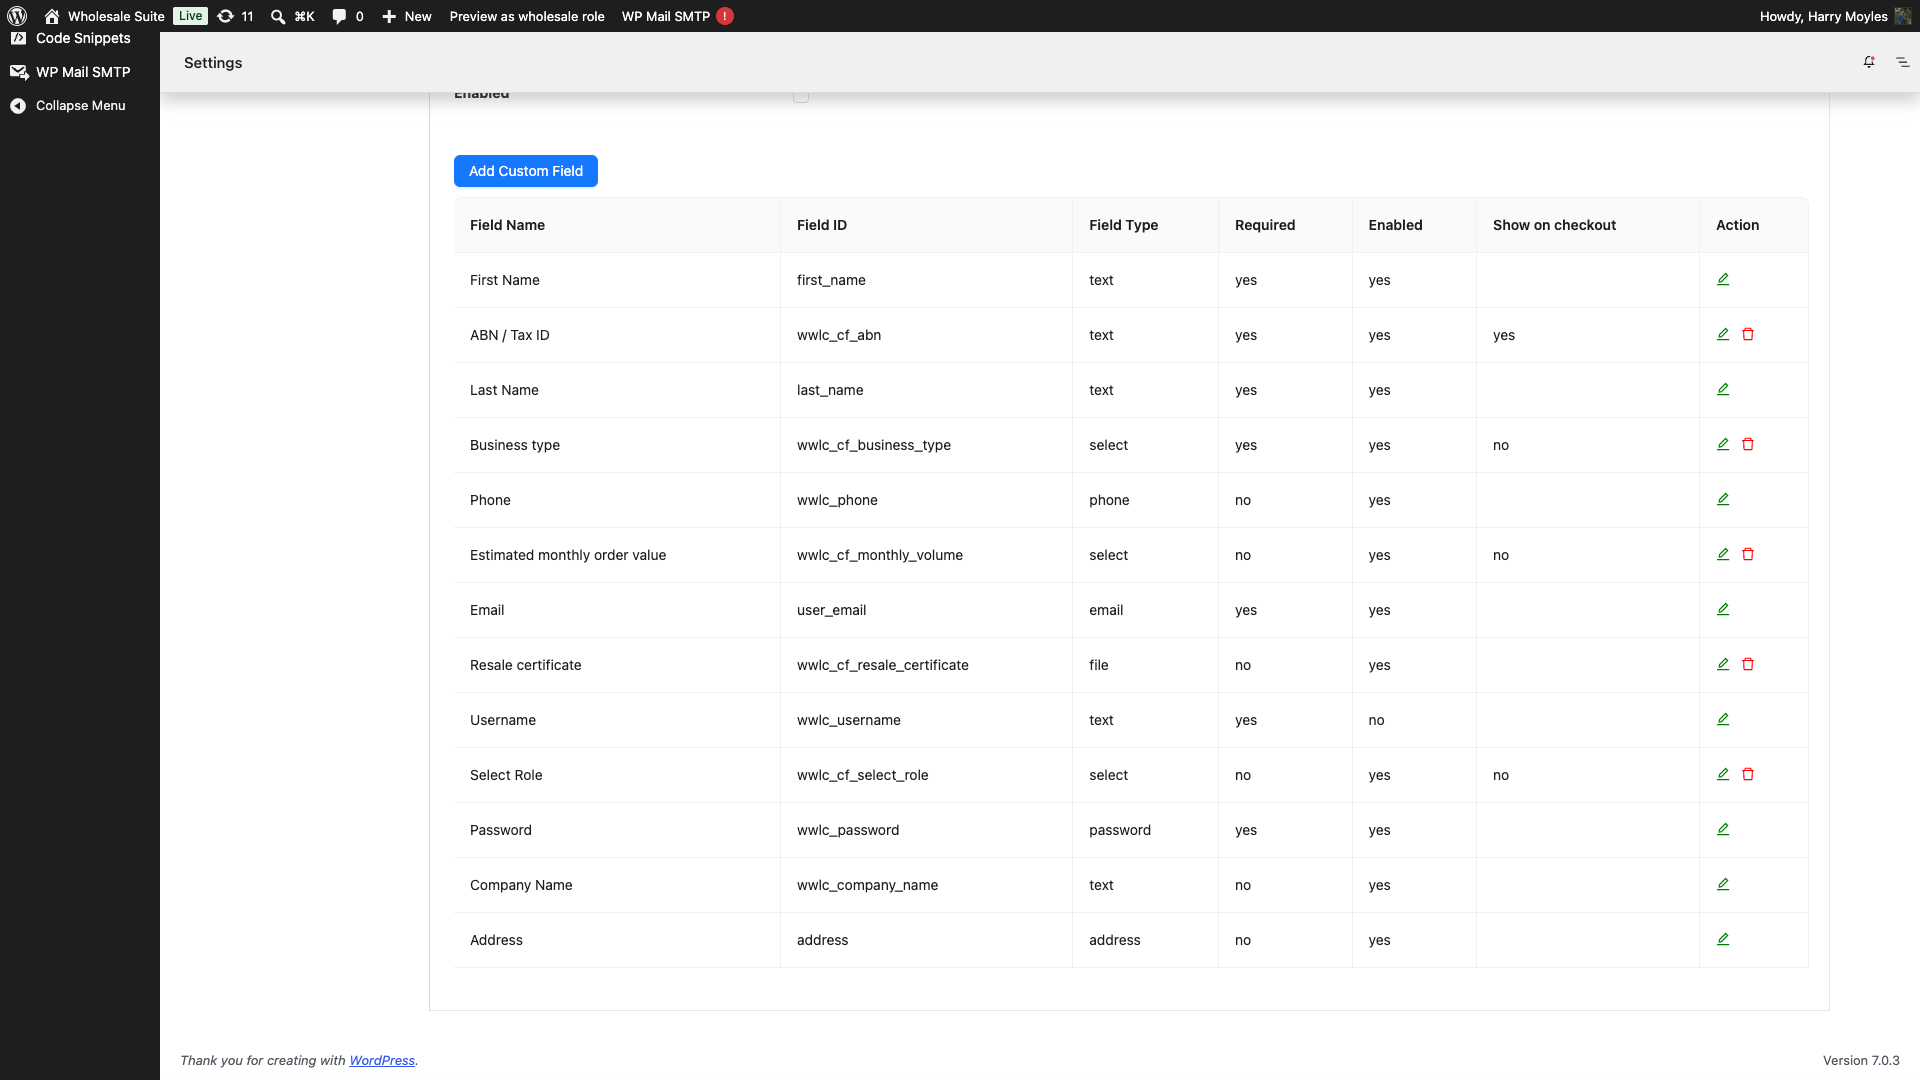
You can also copy the finished tag straight from the Available placeholders list under the Message field. Your custom field tags are listed there alongside the built-in ones.
Custom field tags work on all five wholesale emails. A few field types are worth knowing about:
- Checkbox fields insert every option the applicant ticked, separated by commas.
- Radio and dropdown fields insert the option’s display text rather than its stored value.
- File fields insert the uploaded file’s URL as plain text. The file is not attached to the email, and the wholesale uploads folder is protected from direct web access, so that URL will not open in a browser. To view the file, open the lead’s profile in WordPress instead.
Step 4: Configure admin email recipients
By default, Wholesale Lead Capture sends admin notification emails to your WordPress admin address. To change the recipient or add CC recipients:
- Go to Wholesale > Settings > Wholesale Lead Capture > Emails.
- Update the recipient email address as needed.
- Click Save changes.
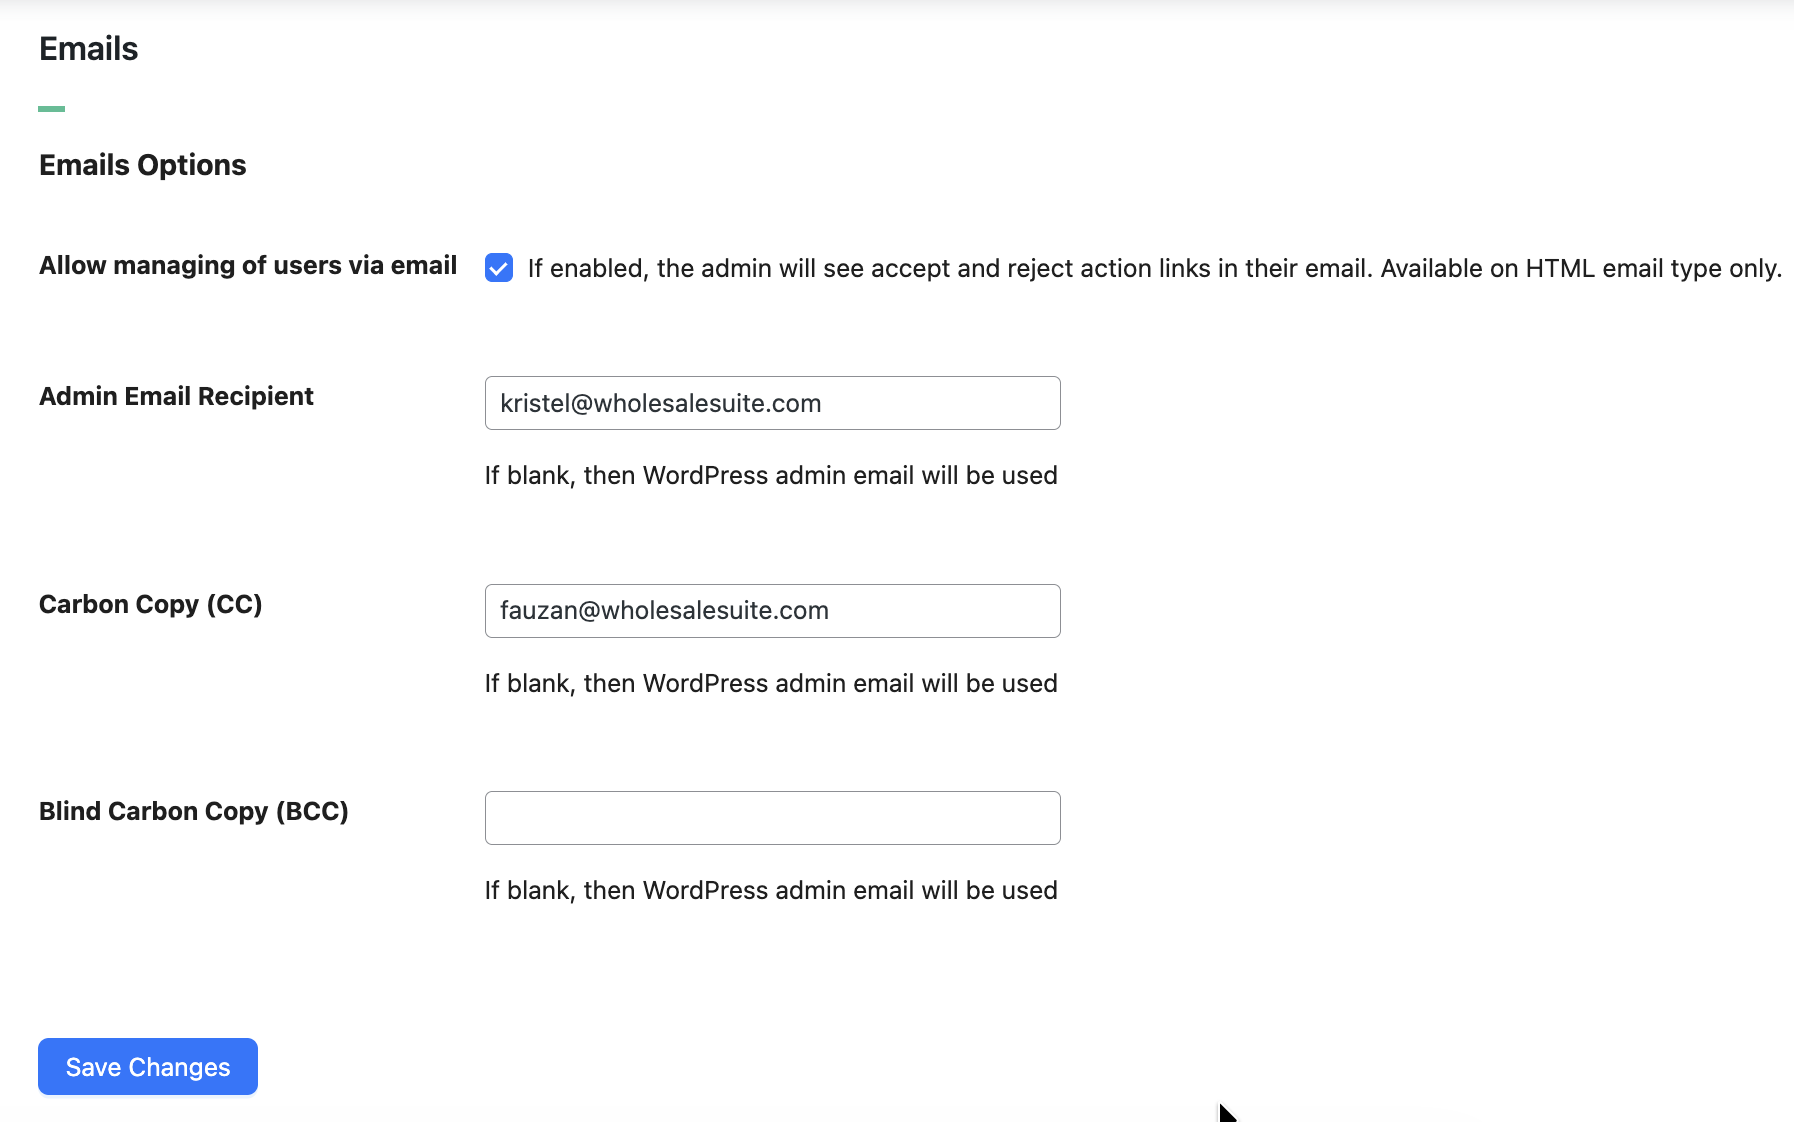
Add CC and BCC recipients
If you need multiple team members to receive every application alert, add Carbon Copy (CC) and Blind Carbon Copy (BCC) addresses alongside the main recipient.
- Go to Wholesale > Settings > Wholesale Lead Capture > Emails.
- In Carbon Copy (CC), enter the email addresses you want to copy on every admin notification. Use commas to separate multiple addresses.
- In Blind Carbon Copy (BCC), add any addresses you want to copy silently (the main recipient and CC list won’t see these).
- Click Save changes. Any invalid entries (typos, missing domains) are silently skipped when emails are sent, so double-check your entries before saving.
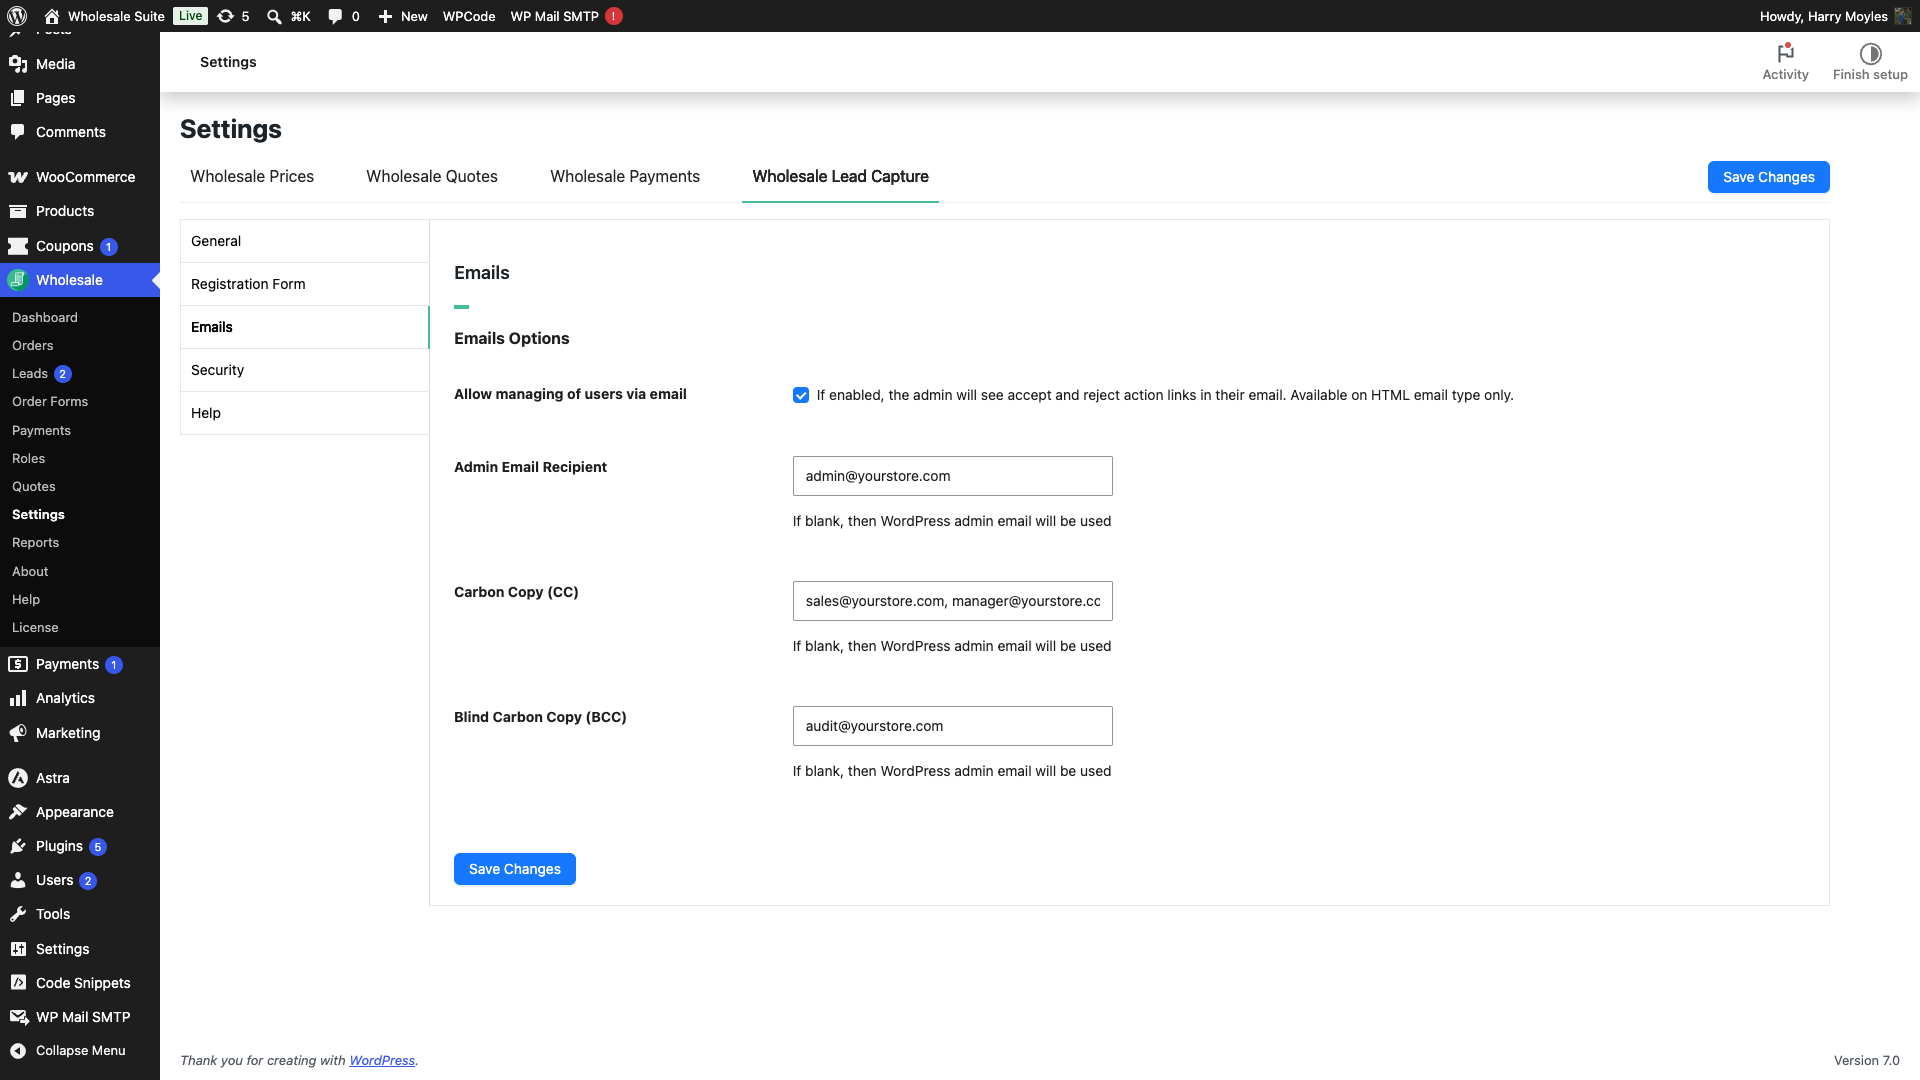
CC and BCC apply to all wholesale admin notifications configured in this panel, so use them for distribution lists or audit inboxes rather than per-message overrides.
If you’re CC-ing many internal addresses, some receiving mail servers may flag the email as bulk or spam. For larger distribution lists, prefer BCC and consider a dedicated mailing list address as the single recipient.
Troubleshooting
Admin emails are going to the wrong address
By default, admin alerts route to your WordPress site’s administrator email. If that address is outdated, go to Wholesale > Settings > Wholesale Lead Capture > Emails to set a specific recipient.
Frequently asked questions
How do I edit wholesale emails in WooCommerce?
Go to WooCommerce > Settings > Emails. All wholesale notifications appear there, click Manage next to any one to update its subject line, heading, and body copy.
Do wholesale emails follow my existing WooCommerce email design?
Yes, the layout and styling of each wholesale message automatically inherits your current WooCommerce template. You don’t need to rebuild the design, update the text and placeholders inside it.
Can custom registration form fields appear in email templates?
Yes. Each custom field on your Wholesale Registration Form gets its own tag in the format {custom_field:wwlc_cf_your_field_id}. Copy the field’s ID from Wholesale > Settings > Wholesale Lead Capture > Registration Form, or copy the finished tag from the Available placeholders list under the Message field.
Can I CC someone on wholesale application notification emails?
Yes, go to Wholesale > Settings > Wholesale Lead Capture > Emails to add CC recipients so multiple team members receive each application alert.
Why are wholesale admin emails going to the wrong address?
By default, admin alerts route to your WordPress site’s administrator email. If that address is outdated, visit Wholesale > Settings > Wholesale Lead Capture > Emails to set a specific recipient.
Need help?
If you have a question or run into any issues, we’re here to help.
- Premium users: Open a support ticket
- Free users: Visit our community forum