Do you want to sell more products on your website? Do you want to increase the conversion rate of your customers? If yes, then you should consider creating a wholesale only content area on your blog.
A wholesale only content area is a section of your blog that restricts users from uploading or posting regular content or sponsored posts. This makes it look like a virtual marketplace where only wholesalers can publish their product details and other relevant information related to their products.
If you’re interested in increasing the traffic and conversions of your blog, why not create a wholesale only category? It won’t cost much, and you can practice what you preach later on when it comes to experimenting with different types of sales promotions on your site. Let’s get started!
This guide will show you how to create a wholesale only area on your site so you can ensure that regular customers don’t stumble across it.
What you need:
- WooCommerce Wholesale Prices (and Premium if you have multiple roles)
- User Specific Content plugin by Brainternet
- Nav Menu Roles plugin by Kathy Darling
- A page you need to secure
Step #1: Install Wholesale Prices plugin
If you haven’t already, get yourself a copy of the wholesale prices plugin to add the Wholesale Customer user role to your site.
Suppose you need more levels of wholesale customers to separate different commitment levels. In that case, you should check out the Premium add-on, which adds the capability to add multiple wholesale roles.
Step #2: Install and configure User Specific Content plugin
The following plugin to install is the user content restriction plugin.
There are loads of different user content restriction plugins on the market, and it doesn’t matter which one you use. Still, I tried many different ones in researching this article, and this one was very simple and achieved the task with minimal fuss.
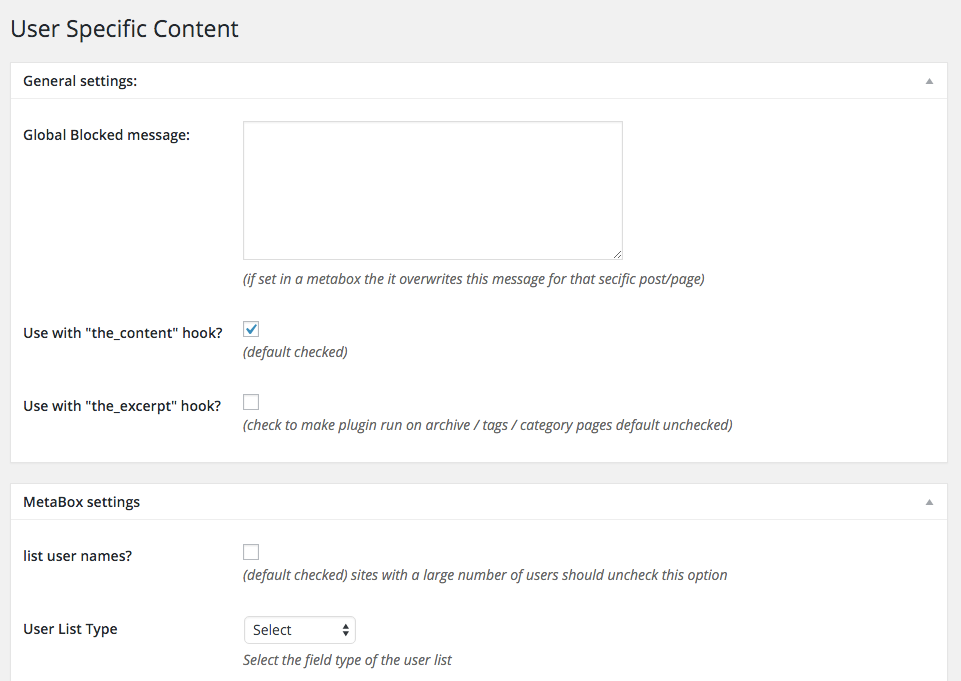
Once installed, you’ll find the settings page under Users->User Specific Content.
You can set a global message that people see when they aren’t logged in or don’t have permission to see the page. This message can also be customized per post/page if you use this content restriction technique for other user types.
Protip: While you’re on the settings page, uncheck the “list user names?” option because this spits out all the user names on your site, and any e-commerce site running for a while will have tons of them!
Step #3: Restrict the page access
The next step is to restrict access to the page.
Create a new page (or open the edit screen if you’ve already created the page), and you’ll see the new meta box to set the access rights.
It should look something like this:
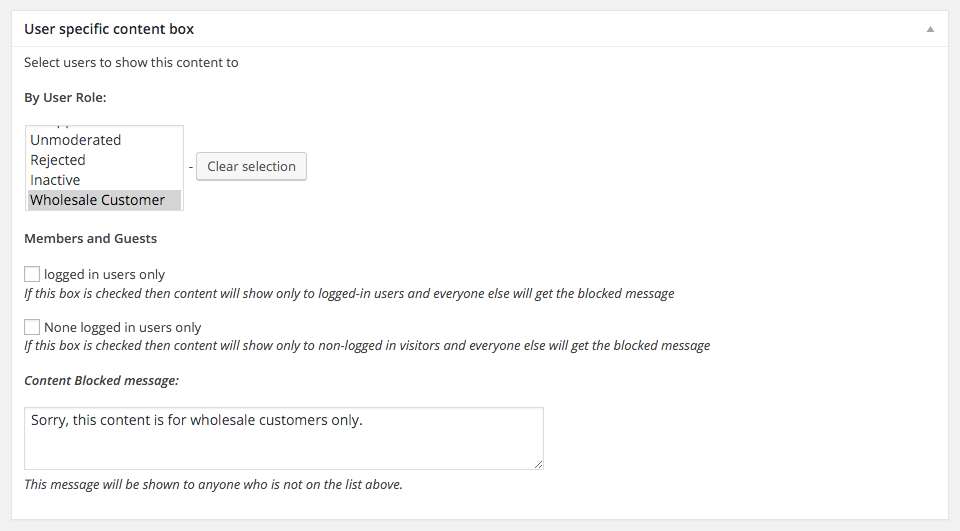
Make sure you’ve only selected the Wholesale Customer (and whatever extra wholesale roles that should have access). These may show as checkboxes based on what you’ve selected in the general settings for the User-Specific Content plugin.
I also like to choose the Administrator and Shop Manager roles so that admins or shop managers logged in can also see the content.
Step #4: Install and configure the Nav Menu Roles plugin
The final plugin we’re using today is called Nav Menu Roles and what this does for you is gives you the ability to hide certain items in your site’s menus from specific users.
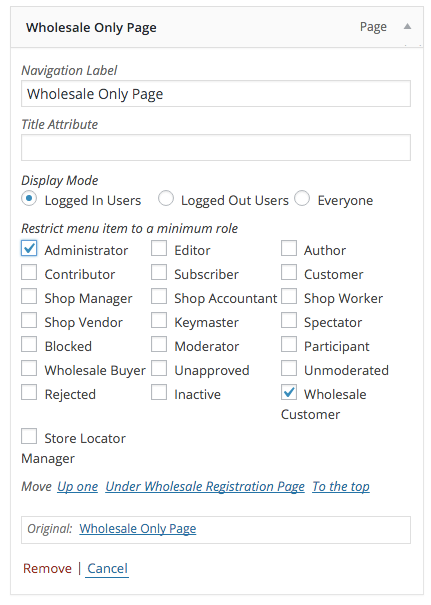
In our case, we will be adding a menu item to point to our new page but will hide it from all users except admins and the Wholesale Customer role/s.
You can do this under the Appearance->Menus page by adding the new page to your menu and configuring it like so:
Step #5: Test the front end
Now we have the whole lot configured; it’s time to test.
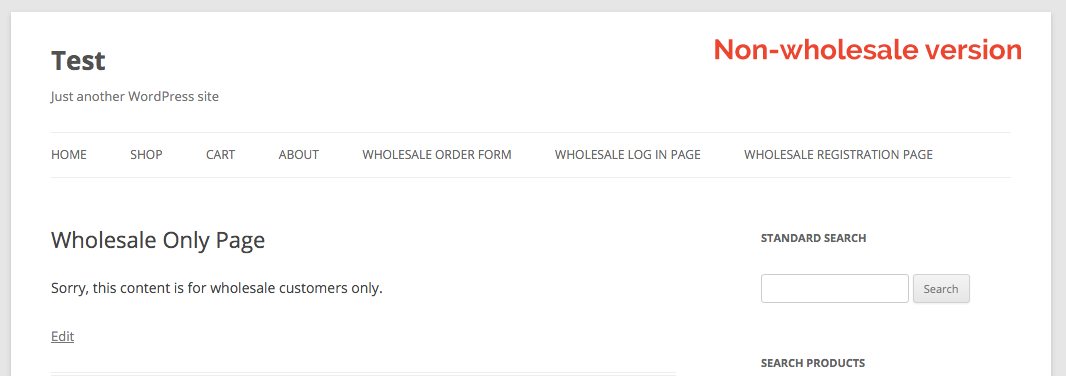
You’ll see your blocked message when you’re not logged in and try to view the page (which you’d have to have a direct link for anyway).
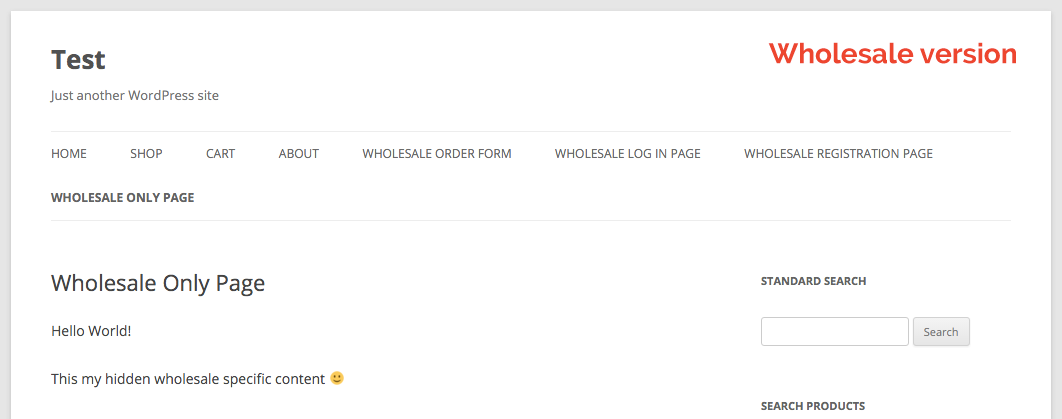
Once you log in as a wholesale customer, you should be able to see the hidden menu item and also the hidden content:
All that is left is to fill up your wholesale-only content with lots of helpful stuff for your customers to use.
Conclusion
Shopping sites like Amazon and eBay have made it easier than ever for consumers to buy merchandise from other people, businesses, and wholesale traders. Along with e-commerce and digital marketing, the rise of social media has led to a boom in social commerce.
Wholesale-only content is one way to attract more customers explicitly looking for wholesale products. Let’s look at why you need wholesale-only content in your WooCommerce store and how you can create a wholesaler area that sells only wholesale products:
- WooCommerce Wholesale Prices (and Premium if you have multiple roles)
- User Specific Content plugin by Brainternet
- Nav Menu Roles plugin by Kathy Darling
- A page you need to secure
Do you have any questions about wholesale only content? Let us know in the comment box down below or send us a message! We’d love to hear them!



This is very useful info, I will try it soon. Thanks!
Does it work for WooCommerce shop page and product pages?
Hey Sam, yes anywhere you can use shortcodes :)
Works brilliantly. Thanks for the very clear instructions. :)
You’re very welcome Courtney
Hi, thanks for this info.
Question:
Is it possible to do the restriction the other way around. We have added Wholesale prices to “regular” products. But then we have another sections for normal customers that want to make bigger purchases. This we also call “Wholesale” section. We don’t want the actual wholesale customers to make purchases on this section, since the prices are not as good as their actual wholesale prices inside the “regular store”.
How do we restrict the wholesale user to shop in this “wholesale section for regular customers”?
I
Hey there Anne, yes you can do it the other way around as well, here is a guide:
https://wholesalesuiteplugin.com/kb/create-wholesale-content-special-shortcodes/
For more detailed instructions or hands-on help we’ll need access to the site so please reach out to the support crew and we’ll take care of you :)