Providing your wholesale customers with a streamlined shopping experience is a key aspect of running a successful WooCommerce business. B2B clients who have a hard time looking for what they need in your store might abandon their purchase altogether. This is why incorporating a WooCommerce search and filter functionality in your order forms is so crucial.
With intuitive WooCommerce search and filter capabilities, your B2B customers are empowered to navigate your product catalog with ease. In this article, we’ll walk you through how you can seamlessly implement this into your e-commerce store. Without further ado, let’s get right into it!
Importance Of Implementing WooCommerce Search And Filter For Order Forms
According to industry insights, 50% of potential sales are lost simply because customers are unable to find what they are searching for in an e-commerce store. One way to solve this pain point for your B2B customers is by implementing an intuitive search and filter functionality.
Here are some of its most compelling benefits:
- Better customer experience: Facilitating quick product searches empowers your wholesale customers to navigate your product catalog with ease. This eliminates frustration caused by manual browsing and improves their overall purchase journey.
- Reduced cart abandonment: Simplifying product discovery minimizes the likelihood of customers abandoning their carts mid-purchase. With seamless product search and filtering, you remove friction points in the buying journey and help customers find what they need faster.
- Create a competitive edge: Improving the online purchase experience for your wholesale customers gives them more reasons to choose your business. With a streamlined WooCommerce search and filter experience, you position your store as a preferred platform for bulk purchasing.
How To Add WooCommerce Search and Filter to Wholesale Order Forms
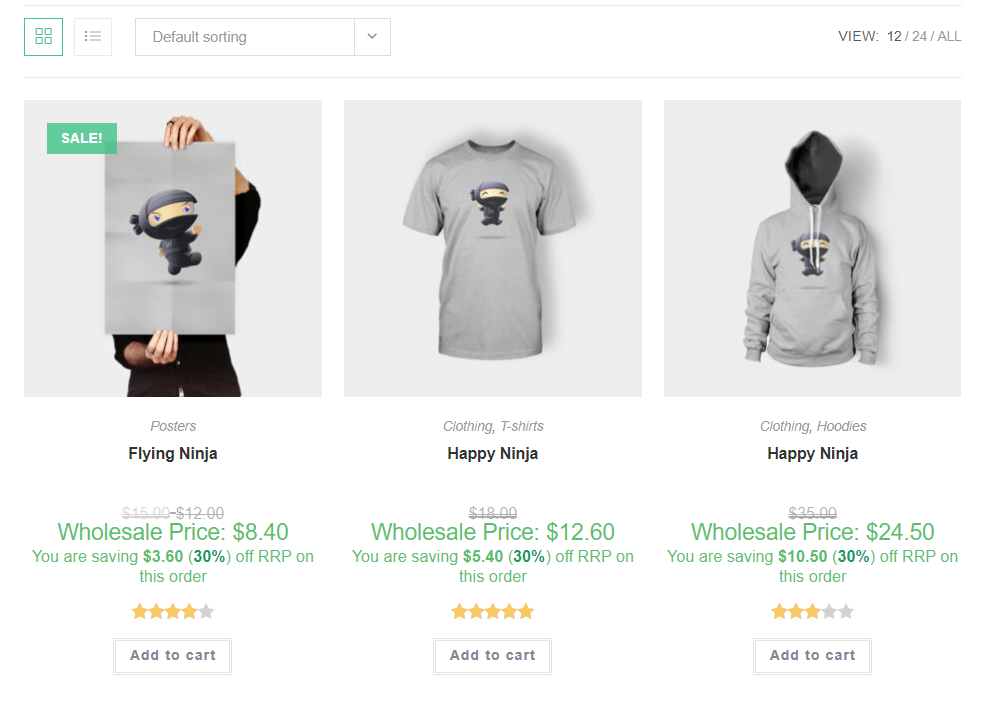
By default, WooCommerce provides store owners with a traditional shop page where customers can browse through product listings. While this may cater well to individual shoppers, it may fall short in meeting the unique needs of your wholesale customers.
Because B2B buyers often order in bulk, they prioritize efficiency, convenience, and ease in their purchase experience. Navigating through a large catalog can be time-consuming and cumbersome, which is why providing a bulk order form is helpful.
Fortunately, you can easily implement this using our powerful plugin, Wholesale Order Form. In this tutorial, we’ll discover how you can create order forms and implement WooCommerce search and filter functionality.
For this guide, we’ll assume you already have a running WooCommerce store and have installed and activated Wholesale Order Form. So, let’s get right into it!
Step 1: Assign SKUs and product categories for your listings
Before creating your bulk order form with WooCommerce search and filter functionality, it’s important to lay the foundation first by optimizing your product catalog for better searchability. This includes adding SKUs (Stock Keeping Units) and organizing product categories effectively. With these details, your B2B buyers can easily search for the products they need!
Tip: 67% of B2B buyers consider product specifications and functionality most useful in their buying process. Aside from assigning SKUs and product categories, it’s just as important to provide detailed and accurate product descriptions. Make sure to provide key details such as product specifications, features, and benefits.
Assigning SKUs
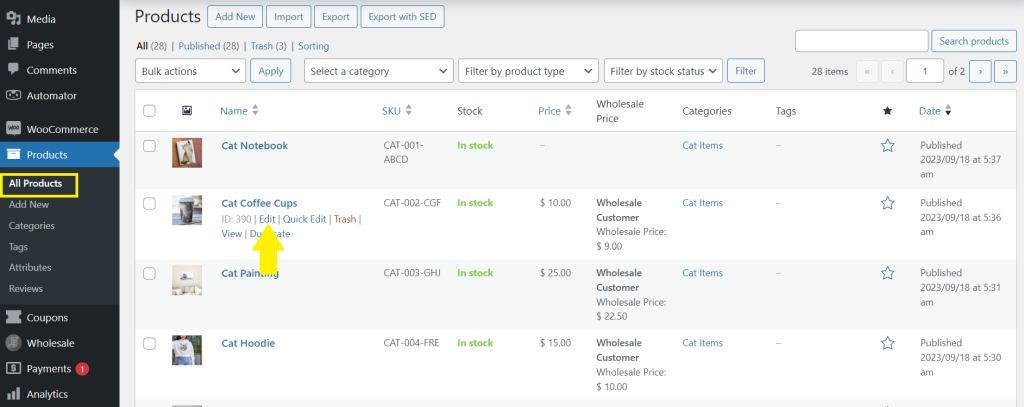
To assign SKUs to your product listings, navigate to your WordPress dashboard > Products > All Products. Then, hover over the product to which you want to add an SKU and click “Edit”.
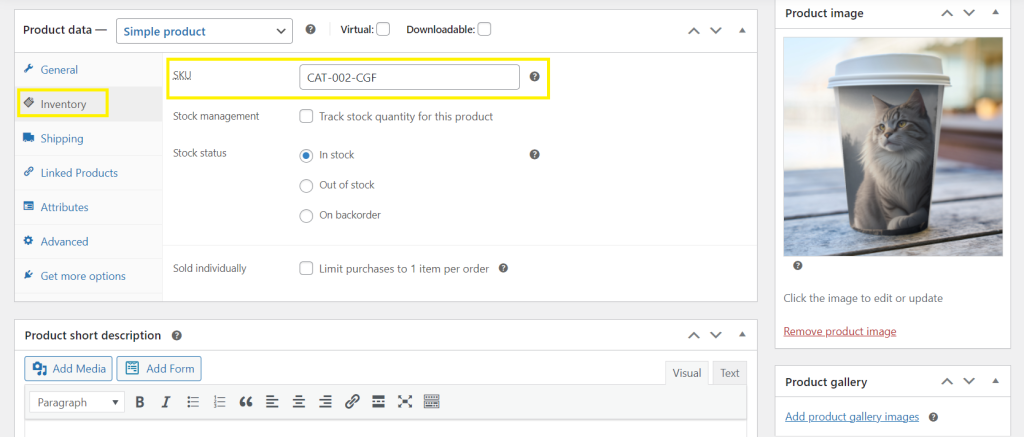
This will take you to the Edit Product page. Scroll down and click “Inventory”. Within the Inventory section, locate the field labeled “SKU“. This is where you can add the unique identifier for your product. Simply type in your desired SKU number.
Don’t forget to hit “Update” to save your changes!
Tip: While you can opt to create random combinations for SKUs, we recommend using product identifiers that describe the item’s important characteristics. For example, can be based on the product name, model, size, material, color, and other relevant parameters.
Creating product categories
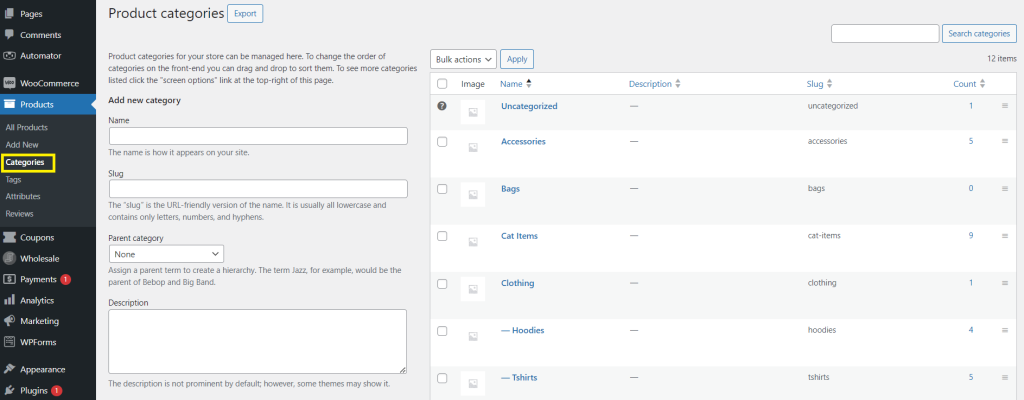
Assigning product categories to your listings can greatly improve WooCommerce search and filter functionality for your wholesale order forms. To create product categories, navigate to your WordPress dashboard > Products > Categories. This immediately takes you to the “Product Categories” page, where you can add or edit existing categories.
When adding new categories, you’ll be able to edit the following:
- Name: Enter the name of the category you wish to create.
- Slug: This is a URL-friendly version of the category name. It’s automatically generated but can be edited if needed.
- Parent Category: If you want to create a hierarchical structure for your categories, you can assign a parent category. This indicates that the category you’re creating is a subcategory of another category.
- Description: You can also add a description for the category to provide additional information or context for your customers.
Once you’ve completed the necessary details, click the “Add New Category” button to save your new category. If you need to edit an existing category, hover over the category name and click “Edit” to make changes.
Assigning product categories to your product listings
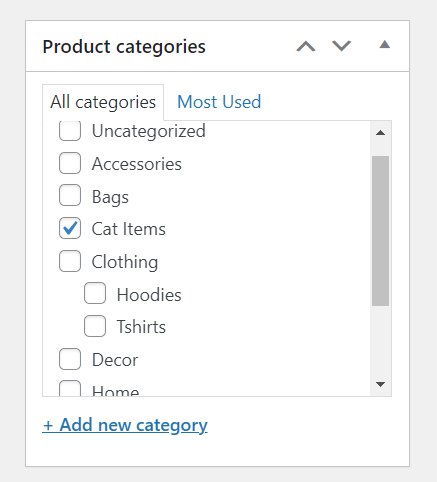
You can easily assign product categories to existing products by navigating to Products > All Products. Click “Edit” on the product you want to assign categories to. Then, scroll down the product editing page until you find the “Product Categories” settings.
In the “Product Categories” settings, you’ll see a list of available categories. Tick the checkbox next to each category that you want to assign to the product.
Tip: You can also create new categories directly from this section! Simply click the “+ Add New Category” link, and you’ll be prompted to enter the name and other details for the new category.
Step 2: Create your wholesale order form and enable search and filter
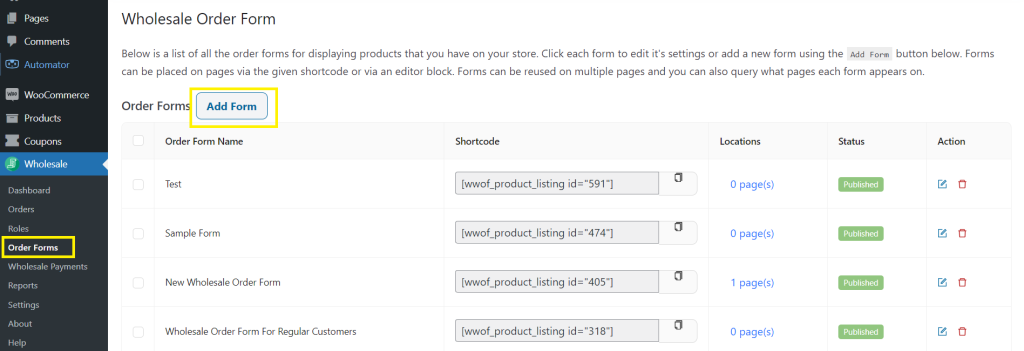
Now that you’ve optimized your product listings, it’s time to create your first wholesale order form! To do this, navigate to your WordPress Dashboard > Wholesale > Order Forms.
Click “Add Form” to create a new wholesale order form. The plugin automatically creates a ready-made order form to save you time and effort.
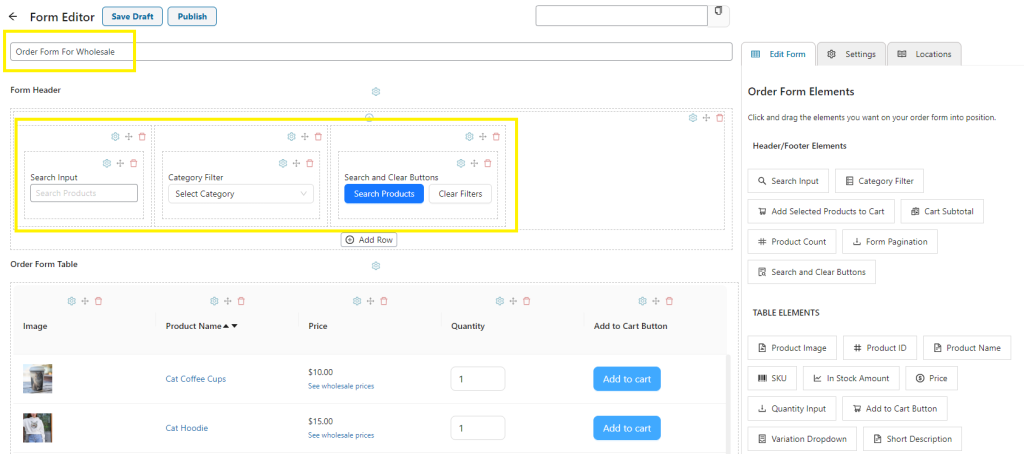
Firstly, give your form a name. This step is crucial, as it is required to generate the form’s shortcode once you’re ready to publish it.
Then, to enable WooCommerce search and filter for your bulk order form, make sure to add the “Search Input“, “Category Filter“, and “Search and Clear buttons” elements to your wholesale order form. These elements empower your B2B customers to easily search for products within your bulk order form.
Configuring your wholesale order form
Wholesale Order Form gives you immense flexibility to edit your bulk order form and cater it to your business needs. Using the plugin’s drop and drag builder, you can easily add, remove, and rearrange elements to create a seamless ordering experience for your customers.
In the form’s settings page, you can also:
- Include/exclude products and product categories
- Restrict access to your order forms based on wholesale user roles
- Set the number of products to be displayed on your order form
- Enable/disable lazy loading
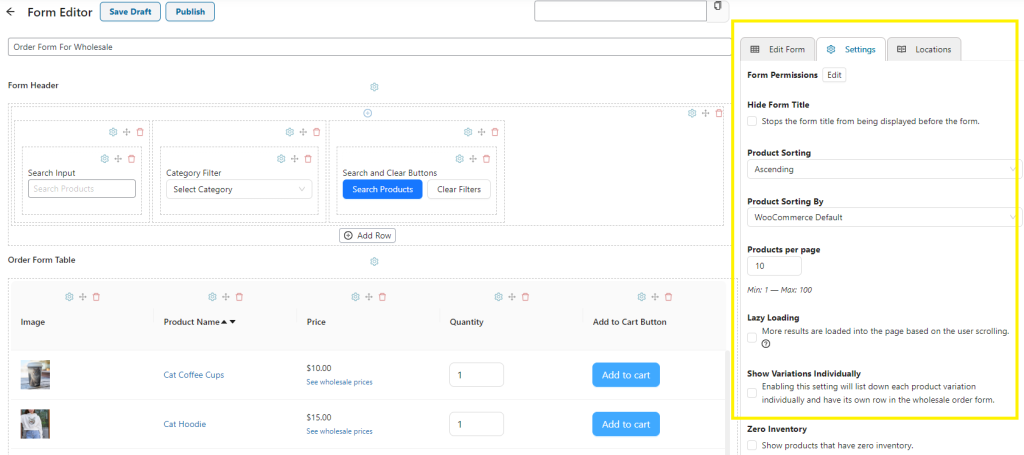
Once you’re done configuring your form, click “Publish” to save your changes!
Check out our detailed Getting Started Guide to discover the full list of functionalities of the Wholesale Order Form!
Step 3: Publish your form
Wholesale Order Form automatically generates a shortcode for newly created forms, giving you the flexibility to place them anywhere on your website! Upon clicking Publish, you’ll notice that a shortcode is automatically provided for you.

Click the copy icon to copy the shortcode. Now that you’ve copied the shortcode, navigate to the page where you want to display your wholesale order form. Then, add a Shortcode block and paste the shortcode. Make sure to click enter to save your changes.
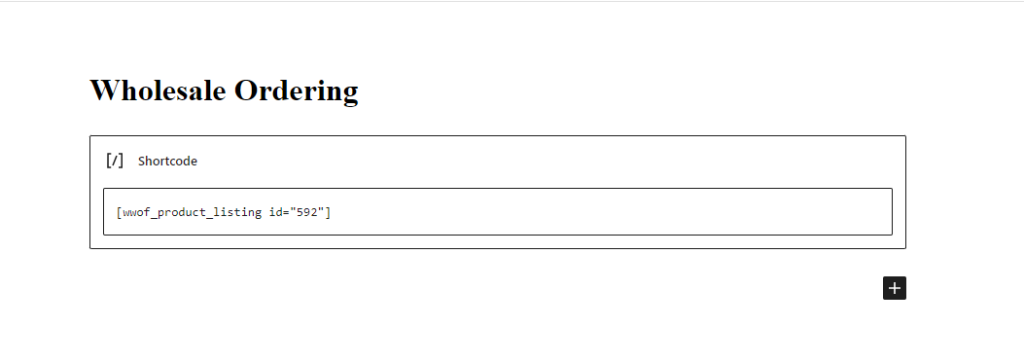
Before publishing your page, take a moment to preview it to ensure that the wholesale order form appears as intended. Once you’re satisfied with the layout and placement of the form, click the “Publish” button to make it live on your website.
So, that’s it! You now have a wholesale order form with WooCommerce search and filter functionality in your store.
Conclusion
Adding a WooCommerce search and filter functionality to your wholesale order forms is one of the easiest ways to streamline the B2B shopping experience. By helping wholesale customers find what they need more easily, you enhance their satisfaction and remove friction in the sales process.
In this helpful guide, we discovered how you can implement this feature effortlessly with Wholesale Order Form. Here’s how in just three steps:
- Optimize your product catalog by adding SKUs and product categories
- Create your wholesale order form and enable search and filter
- Publish your wholesale order form
Do you have any questions about enabling WooCommerce search and filter features in your bulk order forms? Let us know in the comments section below!

