Adding a WooCommerce filter by category to your online store can make a big difference in helping your customers find what they need easily. With this feature, customers can quickly browse products based on their preferred categories. In this guide, we will show you why adding category filters is important, and how you can add them to your WooCommerce store. From creating a simple sidebar filter to using more advanced forms, we’ve got you covered.
Let’s get started and make your store easier to use for your customers!
Why Add Filter By Category To WooCommerce
Adding a WooCommerce filter by category is important for store owners who want to make shopping easy for their customers. Imagine a customer visiting your store and seeing hundreds of products. If they have to scroll through everything to find what they want, they might leave without buying anything. Filters help customers narrow down their choices, which makes shopping faster and more enjoyable.
For example, if you run a clothing store with lots of products, you can use filters to help customers sort between men’s, women’s, and kids’ clothing. This makes browsing easier and helps people find products faster. It helps buyers find what they need quickly, which can lead to more sales and happier customers.

When a product table is grouped by category, it makes everything look cleaner and easier to navigate. Customers will appreciate the effort you put into making their shopping experience as smooth as possible.
Another benefit of using filters is that they can help boost your sales. When customers can easily find the products they are looking for, they are more likely to add more items to their cart. This can lead to a higher average order value and better revenue for your store. Plus, if customers have a good experience, they are more likely to come back for future purchases.
In short, a category filter makes your store more user-friendly.
Adding WooCommerce Filter By Category
Now, let’s talk about how you can add a WooCommerce filter by category to your shop pages. This will make it easier for your customers to find what they need and have a better shopping experience.
To add a filter by category in WooCommerce, follow these simple steps:
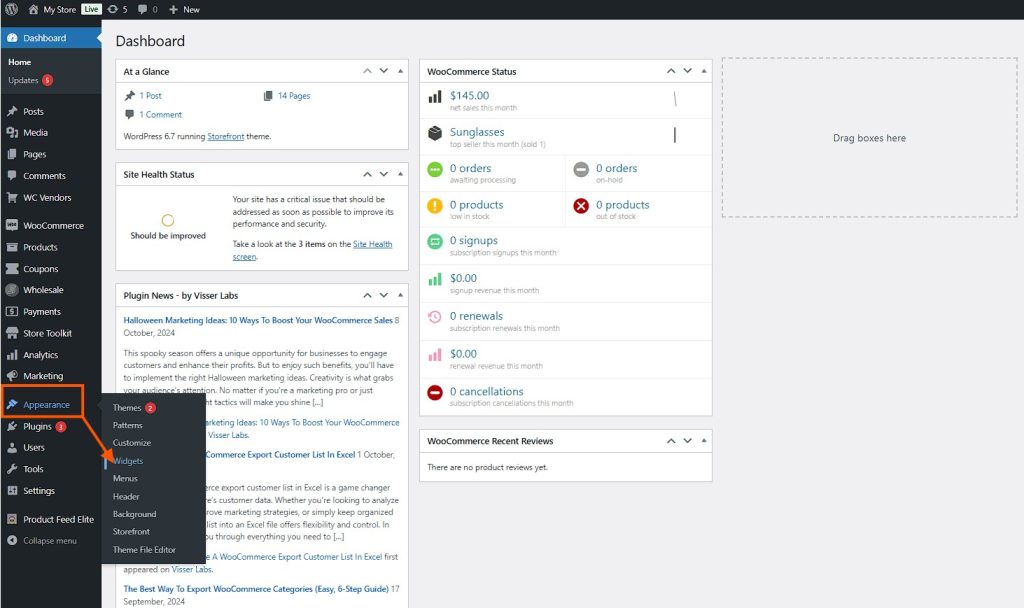
1. Access widgets from WordPress
Start by going to your WordPress sidebar and selecting Appearance > Widgets.
2. Add a new widget
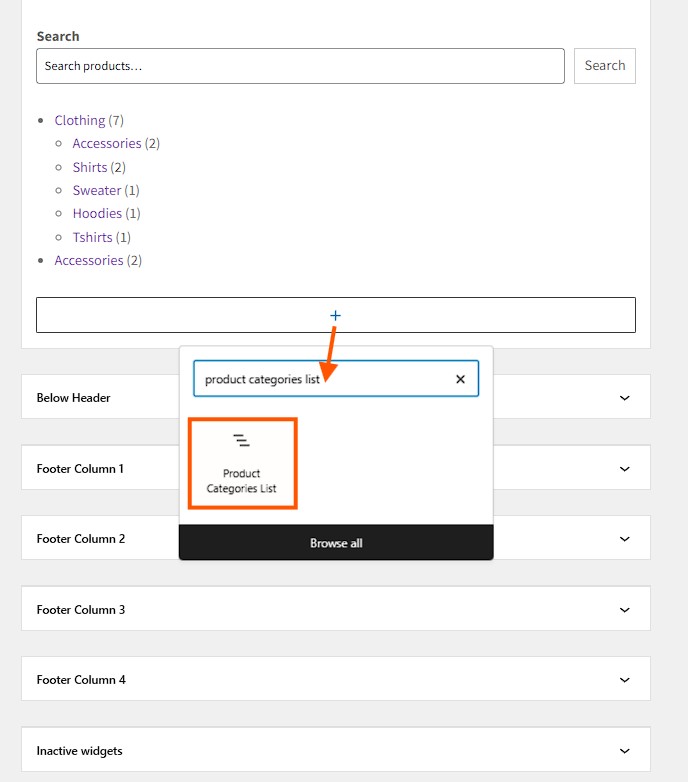
On the next page, look for a box with a plus symbol. Click the plus symbol and type Product Categories List into the search box.
Click on the Product Categories List widget to add it to your sidebar or the part of the page you want.
3. Customize display options
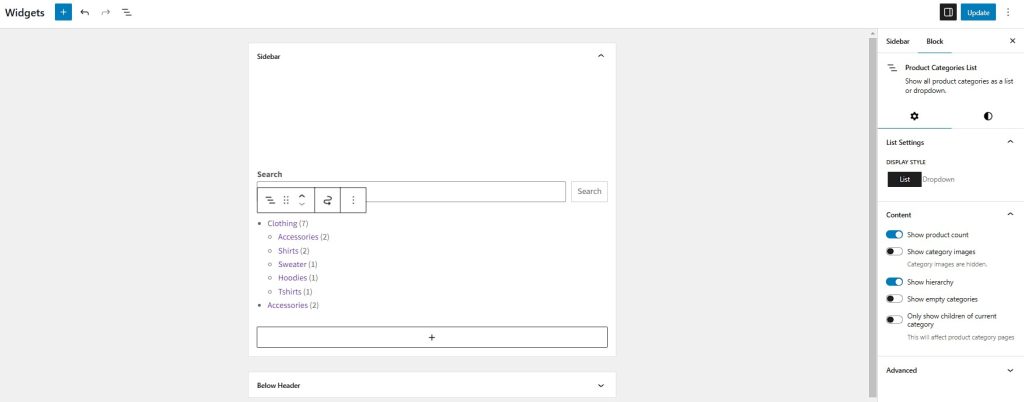
Now, you will see the widget on the Widgets page. You can choose if you want to include product counts, show empty categories, and other options to decide how the categories will look.
When you’re happy with the settings, click the blue Update button at the top of the page. Now, your store’s sidebar will have a category filter for customers to use.
4. WooCommerce category dropdown (optional)
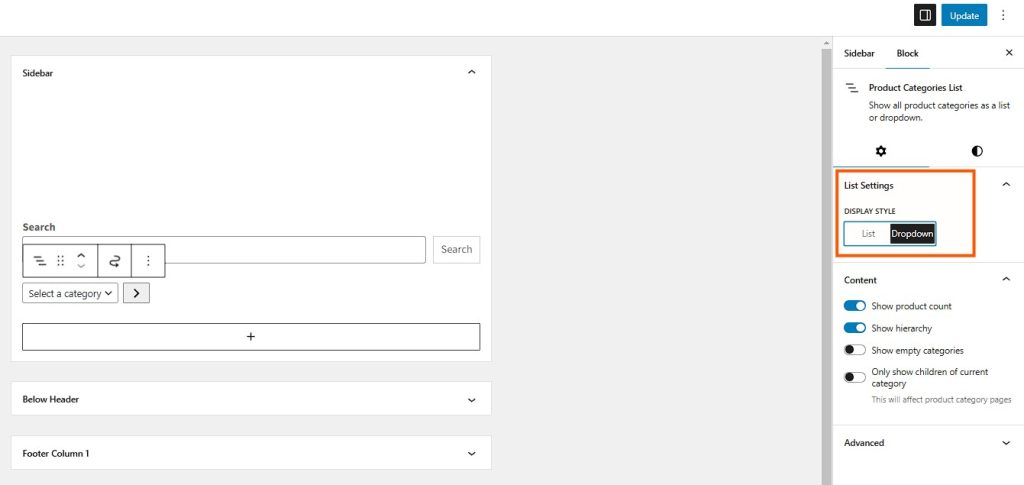
If you want a dropdown instead of a list for WooCommerce category filtering, you can change the settings in your product categories list widget:
- While editing the product categories list widget, go to the list settings and change List to Dropdown.
- Click the blue Update button at the top of the page, and you’re done!
Adding a dropdown filter can be especially helpful if you have many categories. It keeps your shop page from looking cluttered and makes it easier for customers to quickly find what they are looking for. This small change can have a big impact on how easy it is to shop in your store.
Improve Your WooCommerce Filters With Wholesale Order Form
If you want to make your WooCommerce store even better, adding Wholesale Order Form can help a lot. Wholesale Order Form makes it easy for customers to place bulk orders by showing products simply and clearly. This tool is great for wholesale customers who need to find and buy items quickly.
Here’s how you can use the Wholesale Order Form to improve your store:
Step 1: Add and build your form
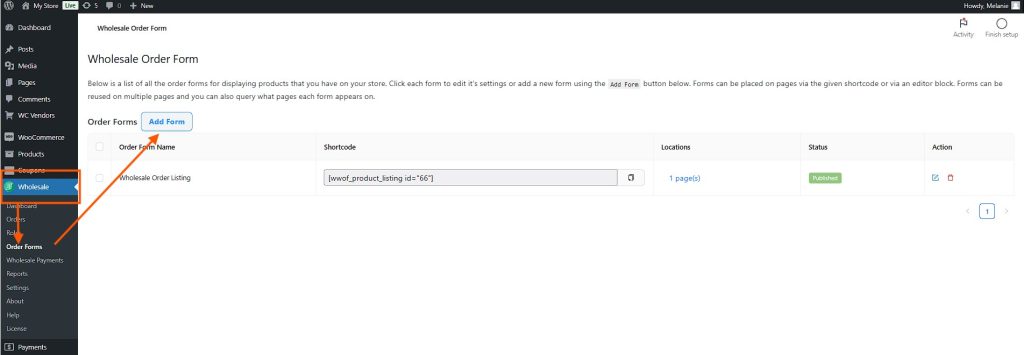
After installing and activating the plugin, go to Wholesale > Order Forms in your WordPress dashboard. You will see a default form already created. You can edit this form or create a new one by clicking on Add Form.
📗 Note: You can also create different order forms and place them on any page using shortcodes.
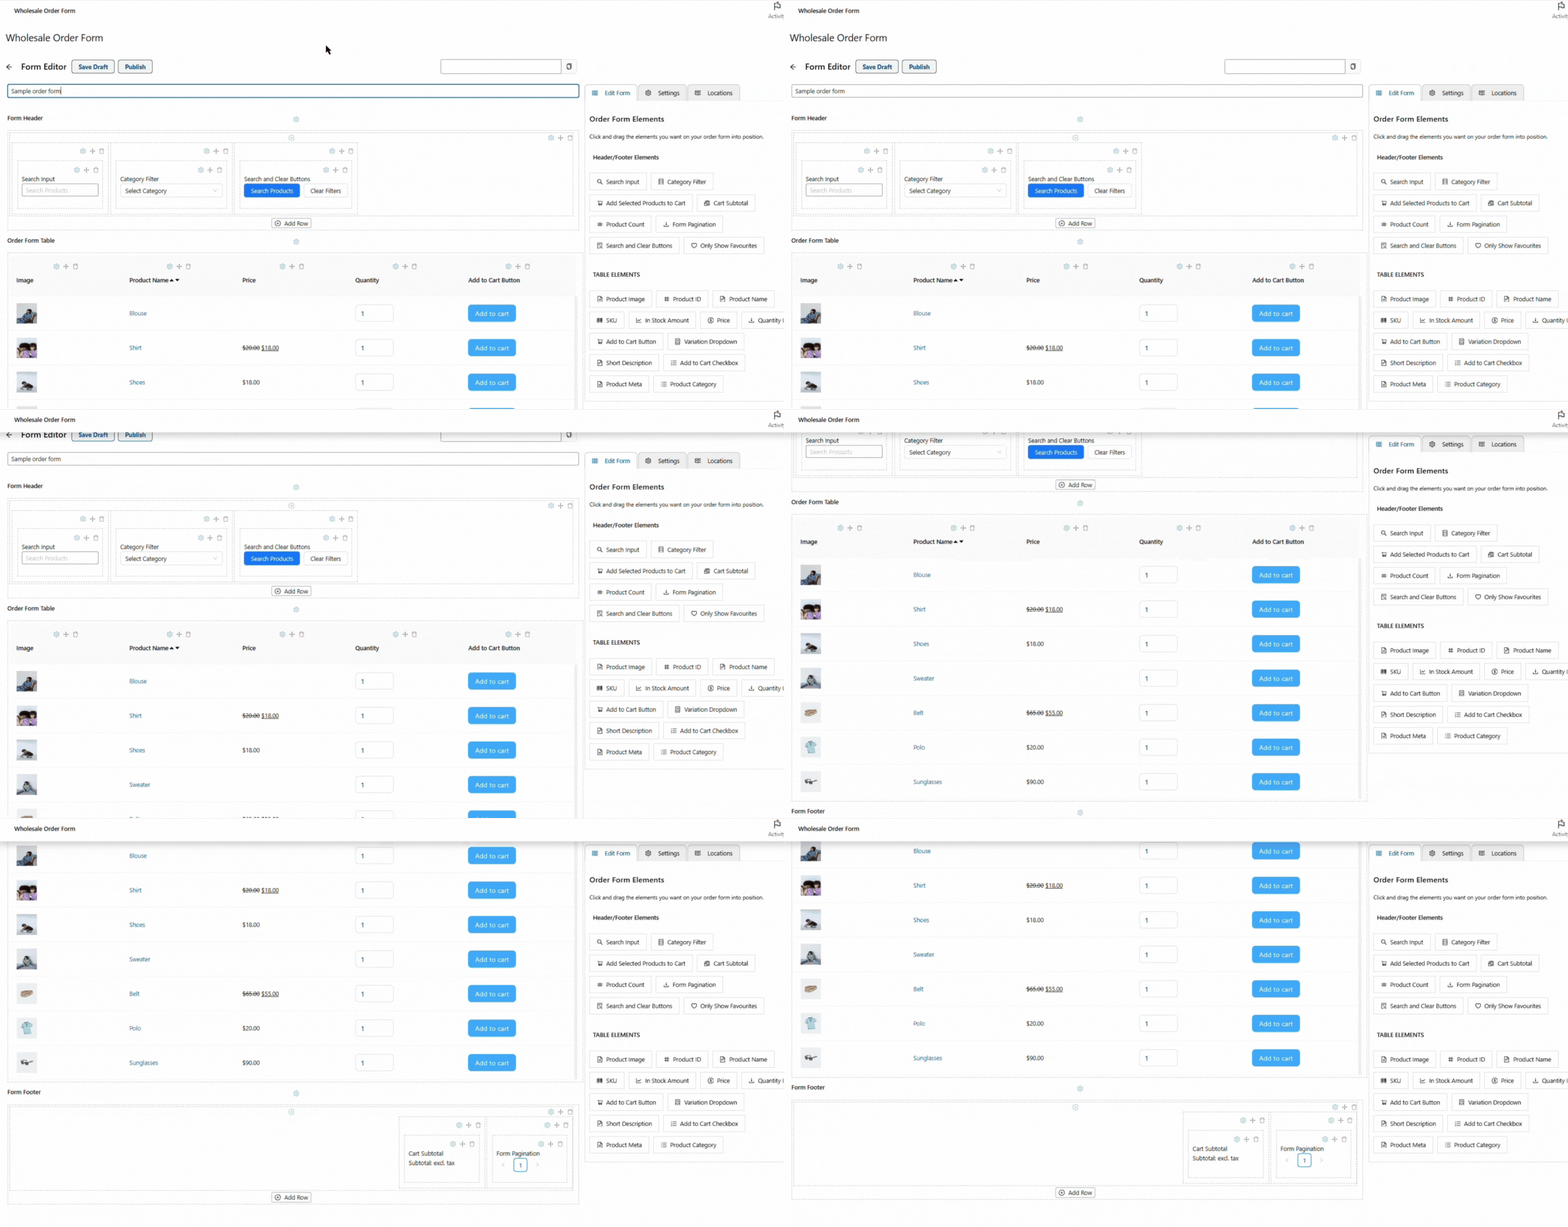
Start designing your order form by giving it a title. The form has three sections: a header, a table, and a footer. To customize these sections, click on Add New Section and choose the number of columns you need.
To customize the header and footer, drag and drop the elements you want from the panel on the right. You can arrange these elements in the order you like.
You can also add elements like search bars or buttons to make the form even more useful. For example, adding a search bar in the header can help customers quickly find the products they want.
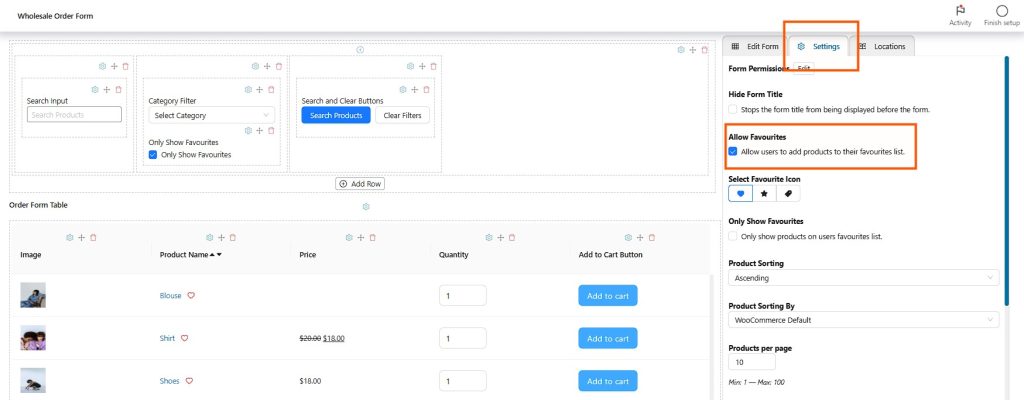
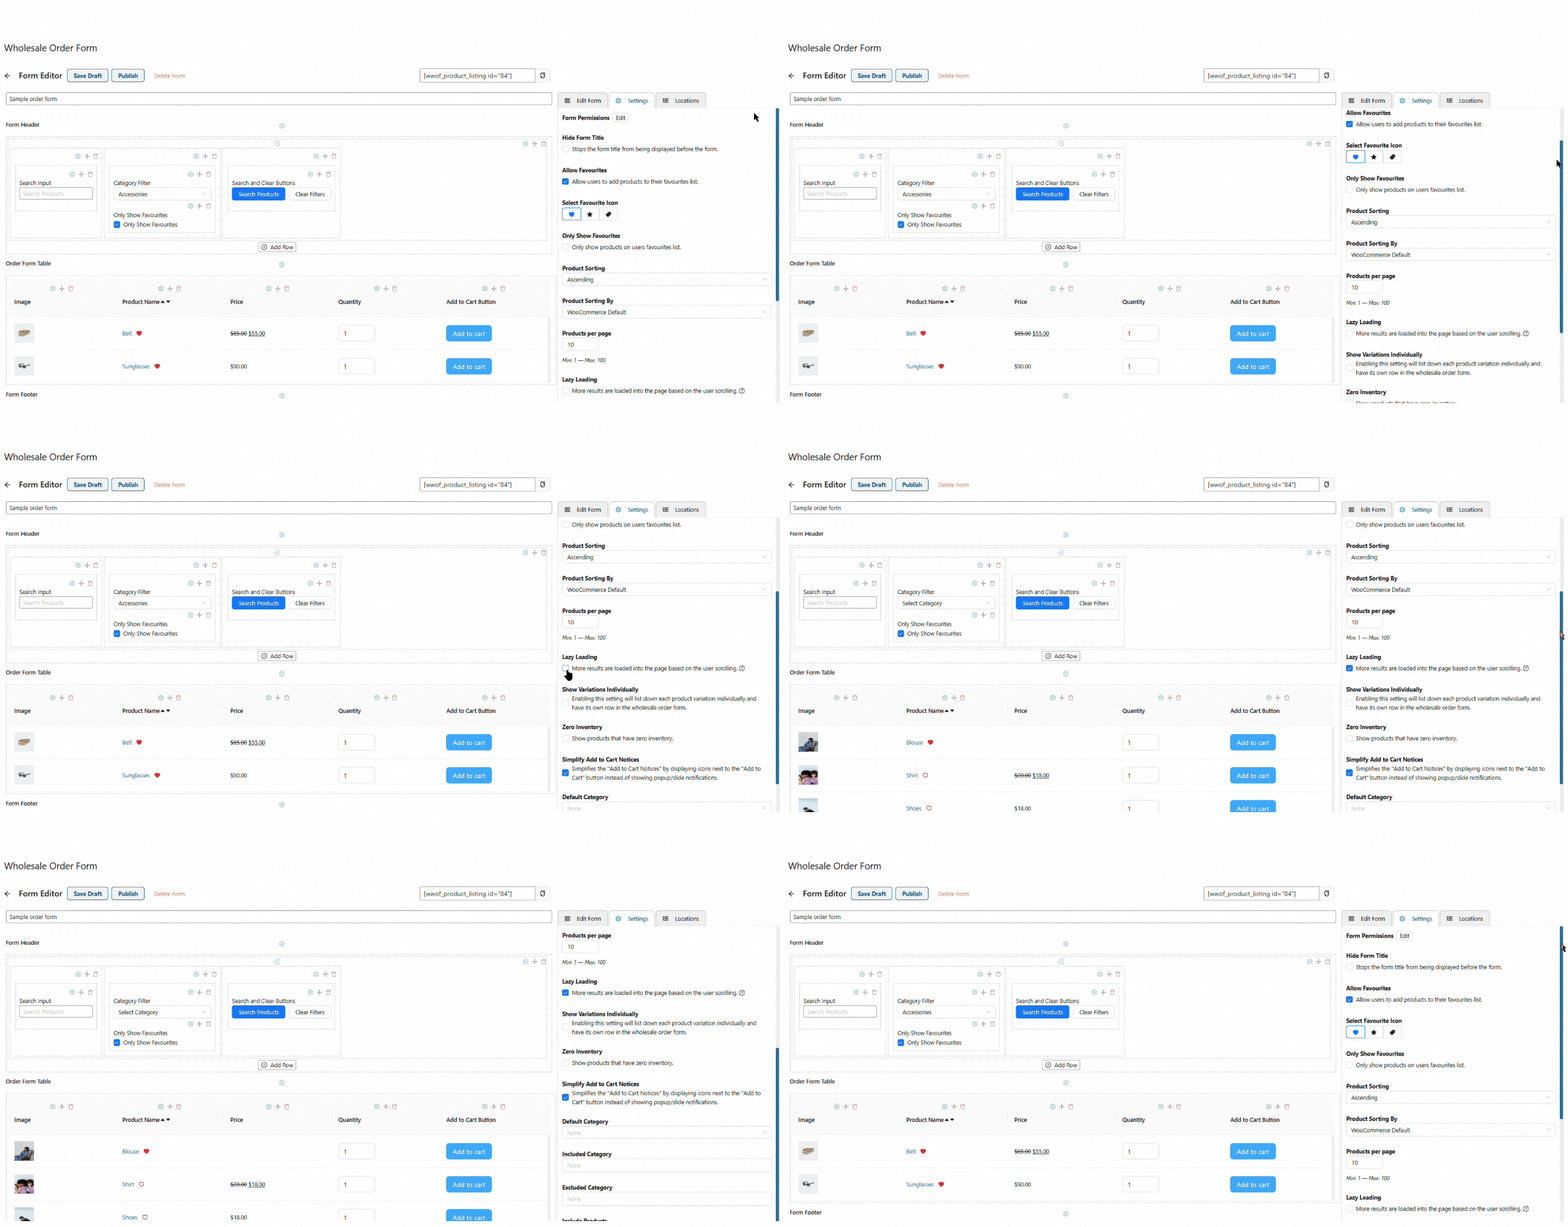
You can also activate and add Favorites to show the most ordered products of your customers and make the order search easier.
To add Favorites, go to Settings and click Allow Favorites.
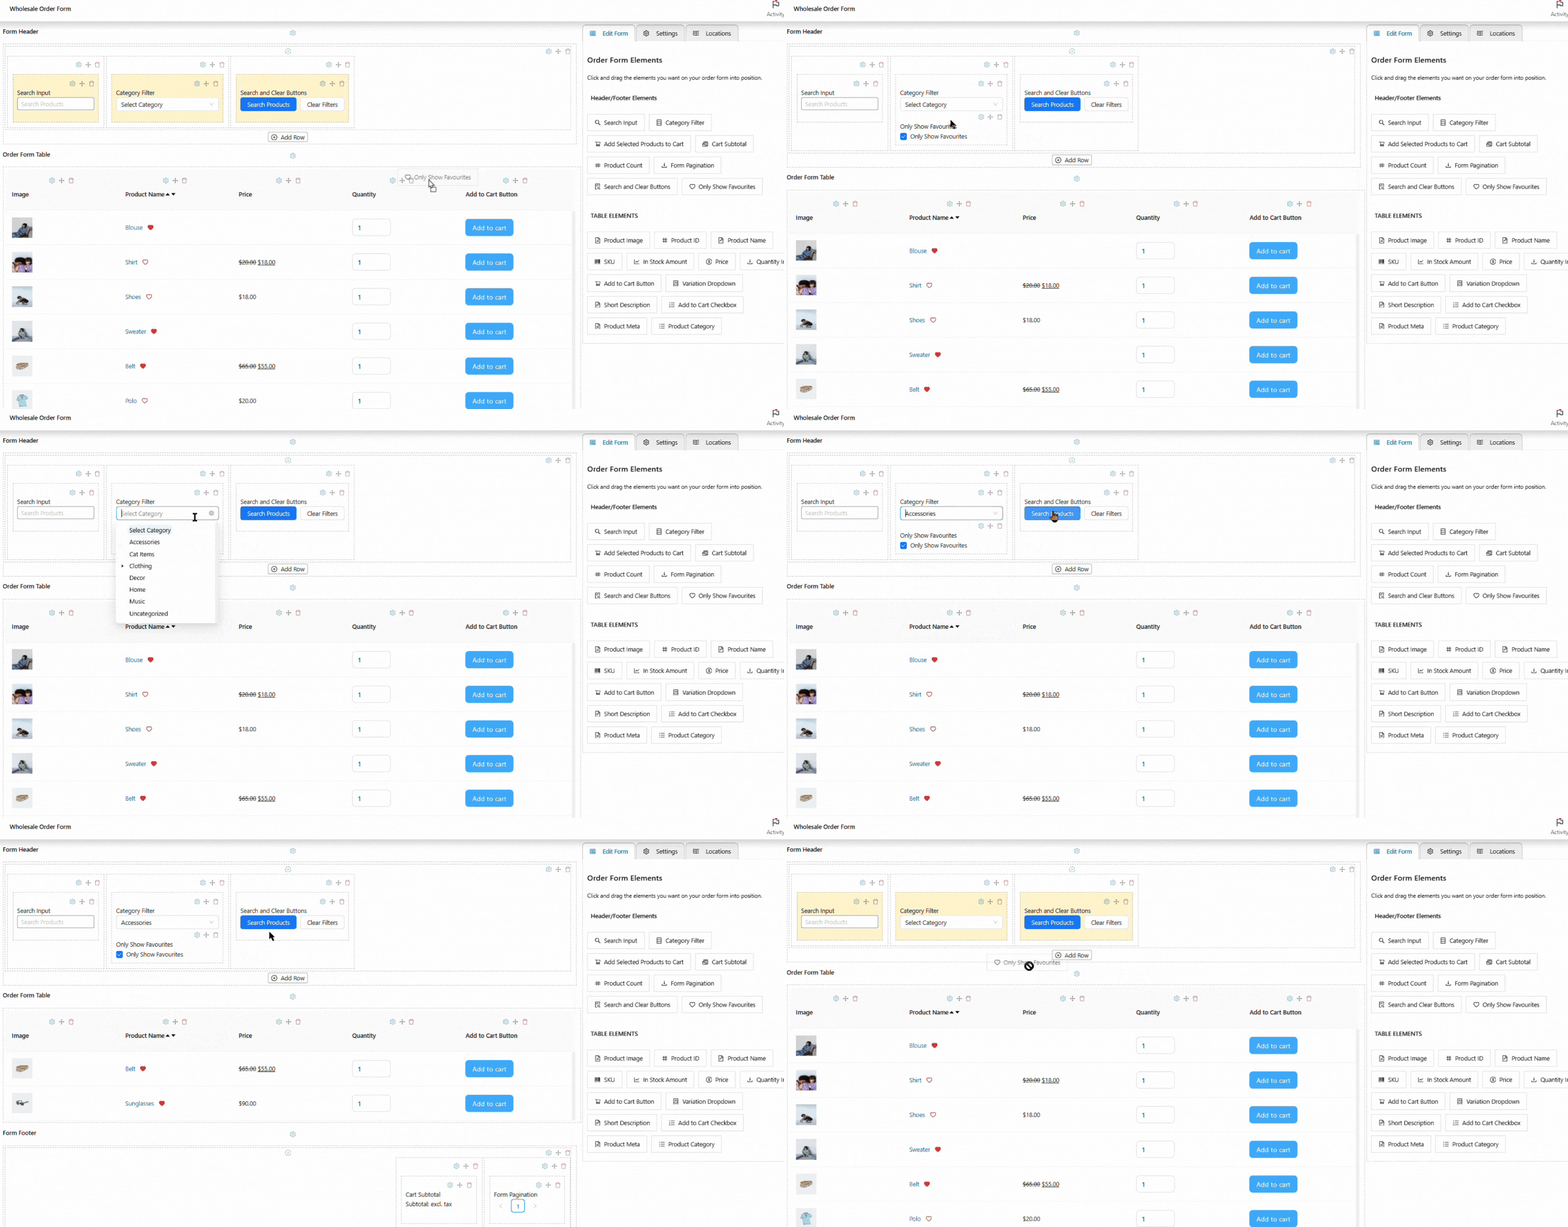
Then, go to Edit Form and drag the Only Show Favorites button to your order form. From there, customers can already filter your WooCommerce products according to their favorites. How exciting is that!
When you’re happy with the setup, click Save Draft.
Step 2: Customize your form’s settings
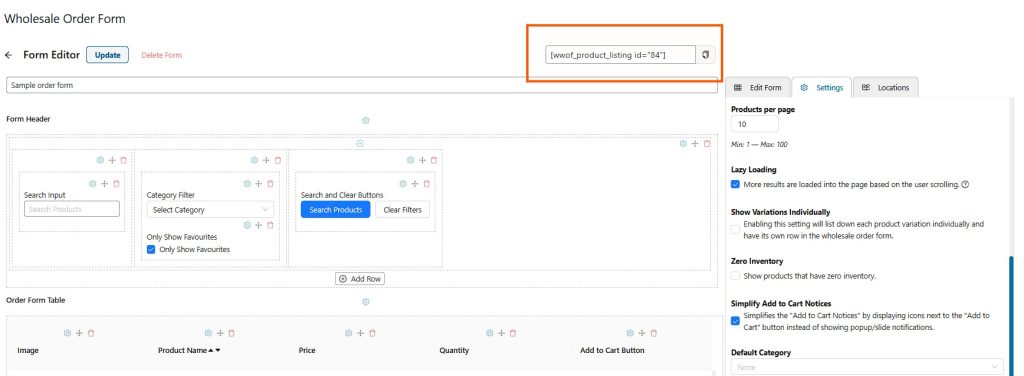
After building the form, click the Settings tab to change the settings. From there, you can hide the form title, sort WooCommerce products by name or other features, and enable lazy loading. You can also choose to show only certain products or exclude others.
📗 Note: Lazy loading can help improve your website’s speed, especially if you have a lot of products. This means that products will only load when a customer scrolls down to see them, making the site faster and more responsive.
When everything is ready, click Publish.
Step 3: Publish your order form
To publish your order form, copy the shortcode you can find above your order form.
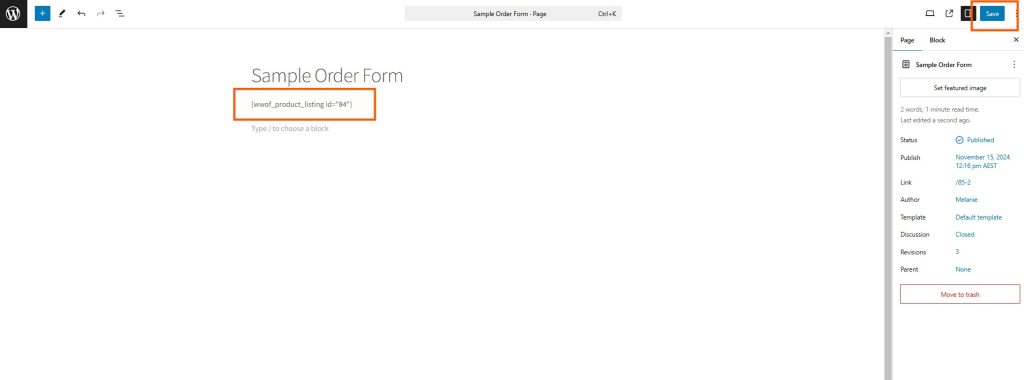
Go to WordPress Pages > Add New Page, then add your page title. Lastly, paste your shortcode and click Publish.
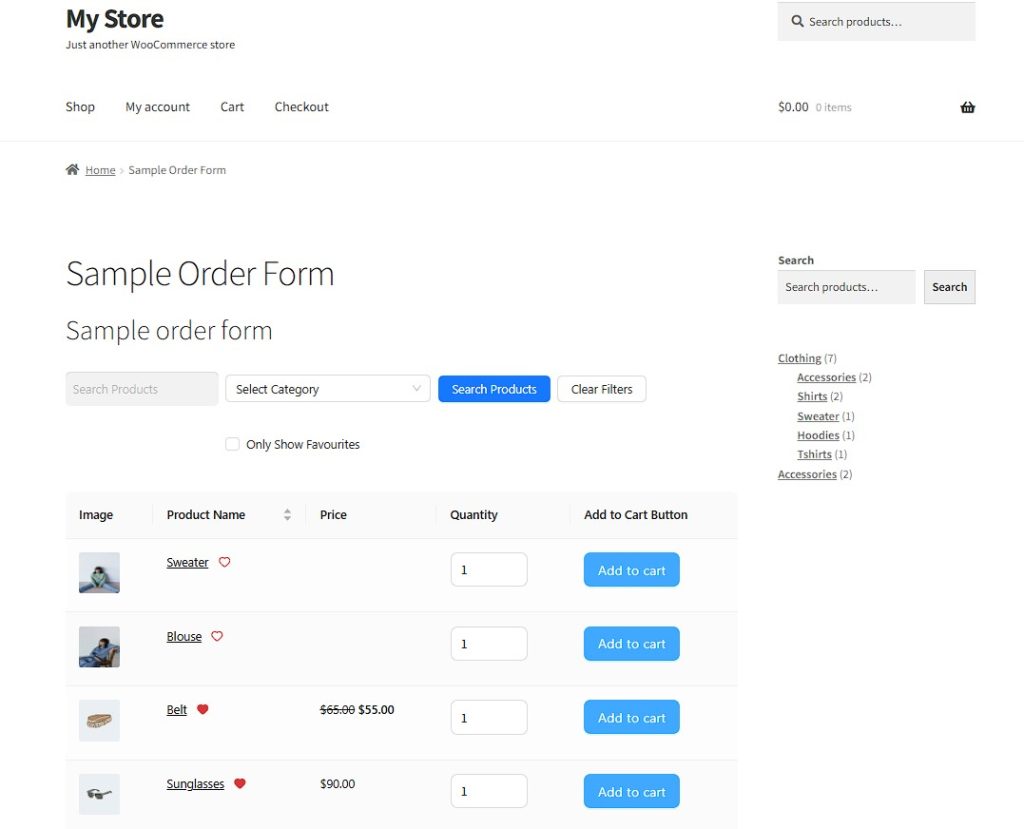
Once you update the page, your customers will see the order form as you designed it.
Using shortcodes makes it easy to place your order form wherever you need it. You can put it on a dedicated wholesale page or add it to different product categories. This flexibility allows you to create a shopping experience that works best for your customers.
If you are interested in learning about product sorting, you may read our article: How To Customize WooCommerce Product Sorting (3 Easy Ways).
Frequently Asked Questions
How do I get a product of a specific category in WooCommerce?
To get a product of a specific category, use the Product Categories List widget in WooCommerce. Filter by category you need to see all products in that group. You can also set up categories in the product settings to organize your products.
Setting up categories properly can help you keep your store organized. When products are in the right categories, it’s easier for your customers to find them. You can also use these categories to create special promotions or discounts for specific groups of products.
How to sort WooCommerce products by category?
To sort products by category, go to WooCommerce > Products in your WordPress dashboard. Assign each product a category. Customers can then filter products by these categories using widgets or dropdowns.
Sorting products by category makes your store look neat and professional. Customers will appreciate being able to find related products together, which makes it more likely that they will buy multiple items. This can help increase your sales and make your store more successful.
How do I add a category filter in WordPress?
To add a filter category in WordPress, go to Appearance > Widgets, and add the Product Categories List widget. You can set it to show as a list or dropdown to help users filter products by categories.
Adding a filter is an easy way to improve your store’s navigation. Customers will have a better time finding what they need, and you will have fewer people leaving your site because they couldn’t find the right product. It’s a simple change that can lead to big improvements in customer satisfaction.
Conclusion
Adding a WooCommerce filter by category to your store is an important way to make shopping easier for your customers. This can help grow your business and make it more successful over time.
In this guide, you can add a category filter widget to your store and customize it to suit your needs by following these simple steps:
Adding WooCommerce filter by category
- Access widgets from WordPress
- Add a new widget
- Customize display options
- WooCommerce category dropdown
Improve WooCommerce filters with Wholesale Order Form
By adding filters and order forms, you create a store that meets the needs of all your customers, whether they are buying one item or placing a large wholesale order. Taking these steps to improve your store shows your customers that you care about their experience. When you make shopping easy, customers will feel more comfortable buying from you and will keep coming back for more.
Have questions about WooCommerce filter by category? Let us know in the comments below!

