WooCommerce is one of the most popular e-commerce platforms worldwide, operating on more than 5 million websites. If you run an online store and want to translate your WooCommerce store into multiple languages for your diverse customer base, it’s essential to find an efficient solution.
Fortunately, a translation plugin such as WordPress Multilingual (WPML) can translate your WooCommerce store into several languages. Furthermore, the tool is easy to set up and use.
In this article, we’ll discuss the benefits of translating a WooCommerce store. Then, we’ll show you how to do it with the WPML plugin. Let’s get started!
The benefits of translating a WooCommerce store
Projected data shows there will be more than 500 million digital e-commerce users in Europe alone by the end of 2022. This means many potential customers speak languages other than English.
If your WooCommerce store doesn’t cater to these consumers, they may look elsewhere to buy products online. As such, translation can help you secure sales from international audiences and boost your business’ growth.
In fact, 76 percent of consumers worldwide prefer to buy products in their native languages. Additionally, 40 percent of these customers never buy from online stores with information in other languages. Therefore, translating your store can improve the user experience and lead to repeat business.
Finally, having a multilingual WooCommerce store can improve your Search Engine Optimization (SEO) efforts and increase your visibility. If you can rank for keywords in different languages, you’ll be able to attract a broader customer base.
How To Translate Your WooCommerce Store With WPML (In 4 Steps)
You can manually translate your website. However, this can be a tedious process involving a lot of time and effort. Therefore, we recommend opting for a translation plugin such as WPML:
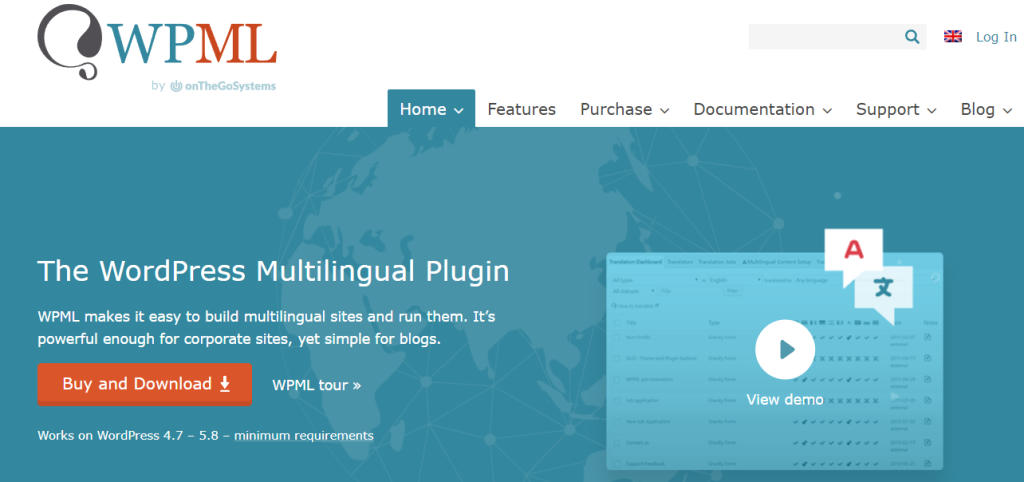
WPML is one of the most popular translation plugins for WooCommerce. It is perfect for small to large-sized businesses because it translates the whole site, including the pages, posts, and product taxonomies. Additionally, it is compatible with many themes and plugins, including our Wholesale Suite plugin.
Here are some of the significant features of the WPML plugin:
- More than 60 pre-configured languages
- Automatic detection of areas for translation
- Support for search engines
- Integration with several translation services
This tutorial will explore how to translate your WooCommerce store with the WPML plugin. Let’s get started!
Step 1: Install and activate the WPML plugin
First, choose one of the WPML premium plans. You’ll need to select Multilingual Agency or Multilingual CMS to access e-commerce translation features.
You’ll then need to download the following files in .zip format from your WPML account:
- WPML Multilingual CMS (or Agency)
- WooCommerce Multilingual
- String Translation
- Media Translation
Now, navigate to your WordPress dashboard and upload the .zip files. When the plugins finish installing, click on Activate.
The plugin will then ask you to enter your license details to activate your account. You can find this code on your WPML account page.
Step 2: Run the WPML setup wizard
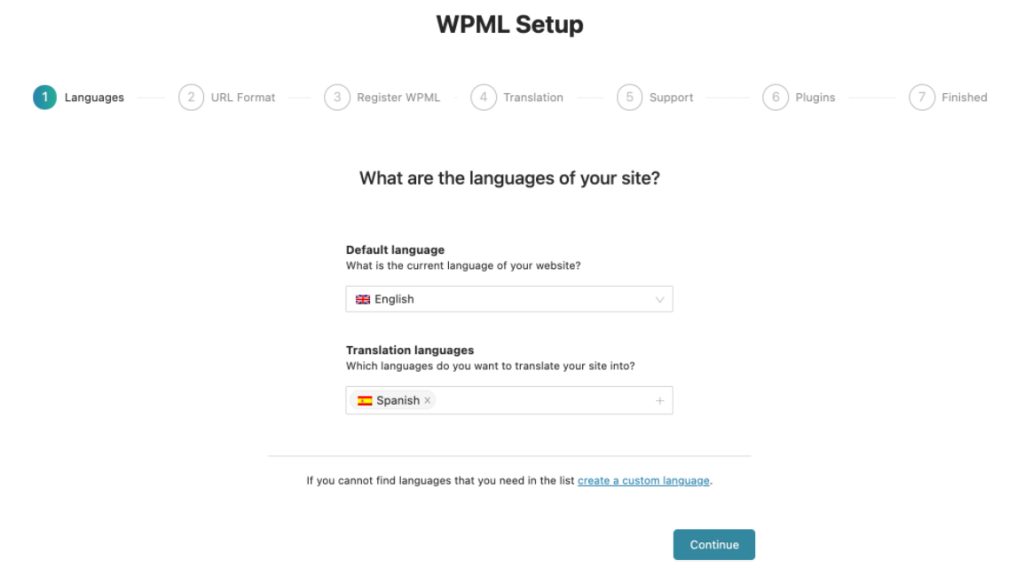
Once you’ve registered your account, this should trigger the setup wizard. First, you’ll need to choose the languages for your site. WPML supports 65 different languages, and you can select as many as you want:
You can even add a custom language if you want to support a dialect such as Swiss German. When you’re happy with your selections, click on Continue.
Now you’ll set up the URL format for your WooCommerce store translation. This step is essential for assigning different URLs to your translated pages. That way, your English content will still exist on your website.
For example, you might choose “www.yoursite.com/es” as the structure for your translated Spanish pages. Then, click on Continue again to proceed to the next step.
Now the setup wizard will ask you to enter your account key and register your account if you haven’t done so already. You can retrieve the code from your WPML account page. This registration will also automatically update the plugin without your input.
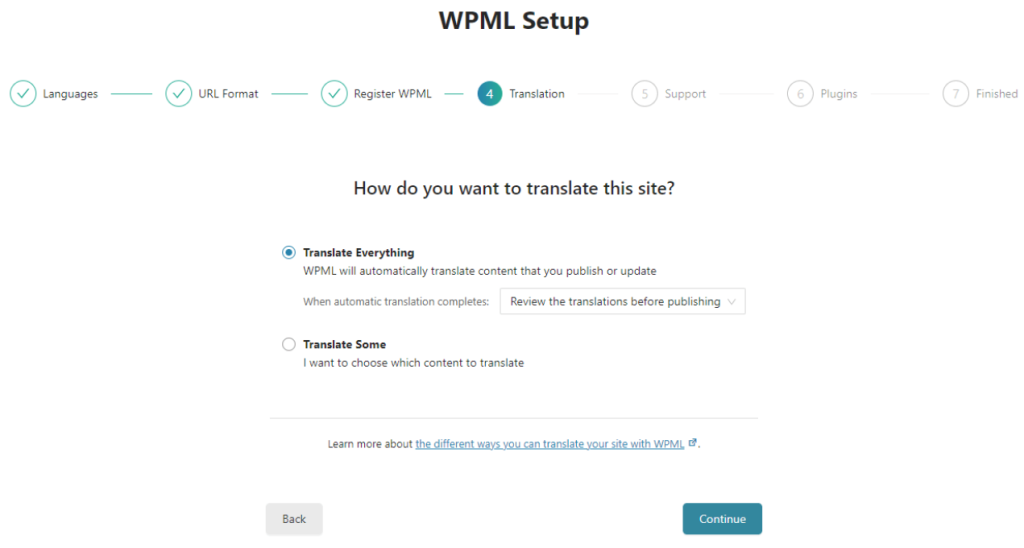
Next, you’ll need to choose if you want to translate your entire WordPress site or just select pages. For instance, you might only want to translate your WooCommerce store pages:
The next setting will ask if you want to send your data to WPML support to improve the user experience. Finally, you can finish the setup wizard and start using the translation plugin.
Step 3: Choose the language order for your WooCommerce store
Earlier in the tutorial, you selected all of the languages you want translations for in your WooCommerce store. However, some of these languages may be more important than others.
For example, your target customers might live in Latin America. In this scenario, you’ll want Spanish to be the first translation option.
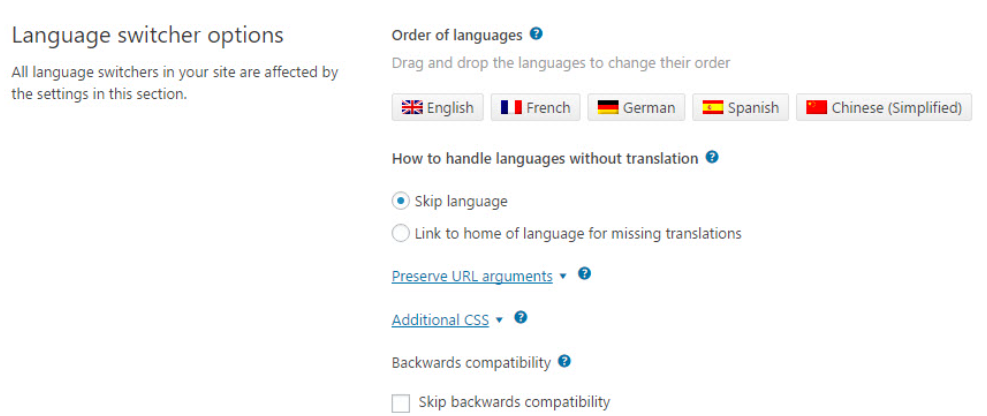
Navigate to your Language Switcher. You can find it in the footer section beneath any WordPress post or page:
You can drag and drop languages to determine which ones will translate first. You can also choose what will happen if a visitor tries to use unsupported language. In this scenario, you can either skip the translation or send the customer to the homepage.
Note that your customers will see the same language switcher when using your WooCommerce store. Therefore, they can easily translate your pages and navigate your site.
Step 4: Translate your WooCommerce store
If you selected Translate Everything during the setup wizard process, WPML will translate all of your store’s content. This includes product descriptions, pages, and taxonomies. Furthermore, the plugin will convert the content into different languages automatically whenever you add it from now on.
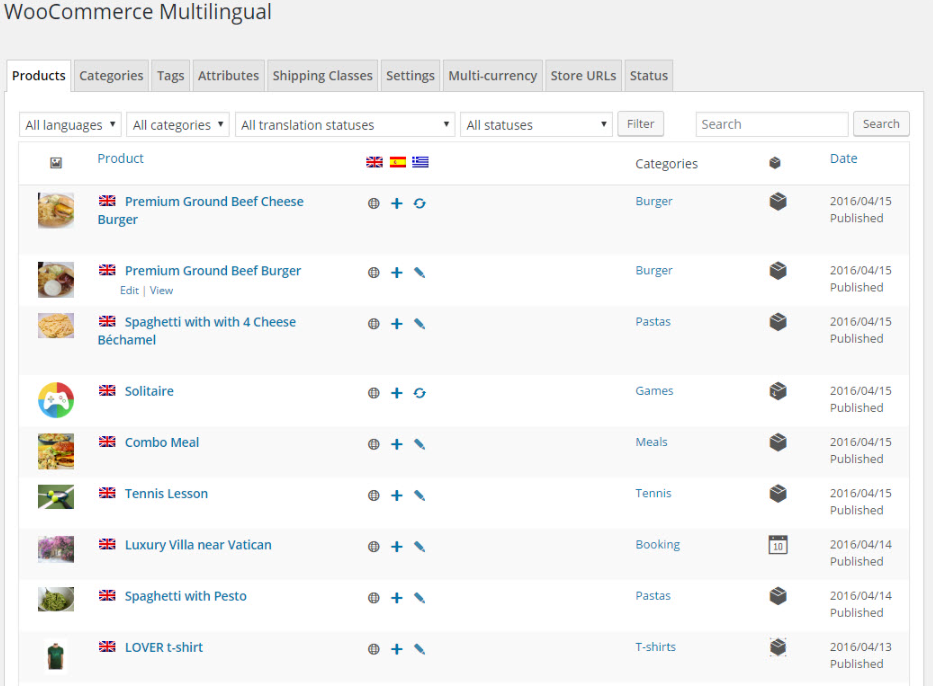
However, if you chose not to translate everything, you can control the translations manually. Head to WooCommerce > WooCommerce Multilingual. You should now see the Products tab with a list of all your store items:
You’ll see your supported languages next to each product. You can click on the pencil icon to edit the translations. Furthermore, the + icon enables you to add new translations.
You can also navigate to the other tabs, such as Categories, Tags, and Attributes, to edit and check your translations for these components.
It’s that easy! You’ve now successfully translated your WooCommerce store.
Conclusion
Offering your WooCommerce store in multiple languages can increase your credibility and help you reach international customers. However, you don’t have to translate all of your content manually. By utilizing a WordPress translation plugin, your online store can support different languages in no time.
To recap, you can translate your WooCommerce store using the WPML plugin in four easy steps:
- Install and activate the WPML plugin
- Run the WPML setup wizard
- Choose the language order for your WooCommerce store
- Translate your WooCommerce store
Do you have any questions about translating your WooCommerce store? Let us know in the comments section below!

