
If you run an online store, you’ll want to make it as easy as possible for customers to complete their orders and buy your products. Therefore, you might be looking for a way to create a WooCommerce quick order form for shoppers.
Fortunately, it’s easy to set up a quick order form with our Wholesale Order Form plugin. Then, your wholesale customers will be able to search for products and add them to their carts from a user-friendly form interface.
In this guide, we’ll explain the benefits of WooCommerce quick order forms. Then, we’ll show you how to create one in a few easy steps. Let’s get started!
An Introduction To WooCommerce Quick Order Forms (And Why You Should Consider Using Them)
A quick order form enables customers to buy your products without having to navigate between multiple pages. Instead of browsing your store and adding items to their carts from individual product pages, shoppers can search for and select products from a single form.
The most significant benefit of using quick order forms is customer convenience. Shoppers can complete their wholesale purchases as quickly as possible since there is minimal friction in the buying process.
This is essential when you consider that 17% of customers abandon their carts due to complicated checkout processes. Furthermore, 16% of shoppers don’t complete purchases because they can’t see the total order value upfront. Thankfully, using a WooCommerce quick order form can address both of those customer pain points.
While quick order forms are helpful for all kinds of stores, they’re particularly suited to wholesale businesses. Since your customers need to buy items in bulk, they’ll be able to save a significant amount of time during the process.
How To Create WooCommerce Quick Order Forms (In 3 Easy Steps)
For this tutorial, we’ll be working with the Wholesale Order Form plugin. This WordPress tool enables you to create and customize order forms for your WooCommerce store. Keep in mind that you’ll also need to use the free Wholesale Prices plugin and have a functional WooCommerce shop.
Now let’s explore how to create a WooCommerce quick order form!
Step 1: Set up Wholesale Order Form
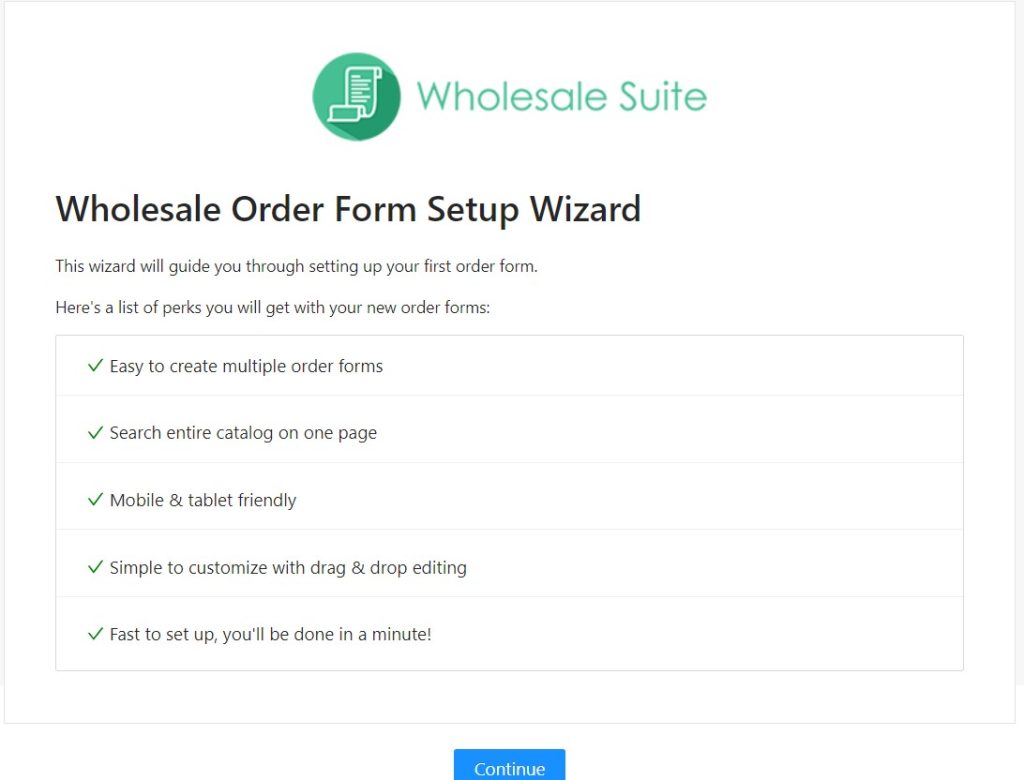
First, install and activate Wholesale Order Form. You should then be able to see the Setup Wizard:
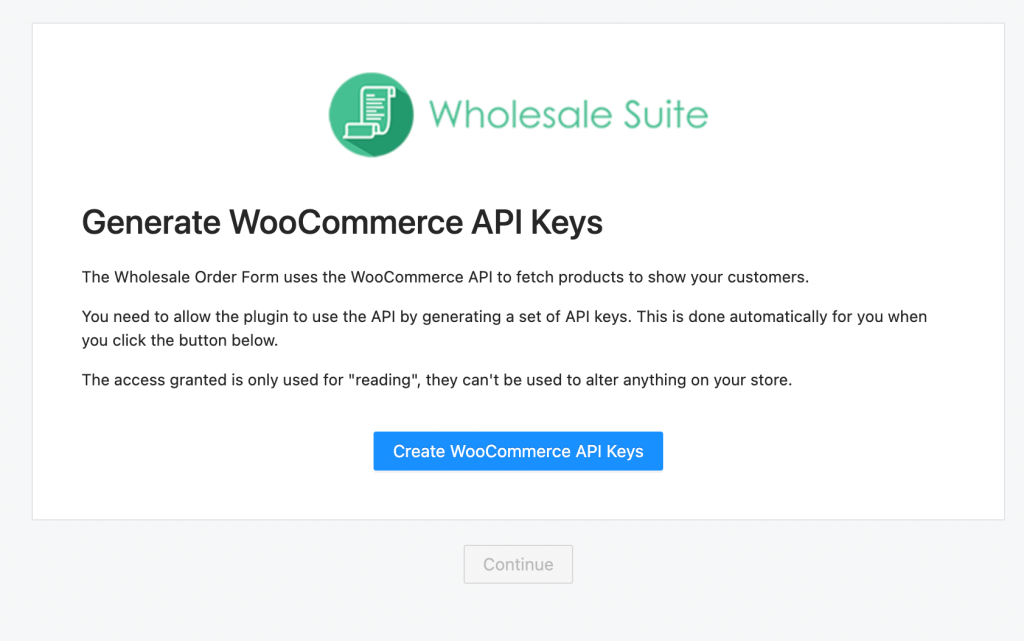
Click on Continue. You’ll now be prompted to generate API keys. Simply select Create WooCommerce API Keys, followed by Continue:
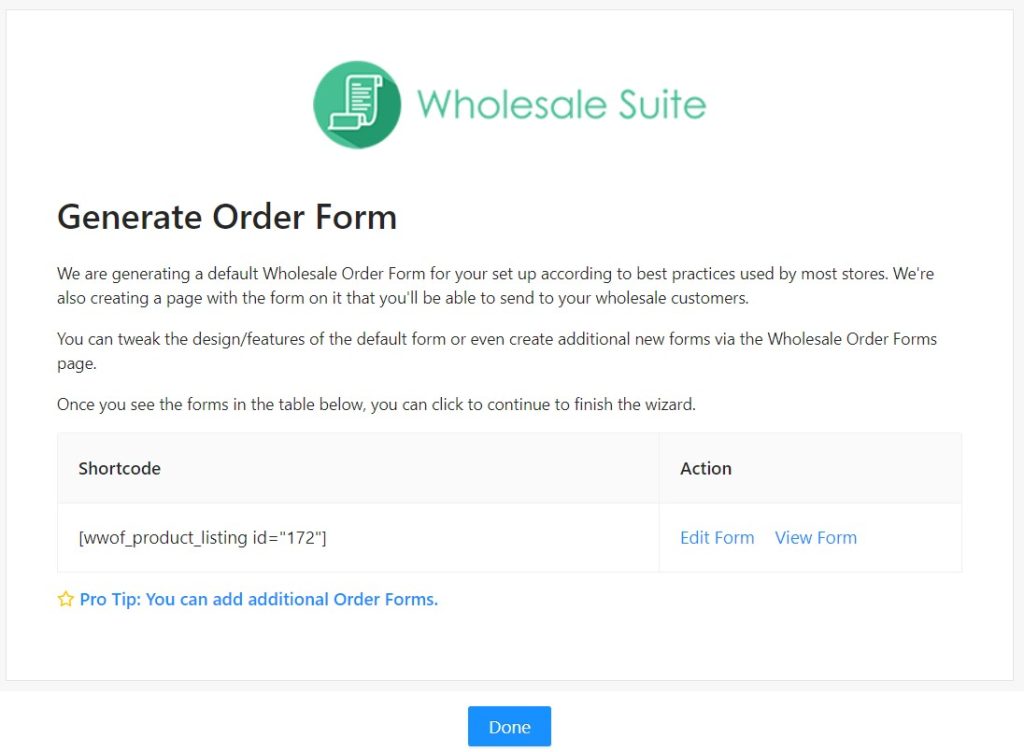
The plugin will automatically generate an order form for your WooCommerce store:
While you can simply edit an existing order form, we’ll show you how to create a new one from scratch! Once you hit Done, you’ll be prompted to Activate the premium plugin by entering your license key and email. You can find these details in your Wholesale Suite account dashboard.
Step 2: Design your form
Now it’s time to design your quick order form. Navigate to Wholesale > Order Forms and click on Add Form:
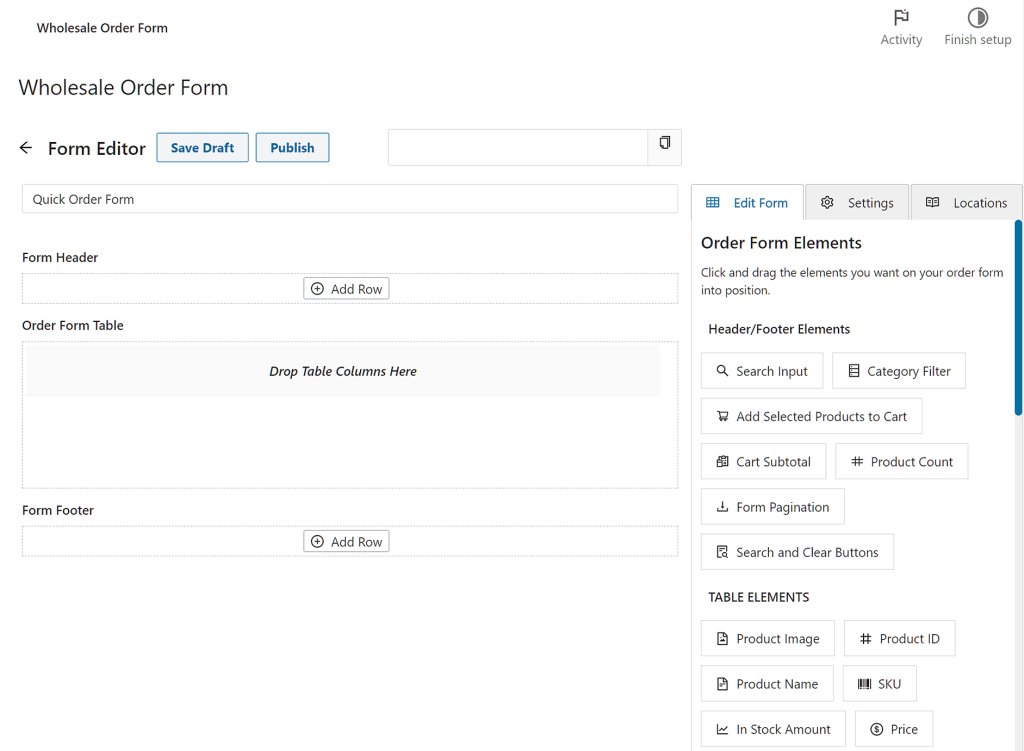
Next, you should name your form. We’re calling ours “Quick Order Form.” Also, we recommend hitting Save Draft while working on the form so that you don’t lose your work:
Now, let’s discuss the order form’s three major sections – Form Header, Order Form Table, and Form Footer – and what you can do with each.
Form Header
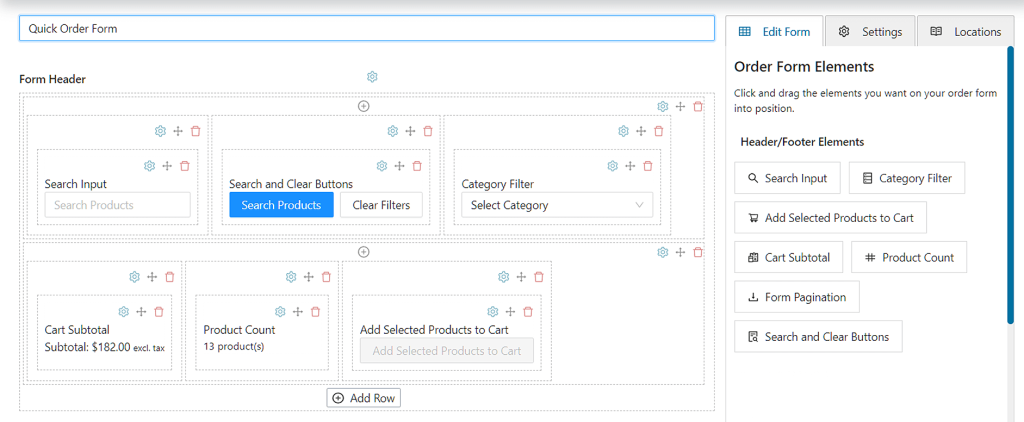
The Form Header section determines the appearance of your order form’s header section. Basically, you’ll be placing header/footer elements into this area by dragging and dropping them onto the interface.
First, create rows by clicking Add Row. Then, click the + icon at the top of each row to create columns into which you’ll be inserting the aforementioned elements. The result is a header composed of rows that are divided into columns of elements.
Since you want shoppers to be able to browse your products and order them as quickly as possible, we recommend including Search Input, Search & Clear Buttons, Add Selected Products to Cart, and Category Filter at a minimum. The other modules can help customers keep track of their subtotals, see the number of products, and move between different pages:
Order Form Table
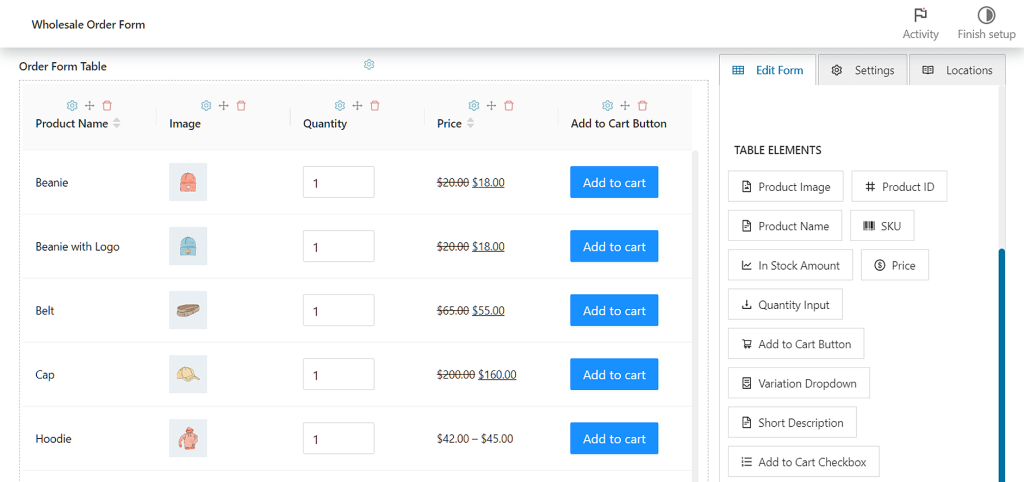
The Order Form Table section lets you design how your products will display on the front end.
Simply drag and drop table elements onto the interface to add product images, names, prices, quantities, and more to the section. In addition, this is where you can include Add to Cart buttons that will allow shoppers to add items to their carts:
Form Footer
Finally, there’s the Form Footer section, which lets you design the look of your order form’s footer section.
Designing the Form Footer is exactly the same as designing the Form Header; you simply have to create rows and columns, then drag and drop header/footer elements into said columns.
In the example below, we inserted Form Pagination to break up the products into different pages:
When you’re happy with how your form looks, click on Save Draft at the top of the page. It’s now time to configure the form’s settings.
Step 3: Configure the form’s settings and publish it
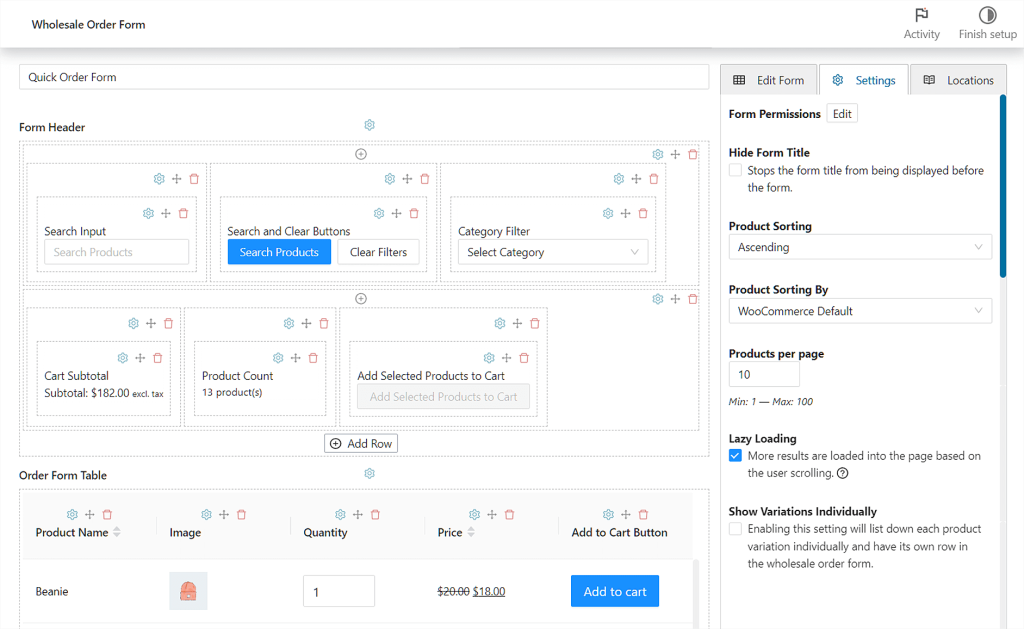
Select the Settings tab in the top right corner to configure your WooCommerce quick order form. Here you can choose how to order the products in your form and whether you’ll show the form title:
In addition, you could enable lazy loading so that customers won’t be able to see products until they scroll down. This setting can speed up your website by not loading everything instantly.
Furthermore, you can display product variations on different lines and include or exclude particular items from the form.
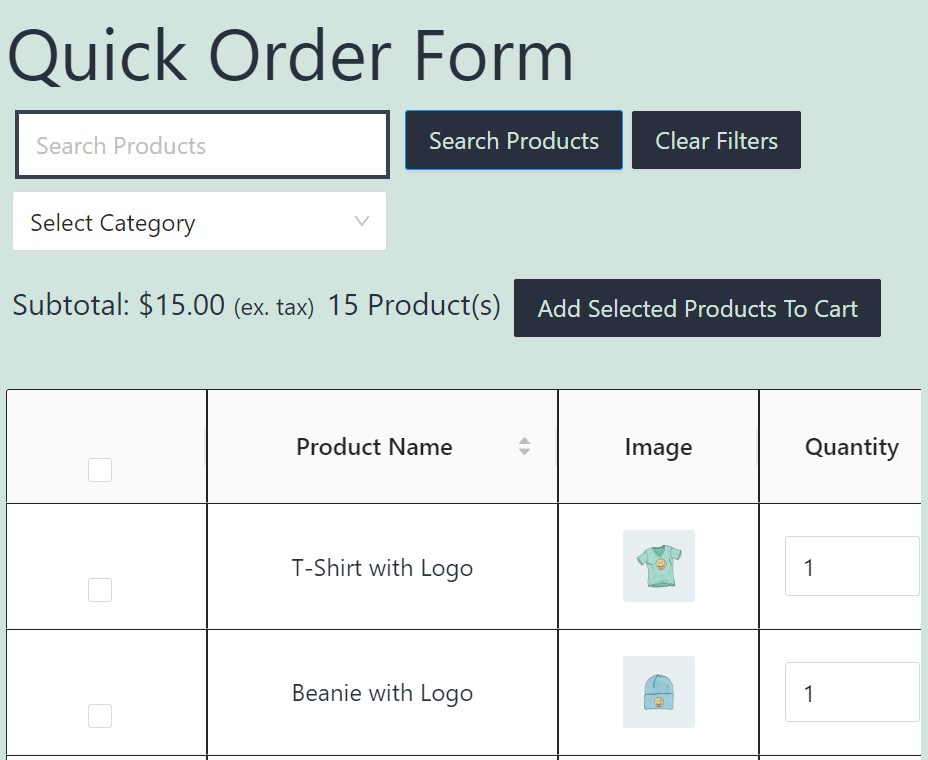
When you’re happy with how everything looks, click Publish at the top of the page. Now you can add your WooCommerce quick order form to WordPress pages by copying and pasting its shortcode:
It should look something like this:
It’s that easy! Remember that you can always go back and edit your WooCommerce quick order form as needed.
Conclusion
A quick order form allows wholesale customers to search for and buy products from a single location. It can save your shoppers significant time, incentivizing them to complete their purchases without abandoning their carts.
To recap, you can create a WooCommerce quick order form by following these steps:
- Set up the Wholesale Order Form plugin
- Design your quick order form
- Configure settings for your form and publish it
Do you have any questions about using WooCommerce quick order forms? Let us know in the comments section below!







Very interesting
Thanks for stopping by Ana-Maria!
cool thanks
great work with this product!
Thanks Enache! Wholesale Order Form can really help save your customers a lot of time.
Thank you, this surely came in handy.
Cheers Fernando! Glad it was helpful!
thanks for the step by step
nice tool
simple to use
Very useful
Cheers Mouhssine!