Running an online store is not just about adding new products and promoting them to your audience. You’ll also need to build and maintain a good relationship with your clients and find clever ways to increase your sales. This is where customizing your WooCommerce thank you page can be helpful.
Having a dedicated WooCommerce thank you page not only makes your business appear more professional, but it can also be a way to encourage your customers to make additional purchases.
In this post, we’ll take a closer look at how a customized WooCommerce thank you page can be beneficial for your business. We’ll then show you how to optimize this page to help boost your conversions. Let’s get started!
Why Your Store Needs A Custom WooCommerce Thank You Page
When a customer completes an online order, they are typically directed to a thank you page. Many businesses add this feature to their store as a way of thanking their customers for making a purchase. This not only shows good manners but can also make companies look more professional.
Perhaps you may already have a thank you page on your store, but you’re looking to customize it. In fact, the default WooCommerce thank you page is pretty basic, and it only allows you to edit the title and message:
For this reason, you may want to consider designing your own thank you page. This will enable you to add brand elements such as your logo and include powerful Calls to Action (CTAs) to encourage customers to engage with your store in other ways.
For example, your thank you page can include a link to your subscription form. This can help you grow your email list. You may also want to display your best-selling products on this page or give your customers a coupon code that they can use on their next purchase.
As you can see, you can utilize your WooCommerce thank you page to promote other products on your store. You can also use it to incentivize customers to make additional purchases, which can result in more sales.
How To Create A Custom WooCommerce Thank You Page
For this tutorial, we’ll be using SeedProd. This drag-and-drop page builder can be used to create a variety of high-converting pages, including a thank you page. While there is a free version of SeedProd available, we recommend using the Pro version to benefit from more features and tools.
Let’s look at how you can create a custom WooCommerce thank you page to drive higher conversions.
Step 1: Create a new landing page
Once you’ve installed and activated the plugin, navigate to SeedProd > Pages in your WordPress dashboard and click on Create New Landing Page:

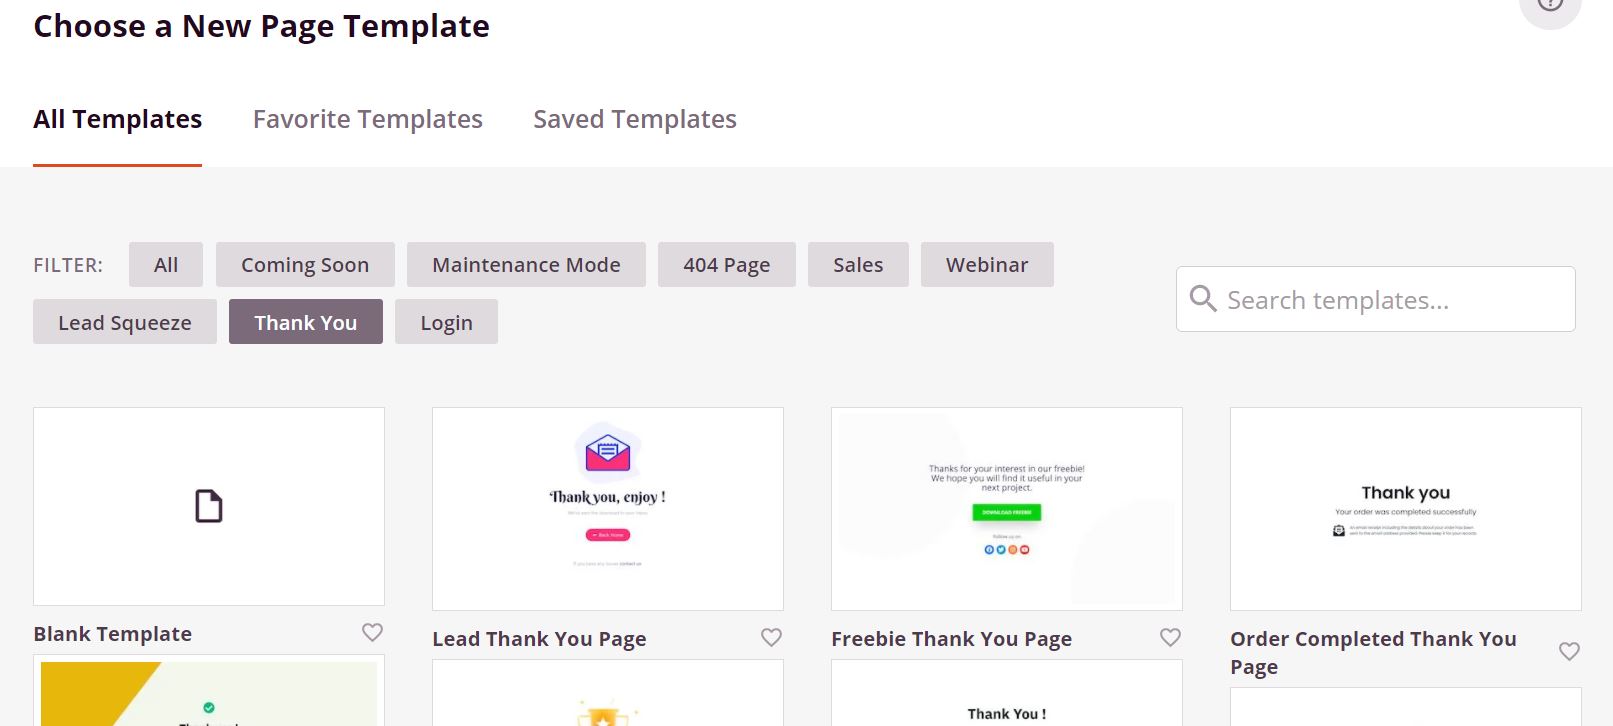
This will take you to a page where you can browse through a broad range of templates. The choice may seem a bit overwhelming. However, for this tutorial, you can simply select the Thank You filter and choose the Order Completed Thank You Page template:
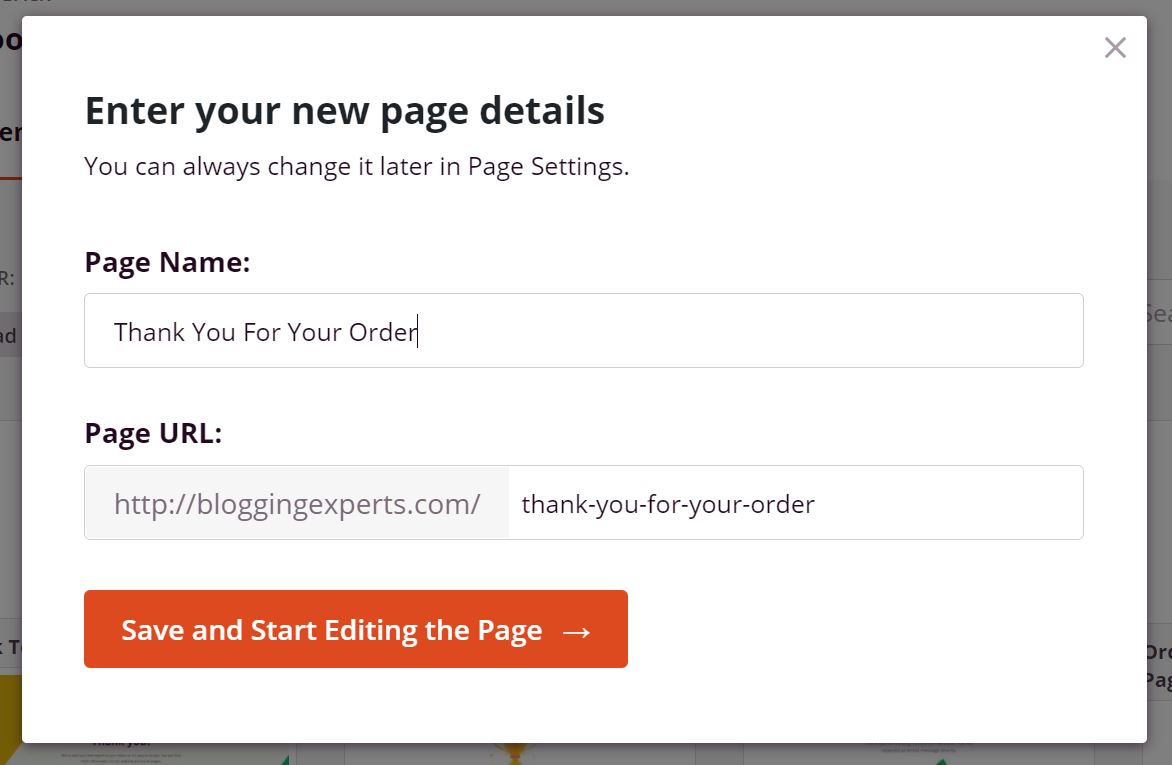
Next, you’ll be asked to enter a name for the page, which will also be applied to the URL:
You can edit these settings later should you change your mind. When you’re ready, click on Save and Start Editing the Page.
Step 2: Edit your thank you page
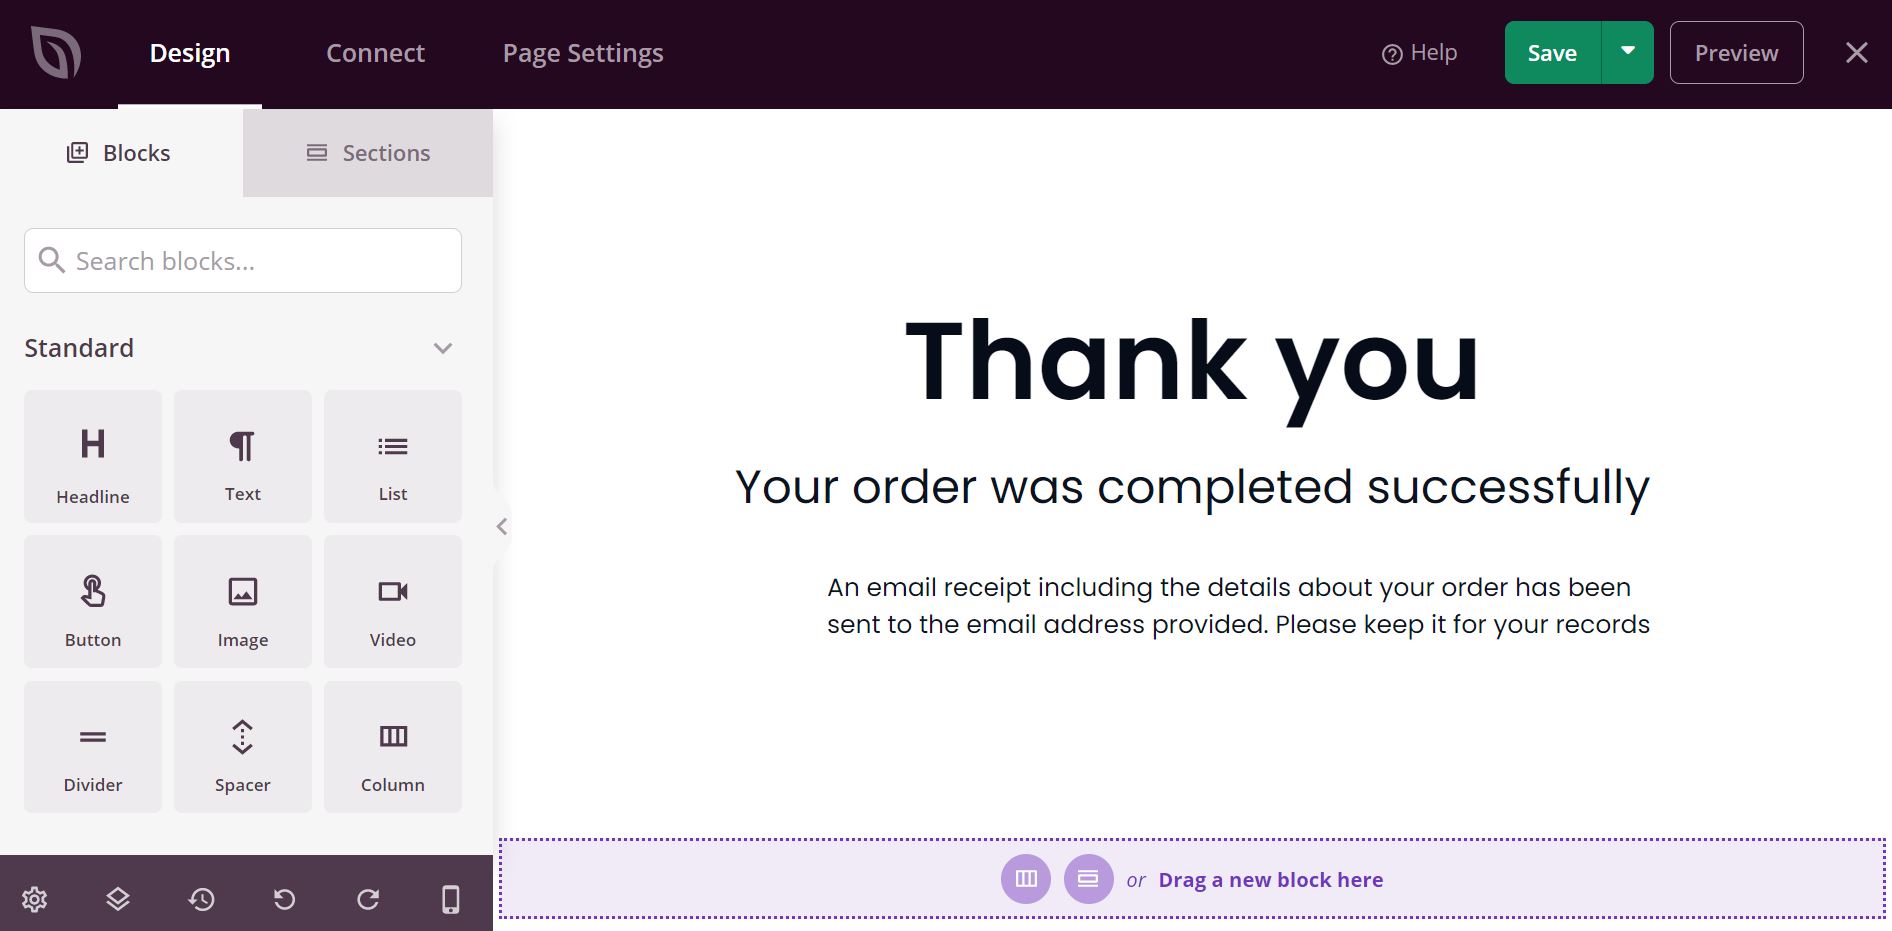
It’s time to customize your WooCommerce thank you page. On the left-hand side of the screen, you’ll find different blocks that you can add to your page:
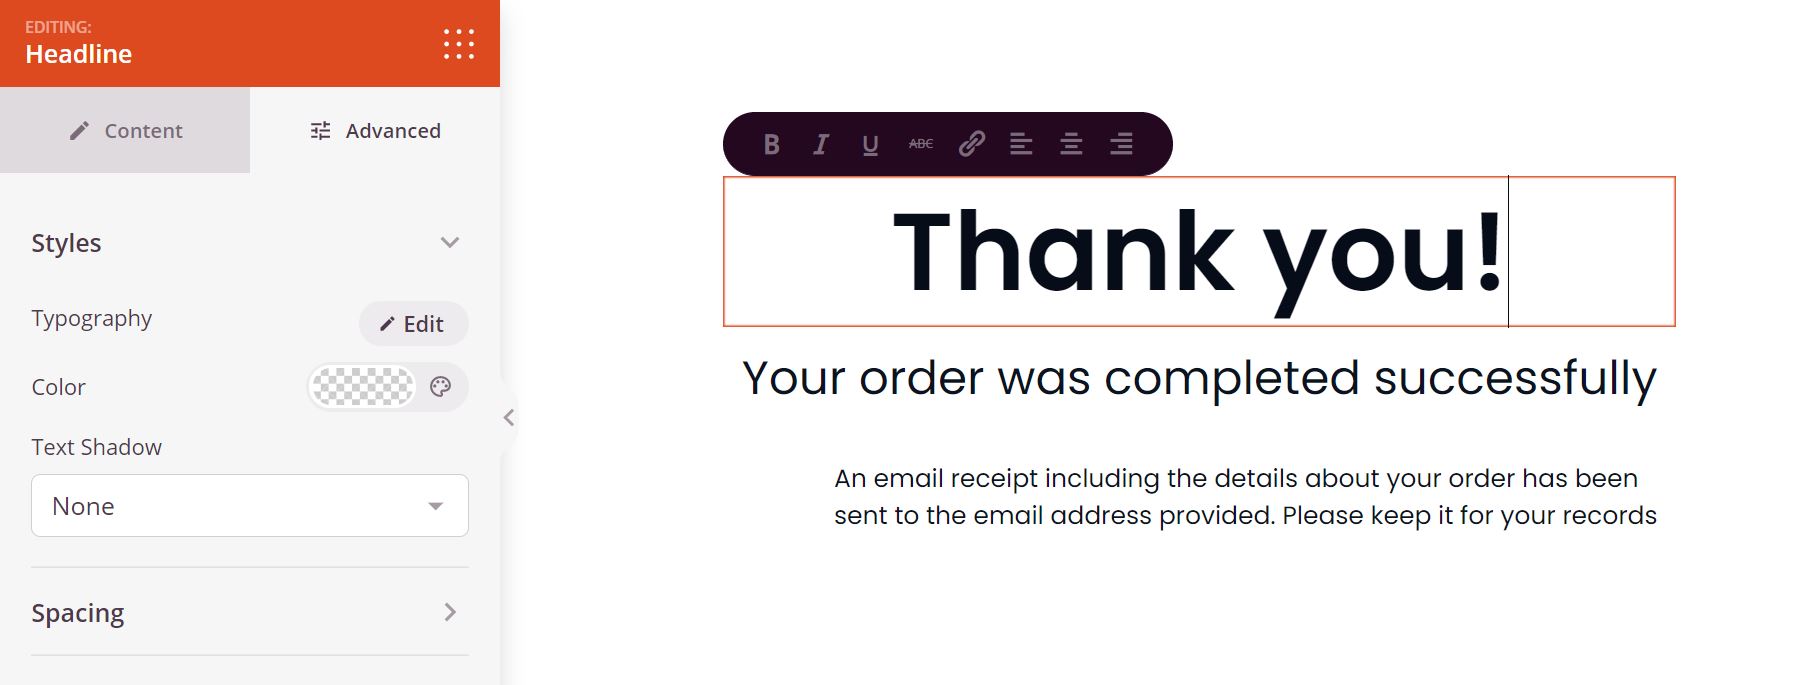
You may want to start by customizing the main content. For instance, you might want to edit the text or change the font. All you have to do is click on the element and adjust the settings from the Advanced tab in the panel:
When you’re done, click on the Save button in the top right corner of the screen. If you’re ready to publish your page, you can click on the arrow next to the same button and select Publish.
Step 3: Add product upsells
As mentioned earlier, you may also want to use your thank you page to drive more sales. For example, let’s say you want to promote a particular product on your thank you page.
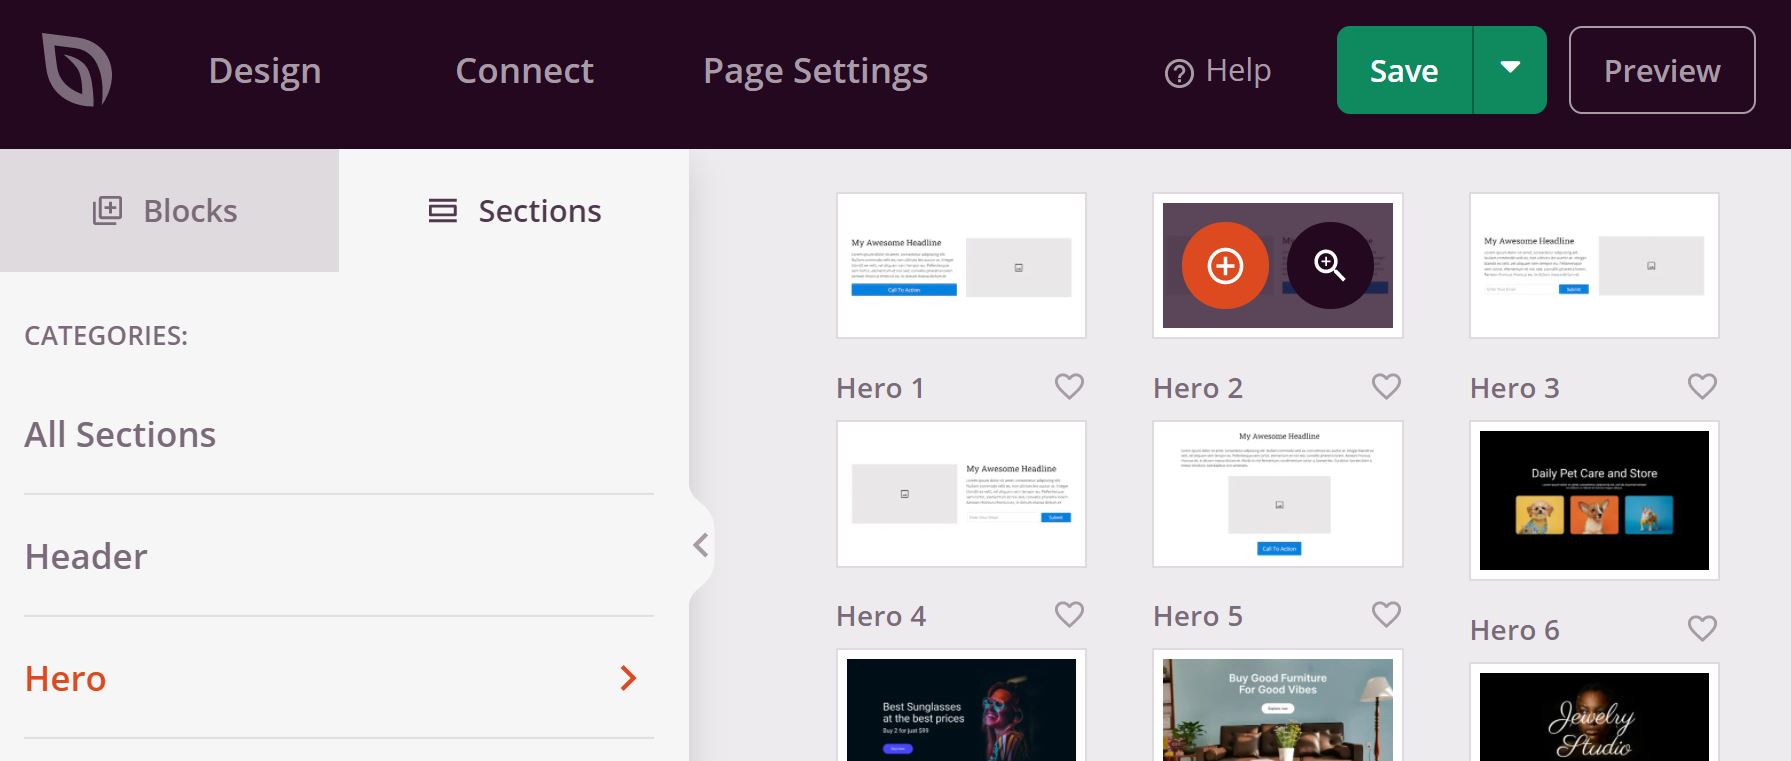
To get started, click on the Section tab in your panel and select the Hero option in the menu. Then, choose Hero 2:
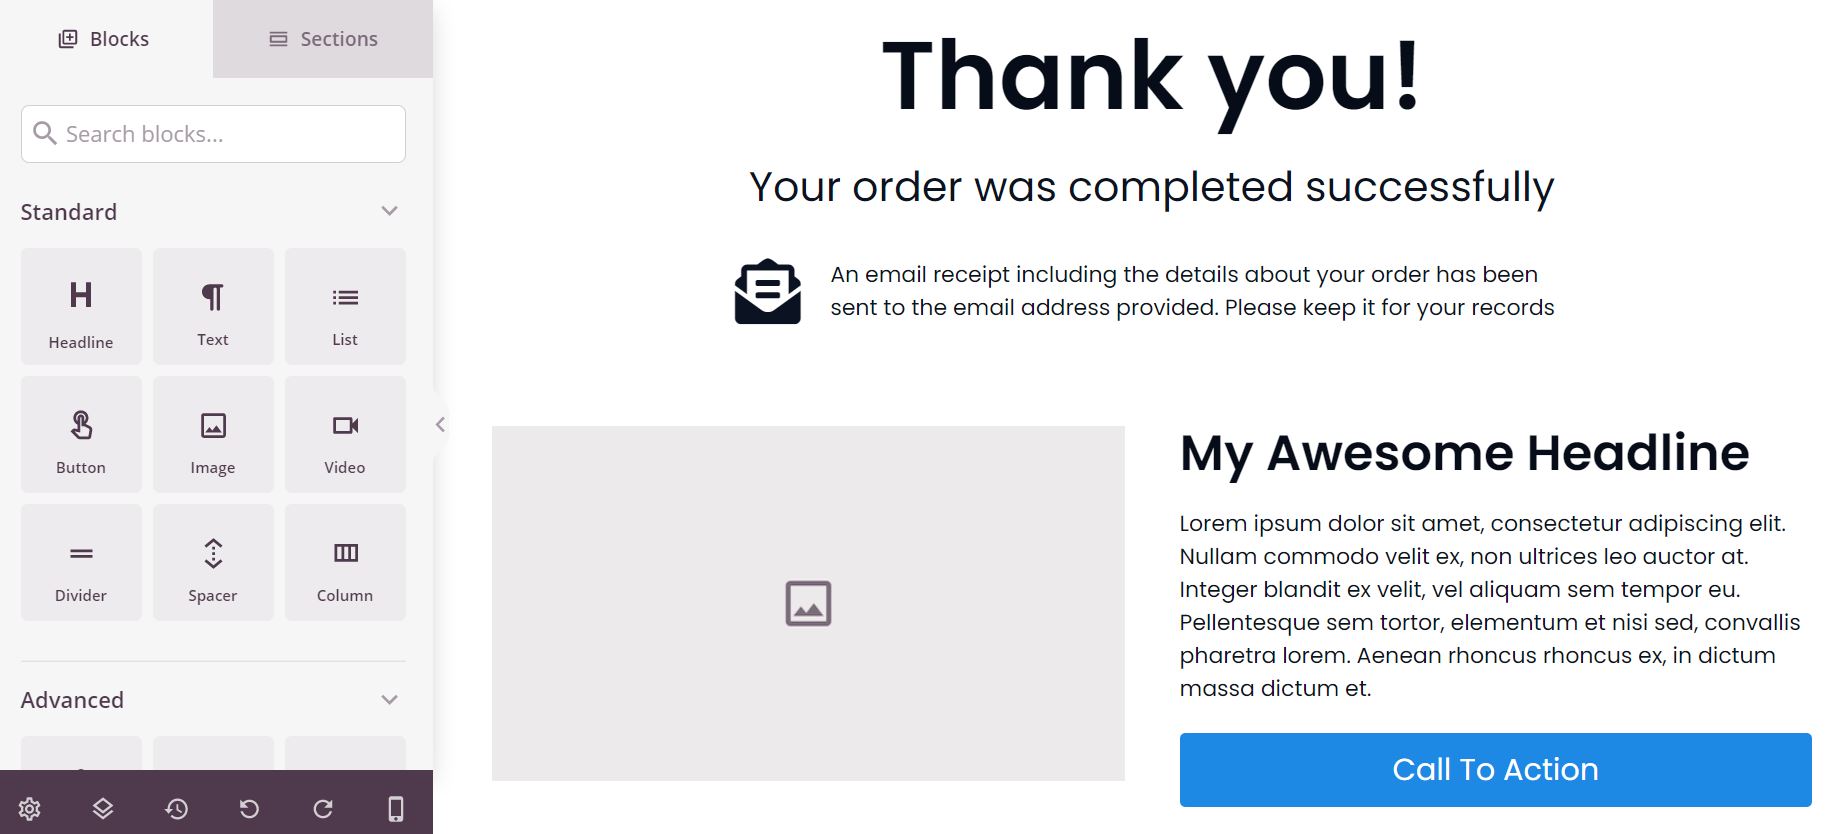
This element will be added to your thank you page:
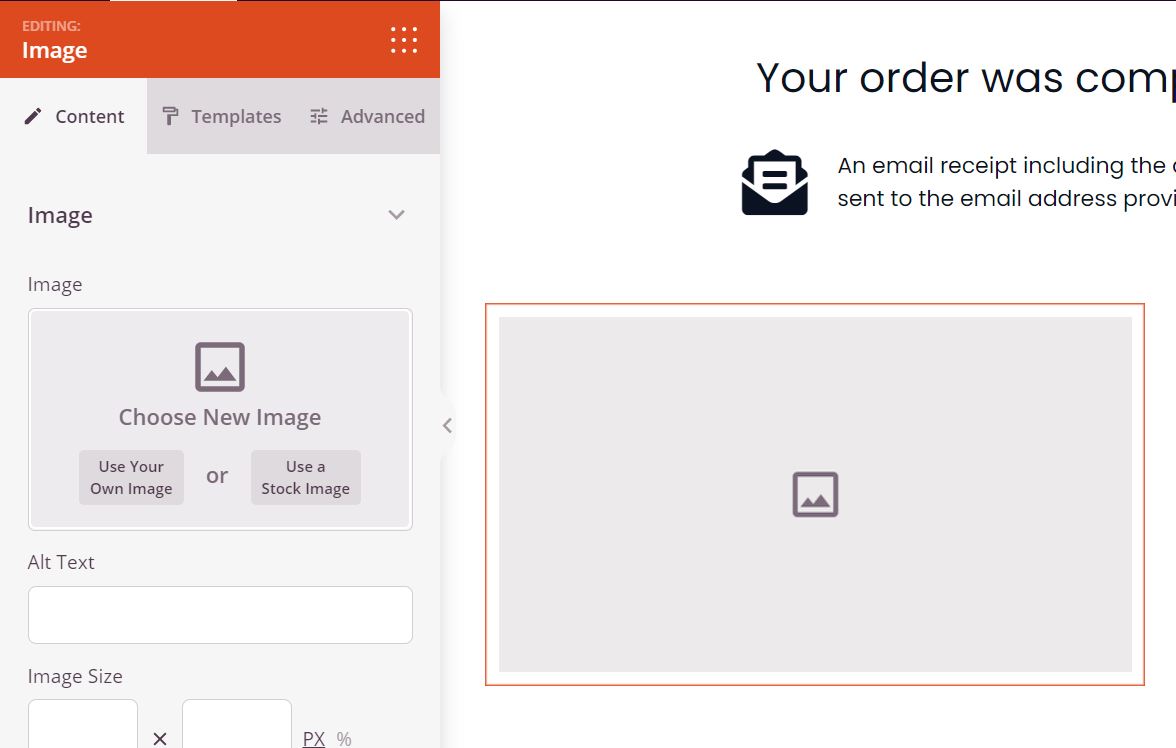
You can now customize it to your needs. To insert an image, click on the appropriate box and upload a photo of the product that you wish to promote on this page:
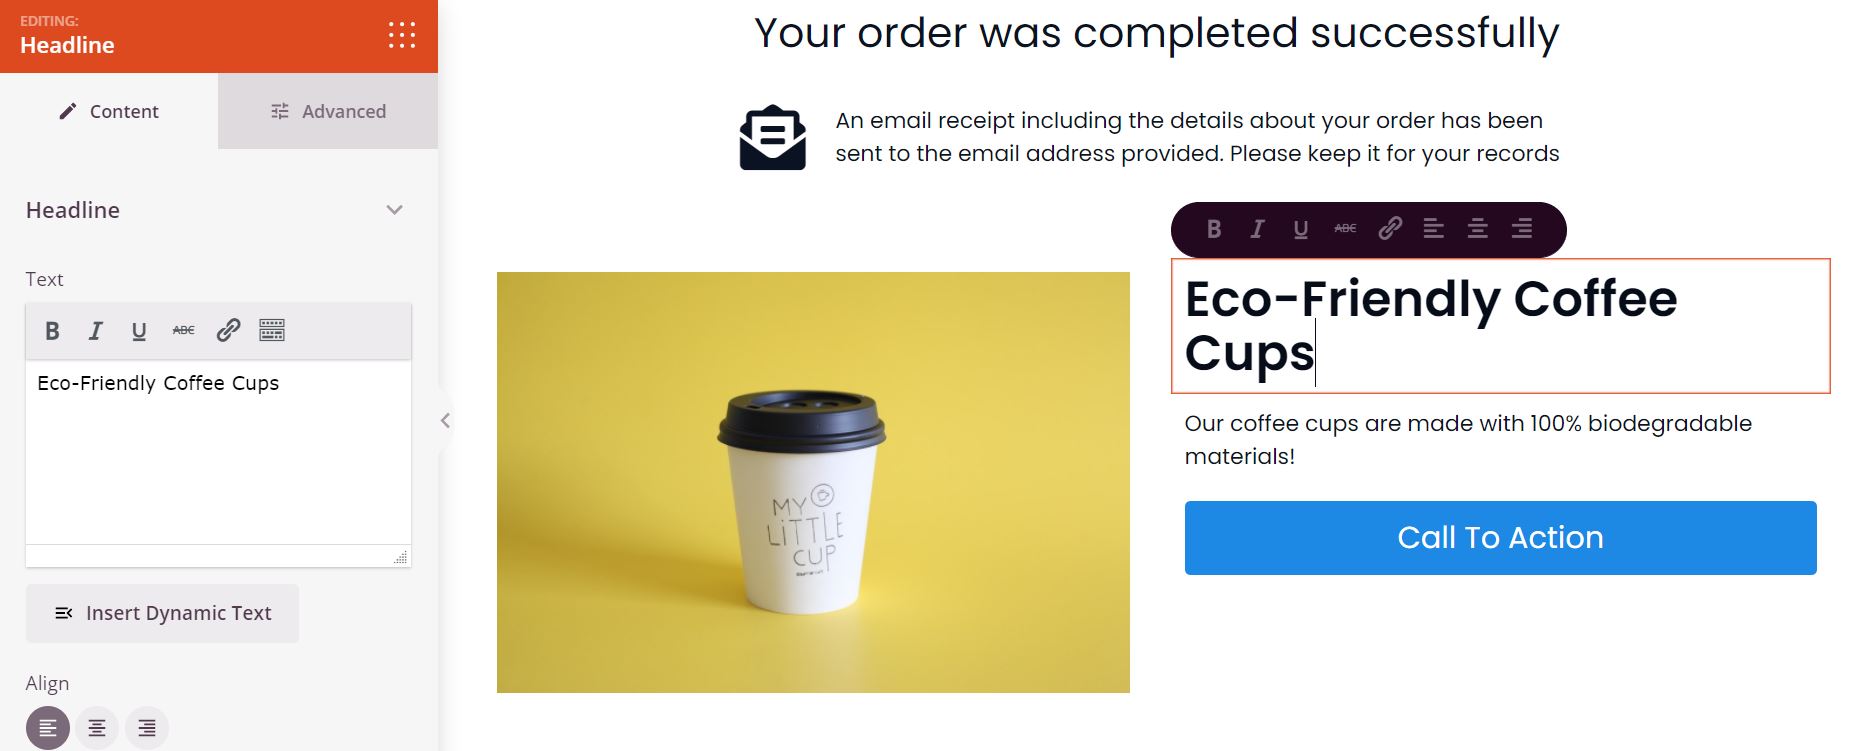
To change the headline and description, you simply need to click on the elements and edit the text. You can then go to the Advanced tab in your panel to format your text:
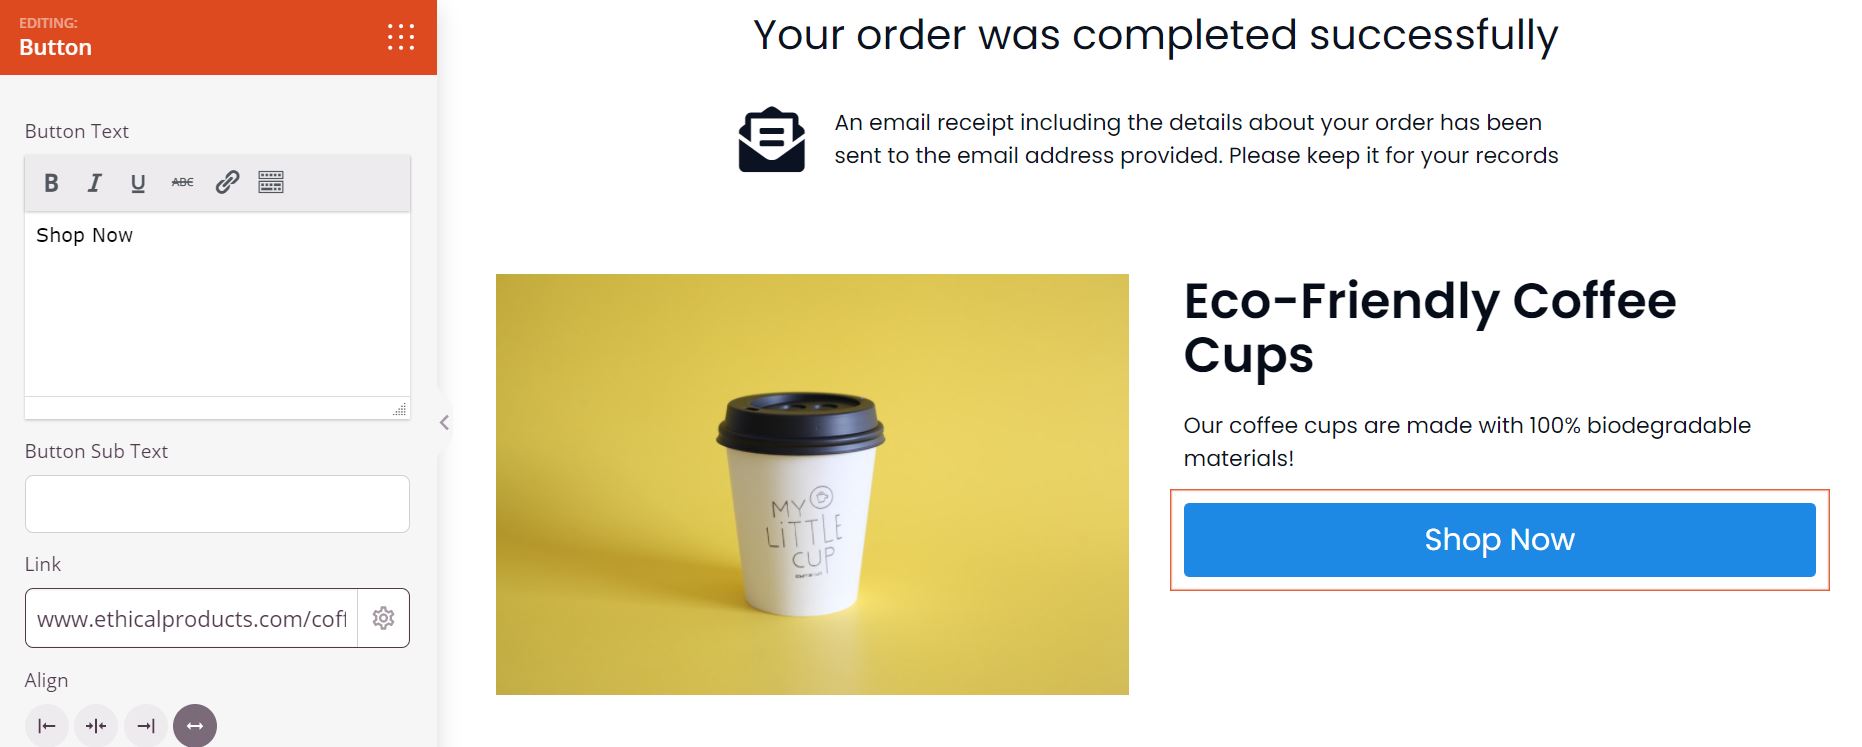
Next, you’ll need to edit your Call To Action button. Once again, you can click on the element to change the text and set the URL to the corresponding page:
Allow customers to add an item to their cart directly
You may also want to enable users to add an item to their cart directly from the thank you page. To do this, start by deleting the current button.
Next, navigate to Blocks in your panel and scroll down to the WooCommerce section. Here, find the Add To Cart button, then drag and drop it onto your page:
You can customize the text and color of the button from the side panel. You’ll also need to enter your Product ID so that the item will be automatically added to your customer’s cart when they click the button.
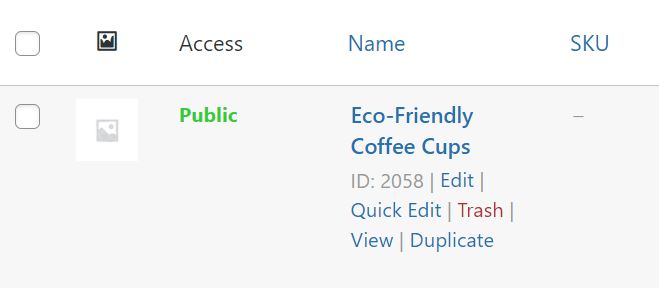
You can find this ID by heading to Products > All Products in your WordPress dashboard and locating the relevant product. If you hover over the name of the product, you’ll see the Product ID in grey:
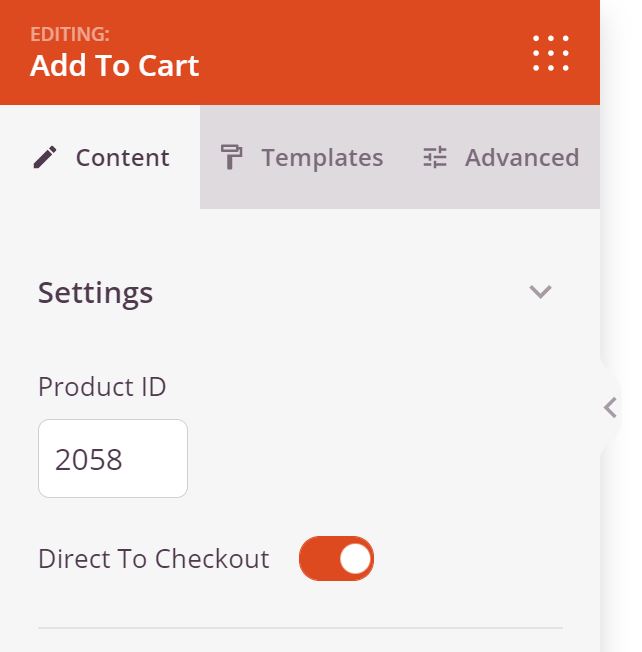
Copy this number, then return to the thank you page in the SeedProd editor and paste it into the appropriate box. You’ll also need to select the Direct To Checkout option:
Feel free to make some further adjustments to your thank you page. For example, you may want to insert an additional headline to make your upsell more prominent.
Displaying best selling products to your WooCommerce thank you page
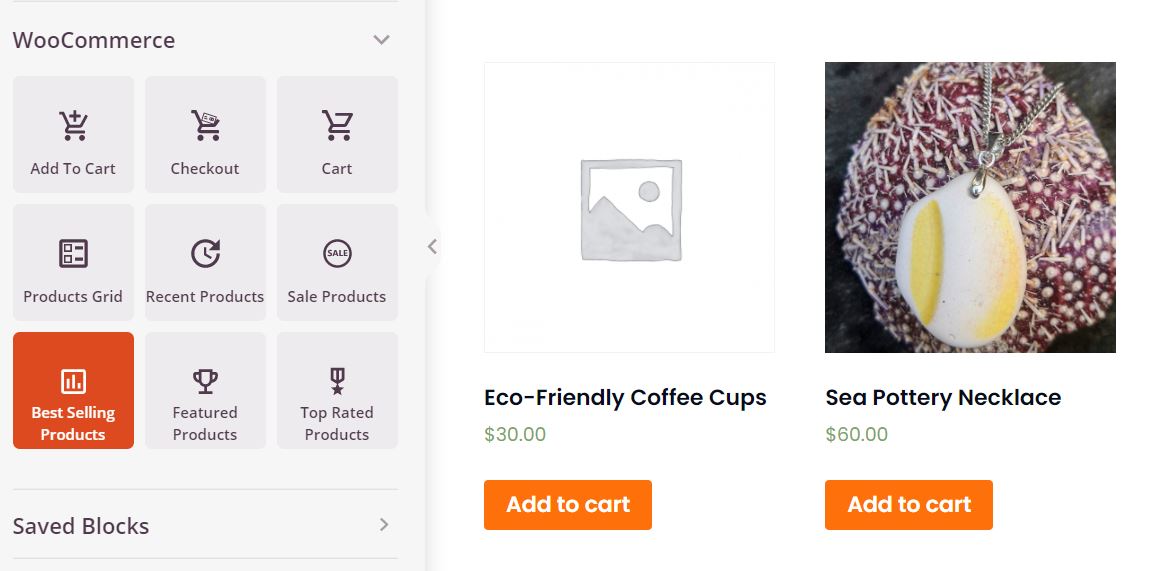
Alternatively, you may want to display your bestselling products on your WooCommerce thank you page. To do this, you just need to drag and drop the Best Selling Products block to your page:
As you can see, there are other options available. For instance, you can choose to display your recent products or top-rated products instead. Remember to save your changes or click on Publish when you’re ready.
Step 4: Add a coupon
Another effective way to increase sales through your WooCommerce thank you page is by offering coupons. For instance, you can incentivize customers to return to your store and place another order with a repeat purchase coupon.
While WooCommerce enables you to offer coupons, this feature is quite basic. Therefore, we’ll be using the Advanced Coupons plugin in this tutorial. This user-friendly tool enables you to create a variety of coupons and offers, including Buy One Get One (BOGO) deal and flash sales.
Once you’ve installed and activated Advanced Coupons, go to Coupons > Add New to create your first coupon:
Start by entering a coupon code. Alternatively, you can generate a random one by clicking on Generate coupon code.
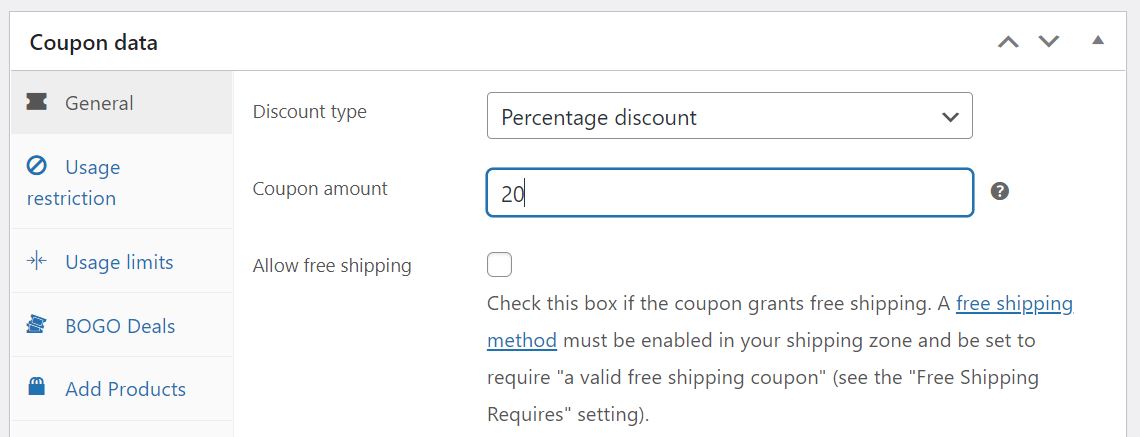
Next, scroll down to the Coupon data box. In the General tab, locate the Discount type and select the Percentage discount option. Then, define the amount:
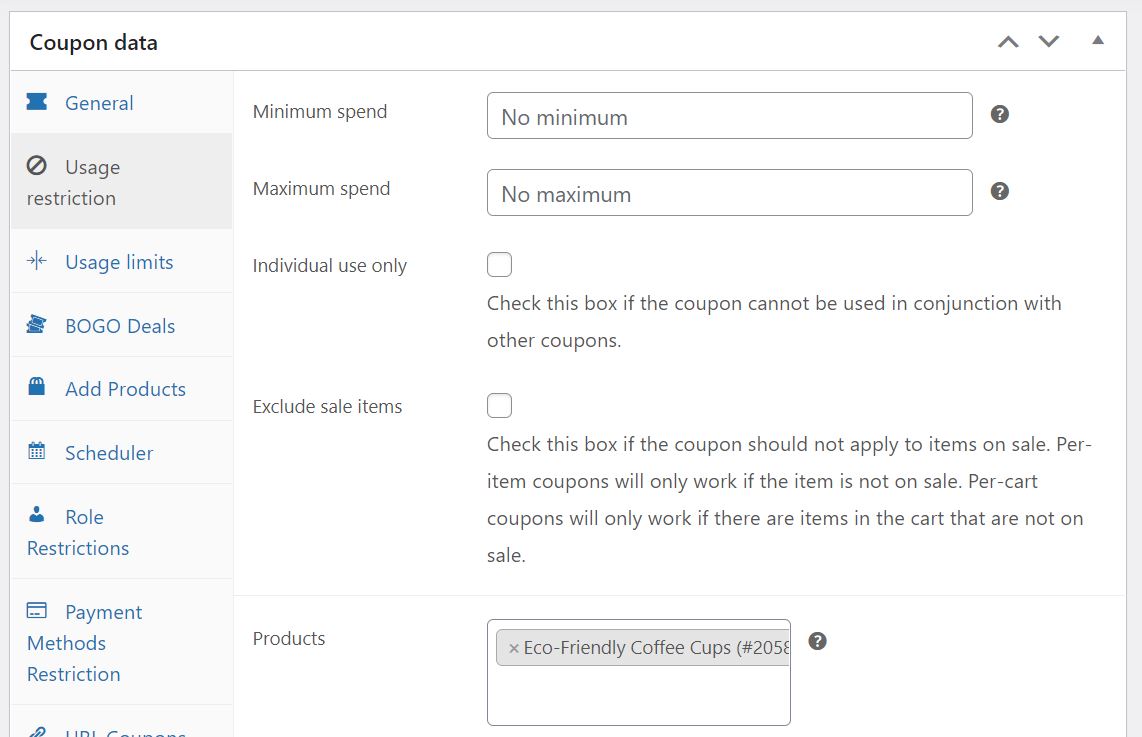
When you’re ready, click on the Usage restriction tab and locate the Products box. Here, you can select the products that the coupon can be applied to:
In this section, you can also set the maximum and minimum order quantity in order for customers to be able to use the coupon. Moreover, you can select the products and product categories that you want to exclude from this offer.
Setting usage limits for your coupons
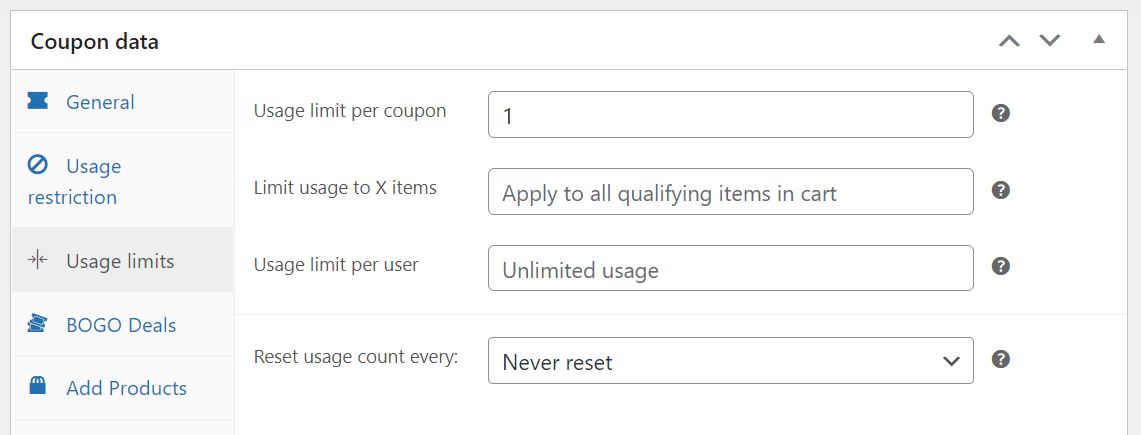
Finally, you’ll need to define some limits for the coupons. Go to Usage limits and in the Usage limit per coupon box, enter 1. This way, each user can only redeem that coupon once:
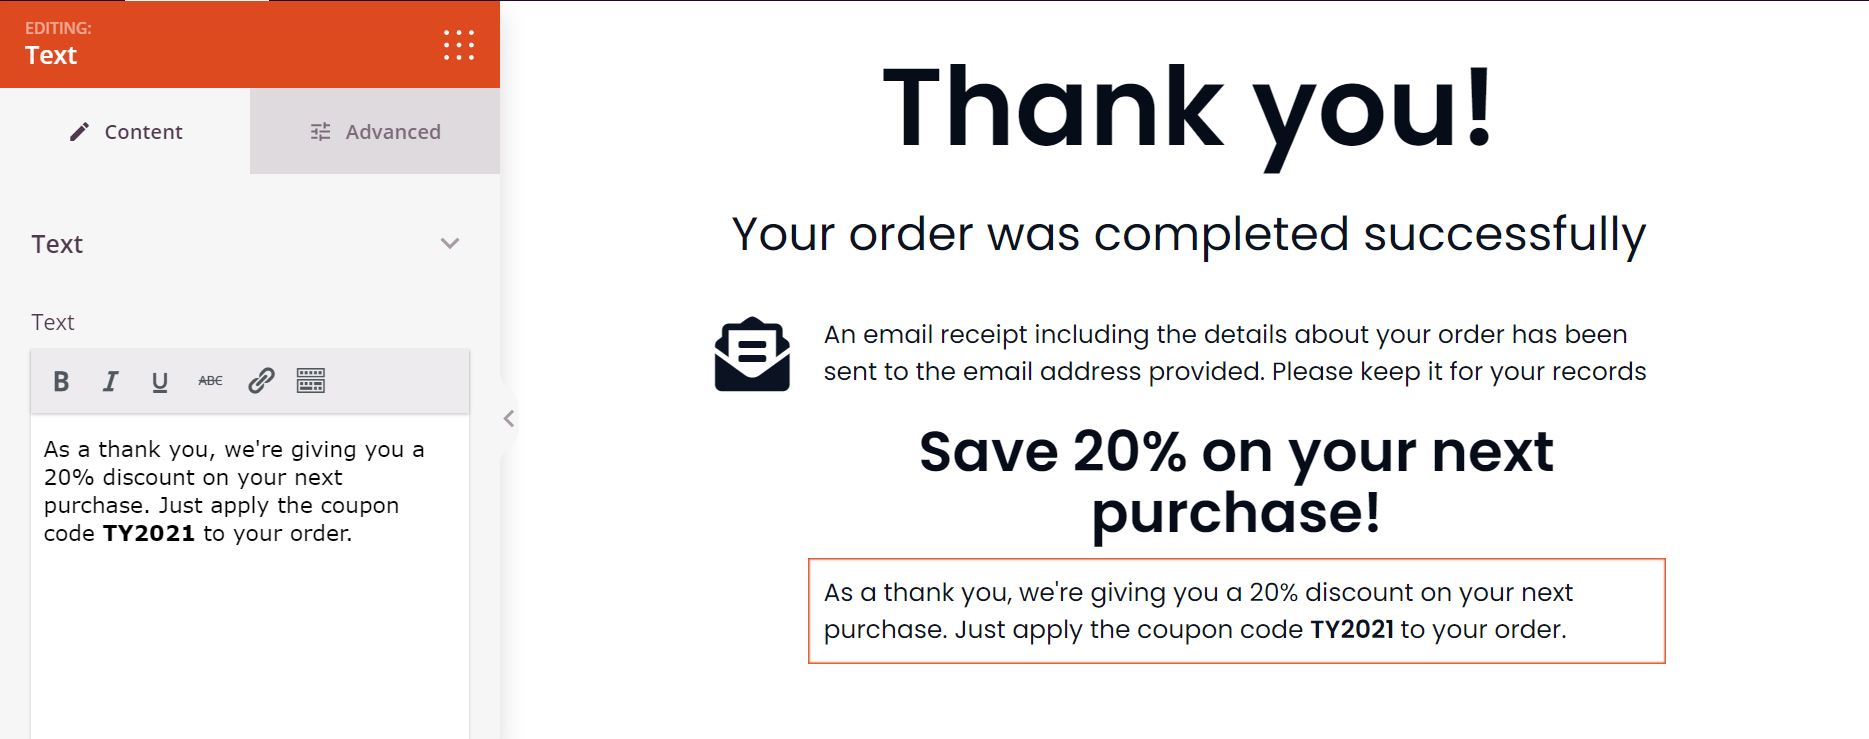
Click on Publish and head back to your thank you page in the SeedProd editor. Then, select the Text box and drag it onto your page. Here, write a short message to let users know that they are entitled to a coupon:
You may also want to add an accompanying image and headline. Remember to save or publish your page when you’re done!
Step 5: Replace the default WooCommerce thank you page
After publishing your custom thank you page, you’ll need to set it as your default one. The easiest way to do this is by using a free plugin like Thanks Redirect for WooCommerce.
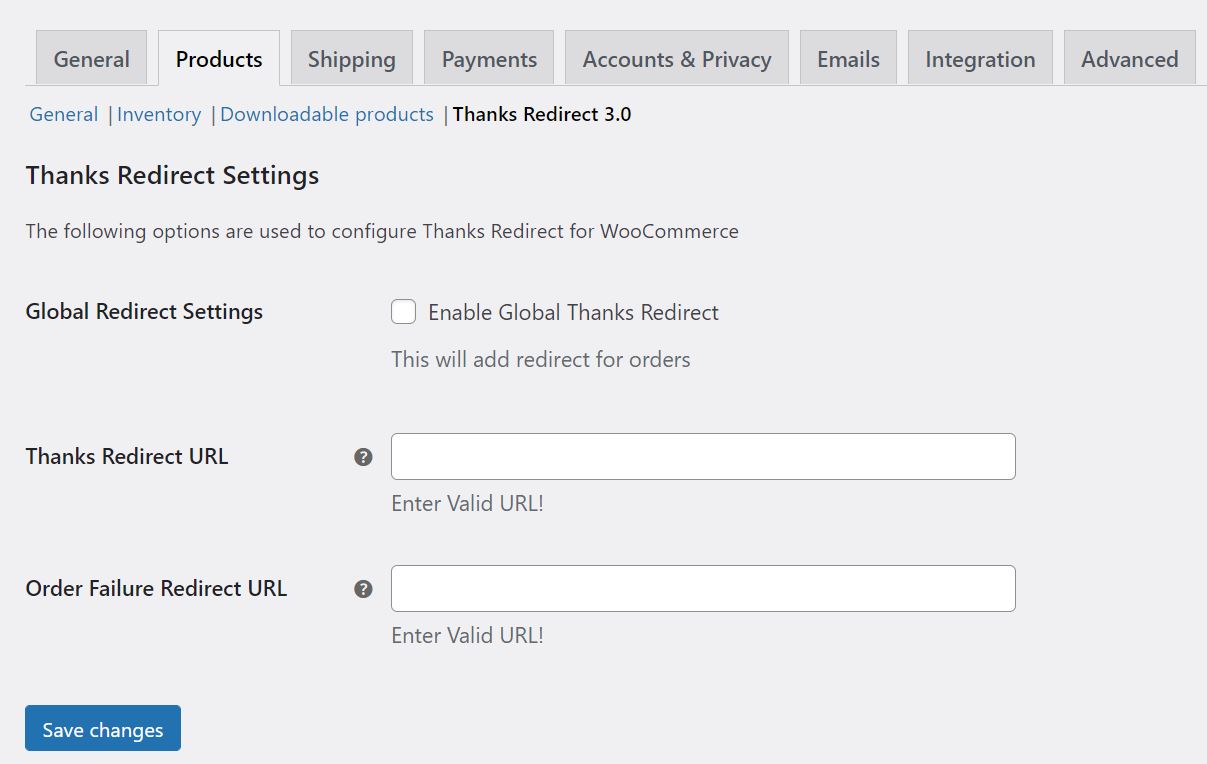
Once you’ve installed and activated the plugin, navigate to WooCommerce > Settings and select the Products tab. Then, click on Thanks Redirect 3.0:
Here, you’ll need to tick the Enable Global Thanks Redirect box and enter the URL of your new WooCommerce page in the Thanks Redirect URL field.
When you’re ready, just click on Save Changes. Now, every time a user makes a purchase on your site, they will be directed to your custom WooCommerce thank you page.
Conclusion
Thanking your customers for making a purchase at your store can help you project a more professional image. You can also customize your WooCommerce thank you page in order to boost your conversions.
In this post, we showed you how to create a custom WooCommerce thank you page with SeedProd, in just five steps:
- Create a new landing page and select a thank you page template.
- Customize the text and appearance of your page.
- Add product upsells by displaying your other items on your thank you page.
- Add coupon codes to encourage customers to make another purchase, using Advanced Coupons.
- Replace the default WooCommerce thank you page with your customized one.
Do you have any questions about creating a custom WooCommerce thank you page? Let us know in the comments section below!

