When you sell products online, a Buy One, Get One (BOGO) offer is a great tactic to have at your disposal. However, there isn’t an easy way to set up a WooCommerce BOGO deal by default. It can be frustrating to have to go without this functionality.
Fortunately, setting up and running a BOGO deal is very straightforward with the help of the Advanced Coupons plugin. Our solution gives you plenty of options when it comes to creating your offers. You can even include messaging to make it easier for your customers to claim their deals.
In this post, we’ll go over some benefits of using a BOGO offer in your online business. Then we’ll show you how to make a WooCommerce BOGO offer in four steps. Let’s get started!
Why You Might Want To Use WooCommerce BOGO Offers
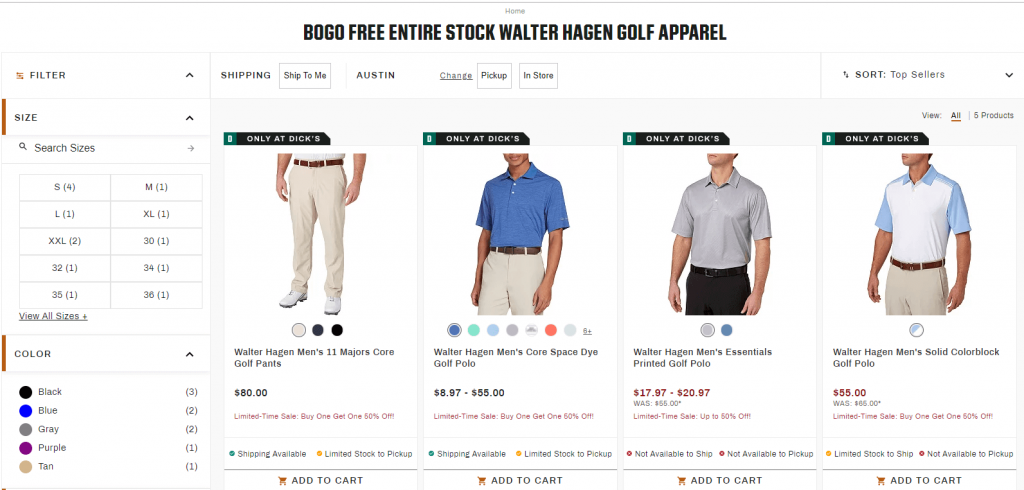
BOGO offers are helpful in accomplishing a number of business goals. First, they’re great for clearing out inventory that you no longer need, or that isn’t selling the way you’d hoped. BOGO sales can also lead to increased conversions and larger orders, as customers are motivated to add more to their carts.
Despite the “buy one, get one” name, you’re not limited to giving an item away for free. You might also offer a different discount type. This can help you to get at least some money for products that aren’t selling as well as you expected.
Sending a WooCommerce BOGO coupon code to your customers can also encourage them to do some shopping. This can be especially helpful during slow times of the year.
How To Make A WooCommerce BOGO Offer (In 4 Steps)
Now that you’re familiar with a few ways you can use a BOGO offer, let’s walk through how to set one up using the Advanced Coupons plugin.
Step 1: Set your Trigger Type
When creating your BOGO coupon for WooCommerce, you have the option of choosing any one of three Trigger Types. You can use these conditions to encourage shoppers to buy particular items.
The Specific Products trigger requires that a customer have a specified quantity of a particular product in their cart. This is a great way to promote a particular item or clear out inventory if it’s underperforming.
Using the Any Combination of Products trigger enables customers to access the BOGO deal with any products they choose, as long as they meet a minimum quantity. This is especially helpful if you have variable product types. Customers can add multiple variations of a single item and still trigger the deal.
The Product Categories trigger is similar, but products must be from specific categories in order to qualify for the deal. This limitation makes it an excellent middle ground between Specific Products and Any Combination of Products.
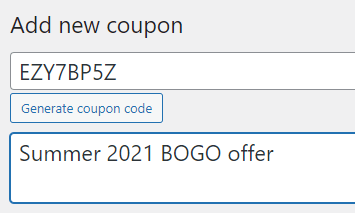
To begin creating your coupon, you can navigate to Coupons > Add New from the WordPress dashboard. You can enter your own coupon code or click on the Generate coupon code button. You might also want to enter a description:
Under the Coupon data heading, you can select BOGO Deals. There, you’ll be able to select your desired Trigger Type from the drop-down menu:
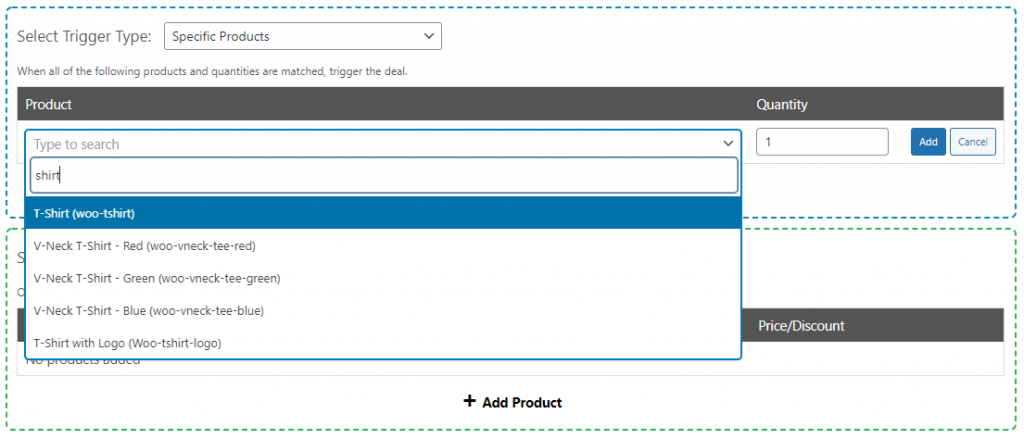
If you’ve opted for the Specific Products trigger, you’ll also need to select which products you’d like to include in the deal. Click on the Add Product button, and you’ll see a new text field where you can search your items. You can set the quantity here as well:
If you’d like to use the Product Categories trigger, you’ll define which categories to include in this step. After selecting Product Categories from the drop-down menu, you can click on Add Category. Begin typing your desired category into the text field, set your quantity, and hit the Add button:
You can even add multiple product or category triggers to a single coupon if you’d like.
Step 2: Set your Apply Type
Next, you can choose your Apply Type for the coupon. The Apply Type is what a customer will get when they satisfy the requirements of the trigger. Once again, you have three options to choose from.
Specific Products will give your customer a particular item in the quantity that you choose. Once again, this is an effective way of clearing out under-performing inventory. If you decide to offer a discount on these items rather than making them completely free, you may even make a bit of money on them.
Any Combination of Products and Product Categories are very similar in how they behave. Once a customer has fulfilled the trigger conditions, you can enable them to select any of the products from a list you define or any item from one or more categories. The system will always apply the discount to the least expensive product in the cart.
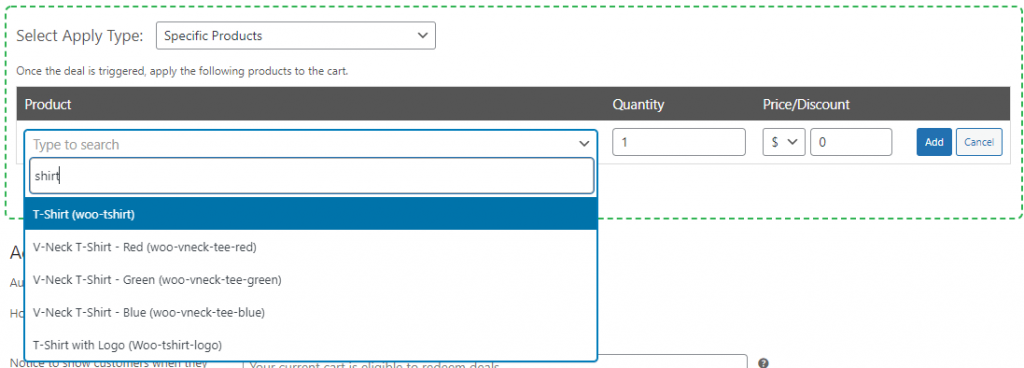
You can choose your desired Apply Type from the drop-down menu. Let’s look at the Specific Products Apply Type first. Once you’ve selected this, you can click on Add Product and use the text field to search your items:
You can also define the quantity here. Then you can choose whether the customer receives the item with a price override or a specific percentage or dollar amount off:
For example, if you’d like the item to be free, you can select Override Price and type “0” into the box. You can add several products in the Apply Type section.
To use the Any Combination of Products Apply type, select it from the menu. This will enable you to search for and add products in the text field. In this example, a customer can choose from three different t-shirts:
Finally, let’s look at the Product Categories Apply Type. After selecting Product Categories from the drop-down menu, you can click on Add Category and begin typing the category name into the text field:
Clicking on the Add button will save the category. You can add several categories to this Apply Type.
Finally, you can set whether you’d like the BOGO deal to be applied only once per customer, or if it should trigger repeatedly. You can make this selection under Additional Settings:
Now let’s set up a BOGO notification to show your customers that they’ve triggered a deal and help them claim it.
Step 3: Design a BOGO notification
If you are using the Any Combination of Products or Product Categories Apply Type, you’ll be able to show a notice to your customer when they fulfil the deal’s trigger conditions. You can start by adding text to the message, letting customers know they’ve triggered the sale and can add discounted items to their carts:
You can also update the text of the button, as well as the URL it should send customers to:
Note that if you’re using the Specific Products Apply Type, no message will be displayed. In this case, the system will automatically add the items you’ve chosen to the customer’s cart.
Once you’re satisfied with your BOGO deal, you can click on the Save BOGO Deals button. If you’d like to start over, you can click on the Clear BOGO Deals button instead.
Step 4 (Optional): Apply your WooCommerce BOGO deal automatically
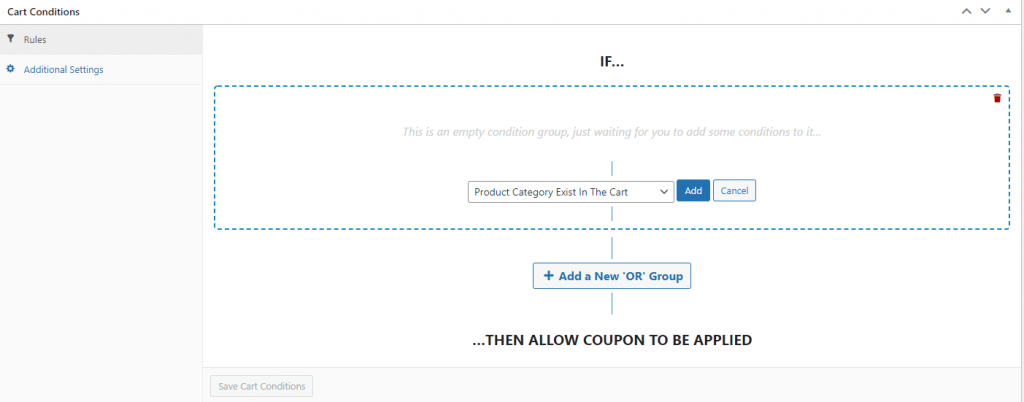
You may want to give your customer a pleasant surprise by applying a BOGO deal automatically without using a coupon code. To do this, you’ll need to make use of the Cart Conditions feature. You can find these settings just under the Coupon Data section:
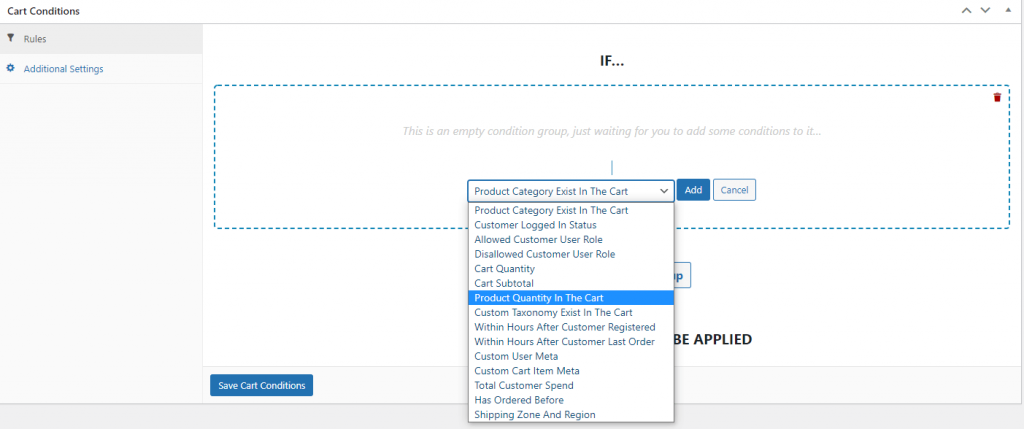
Using the drop-down menu, select the parameter that matches your Trigger Type. So if you’re offering a free t-shirt with the purchase of any other t-shirt, you can choose Product Quantity in the Cart, and then select the Add button:
Next you can search for the required item and define the quantity that needs to be in the customer’s cart to trigger the deal. The Conditions drop-down menu gives you plenty of flexibility in this area:
Once you’ve defined your conditions, you can click on the Add button, followed by Save Cart Conditions. The last step is to enable the Auto Apply feature. You can find this option on the right side of the screen:
Simply check the box to enable this feature. Now when a customer adds an eligible product to their cart, they’ll see your BOGO message letting them know they’re getting a deal.
Conclusion
WooCommerce BOGO offers can be excellent tools for increasing sales and moving outdated inventory. By using Advanced Coupons, you can create offers that can maximize your profits and delight your customers at the same time.
To make a BOGO offer of your own, follow these steps:
- Set your Trigger Type
- Set your Apply Type
- Design a BOGO notification
- Apply your BOGO deal automatically (Optional)
Do you have any questions about how to make a WooCommerce BOGO offer? Ask us in the comments section below!

