Online stores usually don’t cater to wholesalers. They’re designed for regular users who want to buy one or two products and call it a day. By creating a wholesale order form online, you can design a much more enjoyable experience for your big-ticket users.
Although WooCommerce can handle bulk sales, it’s not a wholesaling platform by design. However, when you combine it with Wholesale Suite, you get access to a powerful set of tools such as wholesale order forms.
In this article, we’ll talk about why you need an online order form and how to choose the best solution for your needs. Then, we’ll show you the Wholesale Order Form plugin in action and talk about how it can benefit you. Let’s get to it!
Why Have An Online Order Form
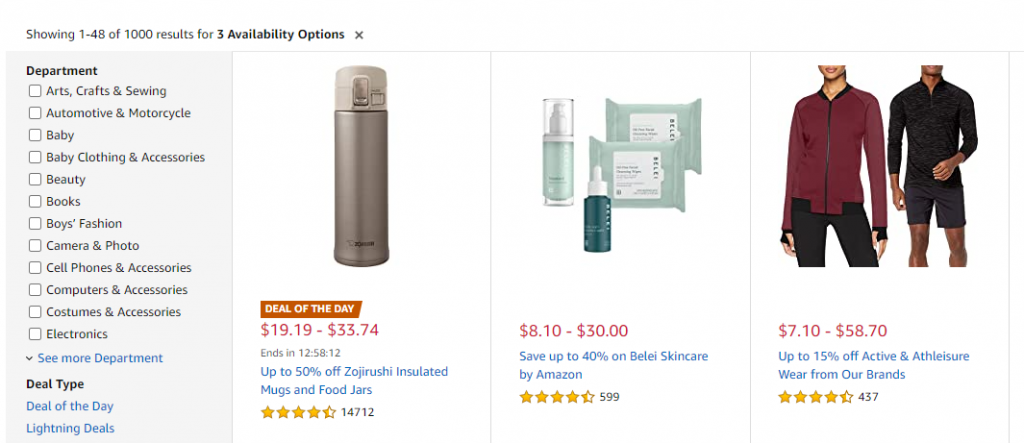
Traditional online stores have shop pages where you can see their entire catalog or part of it. Usually, to add products to your cart, you need to go into their specific pages, decide how many units you want, and then proceed to the checkout page.
Overall, buying online can be a relatively simple process. However, if you want to purchase products in bulk, things start to get more complicated.
For each product that you want to add to your cart, you have to look it up, enter its page, add how many you want, and repeat that process as many times as needed. Depending on the store, you might see shipping costs or additional fees until you’re well into the checkout stage.
If you’re a wholesaler, you can lose hours making an order simply because most e-commerce systems aren’t designed with your needs in mind. Therefore, if you want to cater to wholesalers, you need to design a wholesale order form online that’s easy for them to use.
Simplifying the customer journey is an approach that works across all industries. If you understand what wholesale customers want and you can offer a system that makes their lives easier, they’ll keep coming back to your store.
How To Create A Wholesale Order Form Online Using Wholesale Suite (4 Steps)
In this section, we’re going to show you what our preferred solution is for creating wholesale order forms online. If you want to follow along with the tutorial, you’ll need to set up WooCommerce to get started.
Step 1: Select which Wholesale Suite plugins to use
Wholesale Suite is a collection of plugins designed to transform WooCommerce into a one-stop solution for online wholesale stores. There are three plugins that make up the entire suite:
- Wholesale Order Form: This plugin enables you to create order forms that are easy for wholesale users.
- Wholesale Prices Premium: Using this plugin, you can set custom prices for WooCommerce products that vary depending on user roles. This lets you offer multiple levels of wholesale discounts.
- Wholesale Lead Capture: With this plugin, you can let wholesale users register under specific roles so that they get the discounts that you set using the Wholesale Prices plugin.
In theory, you can create a wholesale order form online using only the Wholesale Order Form plugin. However, Wholesale Suite works best as a package (hence the name “suite”). With all three plugins, you’ll be able to configure your wholesale store to work just the way that you want it to.
Throughout the rest of this tutorial, we’ll focus on the Wholesale Order Form plugin, so you’ll need at least that one to follow along. You can purchase and download the Wholesale Order Form plugin here.
Step 2: Configure the Wholesale Order Form Plugin
The Wholesale Order Form plugin automatically creates a wholesale order form online for your WooCommerce shop. However, we recommend that you customize its display settings before giving customers access to it.
To access those settings, go to Wholesale > Order Forms. Then, click Add Form to create a new form.
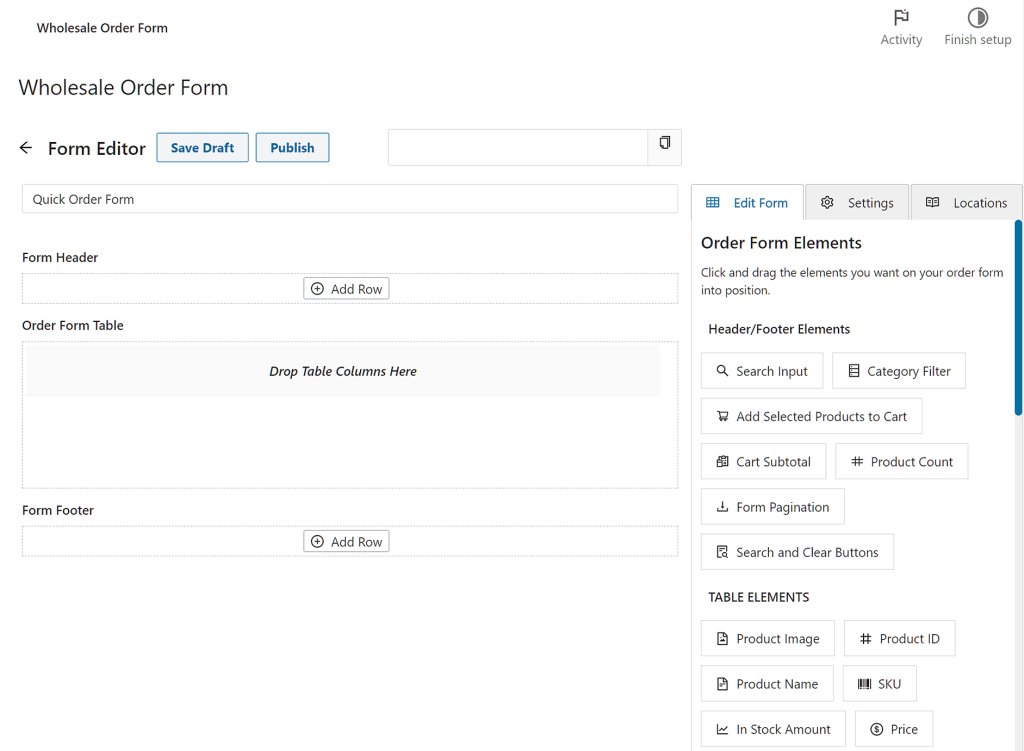
Creating a new form will redirect you to the Form Editor page. Here, you’ll see three main sections on the left side: Form Header, Order Form Table, and Form Footer. And on the right side, you’ll see three tabs: Edit Form, Settings, and Locations.
Let’s find out how you can customize your Form Header, Order Form Table, and Form Footer.
Form Header and Form Footer
Customizing the Form Header and Form Footer sections will determine how your order form’s topmost and bottommost regions will appear to customers.
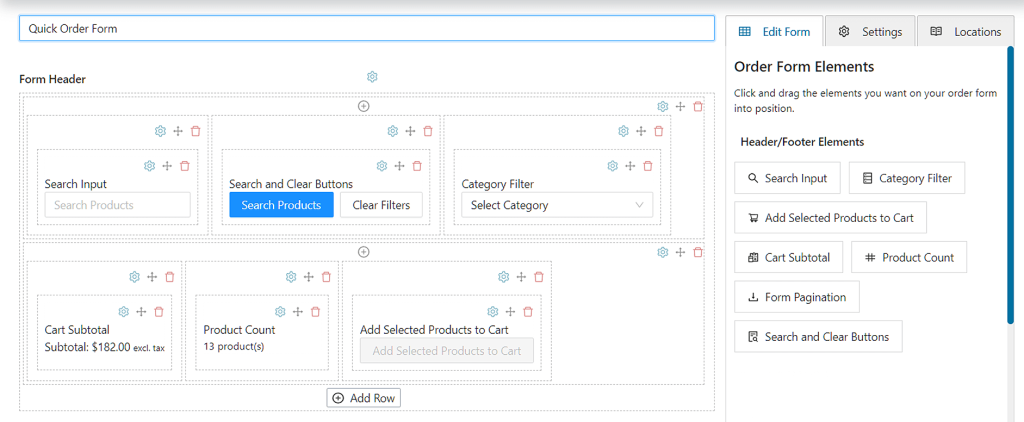
First, create rows by clicking Add Row in each section. Then, click the + icon at the top of each row to create columns.
Your goal is to create a header and footer that are composed of rows divided into columns. Therefore, you should drag modules from Header/Footer Elements under the Edit Form tab, then drop them into these columns. This is how you create a header or footer that contains elements that your customers can use to search for and learn about your products.
For example, we created a header consisting of two rows, with each row containing three columns, and each column containing a header/footer element.
The footer we created has only a single row with a column containing the Form Pagination element.
Order Form Table
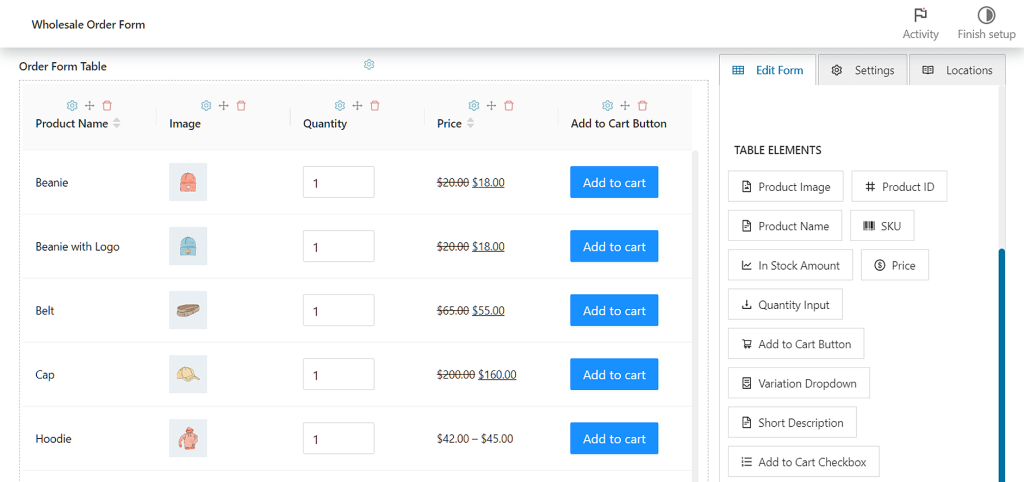
Order Form Table lets you design how your products will appear to customers on the front end.
There’s no need to create rows here; to create columns of elements, simply drag modules from Table Elements under the Edit Form tab, then drop them into the Order Form Table section. This way, you can add product images, names, prices, and more to the section. Don’t forget to include Add to Cart buttons that will allow shoppers to put items in their carts:
You can rearrange the positioning of these columns by clicking the Re-order Element icon at the top of each column, which will let you drag the column left and right.
When you’re happy with how your form looks, click on Save Draft at the top of the page.
Now, it’s now time to configure the form’s settings.
Step 3: Tweak your order form settings
On the right side of the Form Editor page, click the Settings tab.
As you can see, there are fourteen default settings found on the Form Editor page:
- Form Permissions
- Hide Form Title
- Product Sorting
- Product Sorting By
- Products Per Page
- Lazy Loading
- Show Variations Individually
- Zero Inventory
- Simplify Add to Cart Notices
- Default Category
- Included Category
- Excluded Category
- Include Products
- Exclude Products
It’s important to understand what each setting does before altering or enabling it, so we’ll go over each one individually:
Form Permissions
Skip to Step 4 to know more about Form Permissions.
Hide Form Title
When activated, Hide Form Title stops your form’s title from being displayed on the front end.
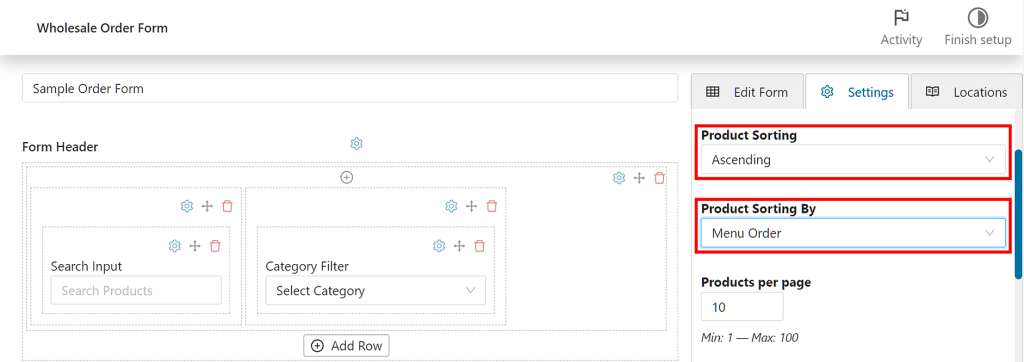
Product Sorting and Product Sorting By
Previously, the Wholesale Order Form’s sorting was determined by a generic setting. However, with the most recent feature upgrade, you may now sort the products on the order form separately.
Product Sorting lets you specify how your products will be previewed upon checkout.
If you choose “Ascending” order, your products will arrange themselves from lowest to highest. On the other hand, selecting “Descending” order lists products from highest to lowest.
Note that the product sort order is determined the Product Sorting By option you selected.
You have five ways to organize your products on the Wholesale Order Form:
- WooCommerce Default
- Menu Order
- Name
- Sort by Date
- SKU
For example, if your Product Sorting is “Descending” and your Product Sorting By is “Sort by Date,” then your products will be arranged from the most recent date to the oldest date.
Products Per Page
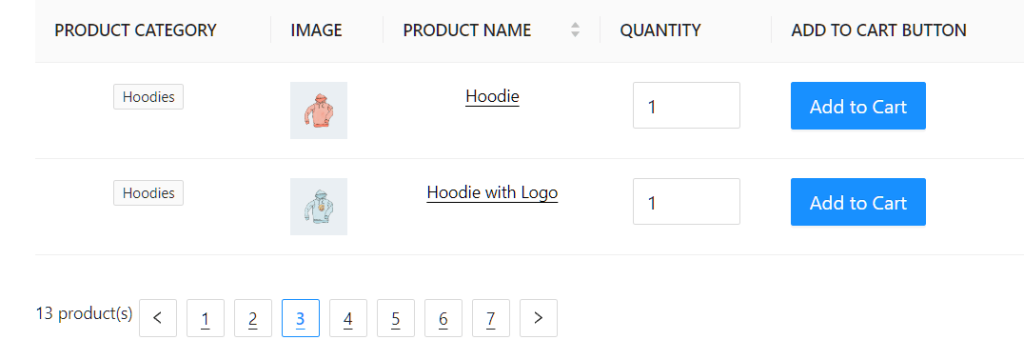
This option simply determines how many products will be shown on a page. For example, if you set the value to 10, then the customer will only see 10 products per page. To see your other products, they’ll have to click to another page.
This option works with the table element Form Pagination, which offers customers arrows and page numbers that they can click to be redirected to other product pages.
In the example below, we created an order form with a Products Per Page value of 2, meaning each page only displays 2 products. Therefore, a customer will have to click either of the arrow buttons or any of the page numbers below to see the other product pages.
Lazy Loading
Moving on, the Wholesale Order Form plugin also allows you to use lazy loading so users don’t have to move between pages to see more products.
Keep in mind that if you add a Form Pagination element to your form, it will be hidden on the front end when Lazy Loading is enabled.
To enable Lazy Loading, simply tick the box below Product Per Page.
Show Variations Individually
Enabling this feature will create a separate row in the wholesale order form for each product variation.
Zero Inventory
Enabling the Zero Inventory option allows you to display even those products that you no longer have in stock. In other words, products with no inventory will appear on the front end.
However, we strongly advise you to reconsider this approach because displaying out-of-stock items may cause more harm than good.
Simplify Add to Cart Notices
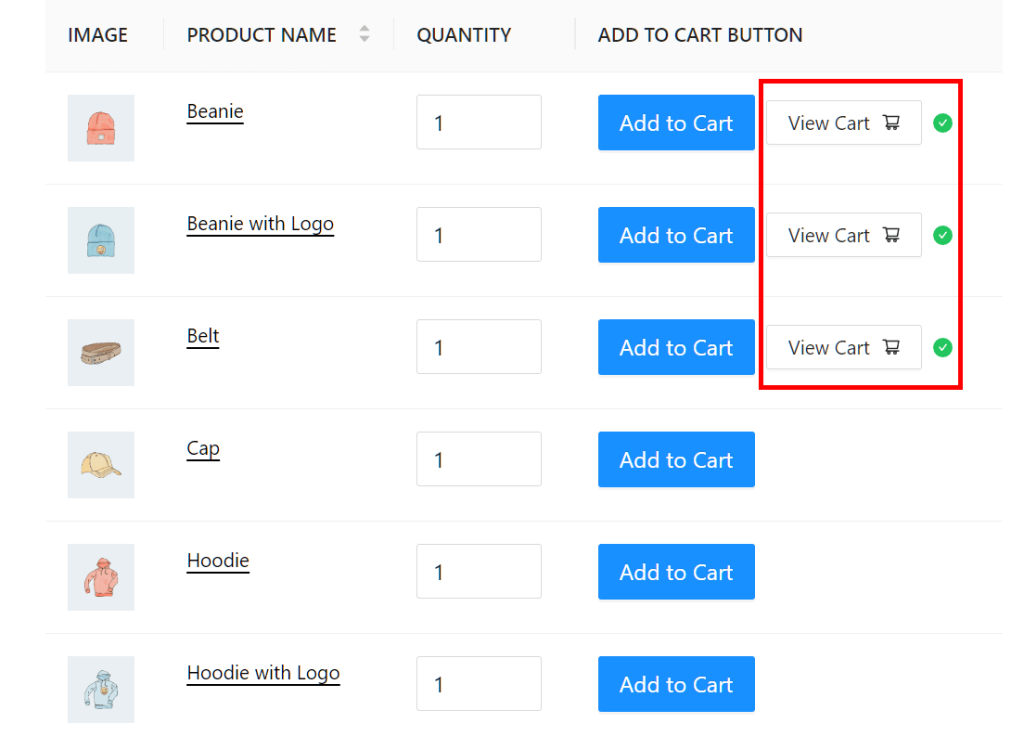
When Simplify Add to Cart Notices is unchecked, rapidly clicking the Add to Cart buttons on the front end will flood the page with multiple popup/slide notifications. The result is a cluttered look.
Thankfully, when enabled, the Simplify Add to Cart Notices simply displays icons next to each clicked Add to Cart button.
This is how it looks on the front end. As you can see, this produces a neater appearance!
Default Category
This option simply sets the default product category that the header/footer element Category Filter displays.
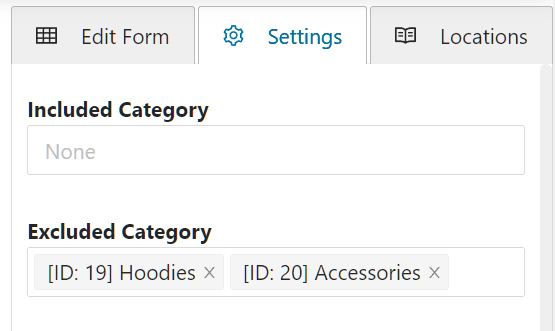
Included Category and Excluded Category
These options allow you to choose which product cateogories are included or excluded in the order form.
For example, the settings below will cause all types of hoodies and accessories to remain invisible on the front end, thus preventing customers from seeing them.
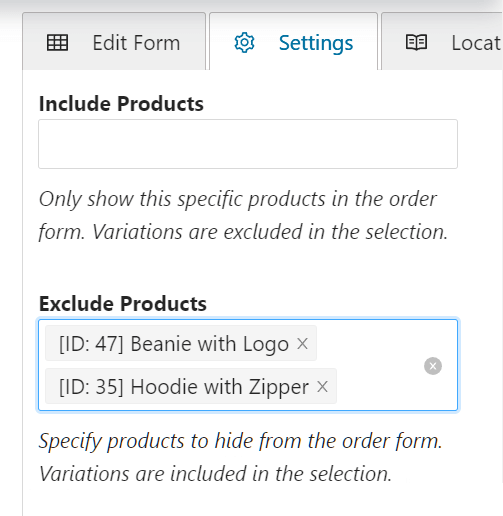
Include Products and Exclude Products
Using these choices lets you indicate the products that you want to include or exclude in the order form.
For example, the settings below will prevent the “Beanie with Logo” and “Hoodie with Zipper” products from appearing on the front end.
Step 4: Set permissions for your order form
The Wholesale Order Form plugin gives you full control over who can access your wholesale order form online depending on user roles.
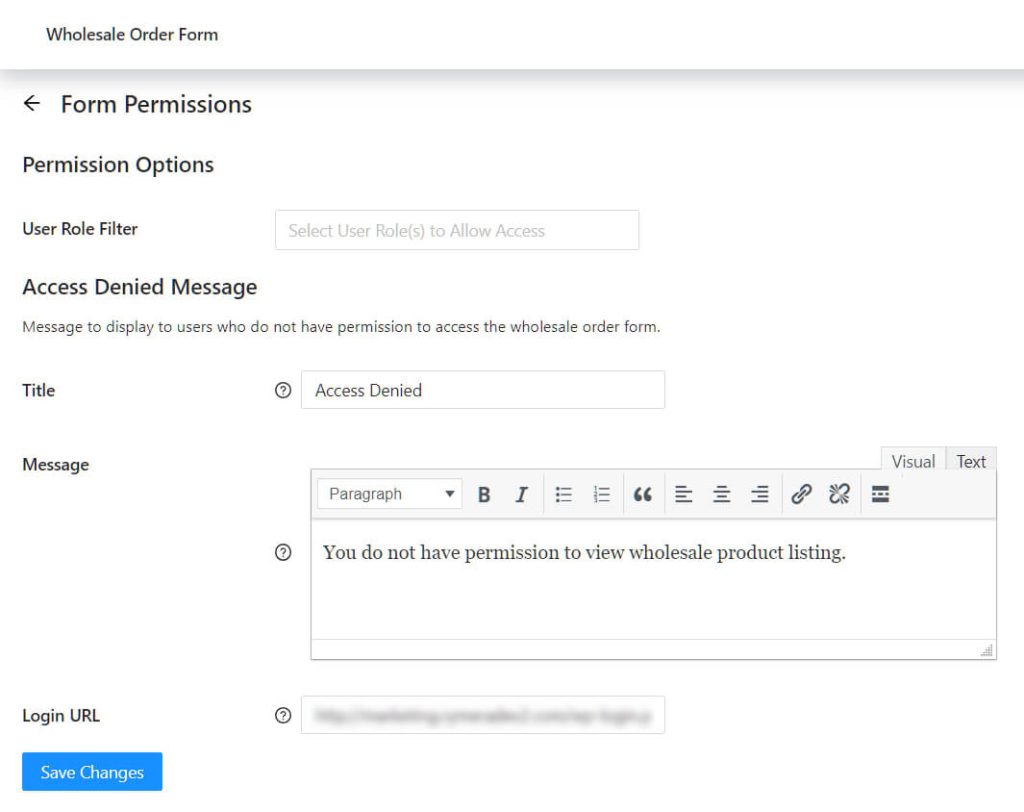
On the right side of the Wholesale Order Form page, click the Settings tab and select Form Permissions. This will redirect you to the Permission Options page.
The User Role Filter lets you pick who can use your wholesale order form. Basically, it provides a dropdown menu from which you can pick the user role(s) you’re permitting to use the form.
On the other hand, the Access Denied Message lets you customize the message displayed to users who don’t have permission to access your order form.
If you’re creating a wholesale order form online, you might want to include a link to a wholesale registration page in the access denied message. This will let people know where they can request a wholesale account.
Don’t forget to click Save Changes once you’re done customizing your Form Permissions.
Lastly, click Publish on the Wholesale Order Form page to activate your wholesale order form.
Conclusion
Creating a wholesale order form online can be a great way to improve the customer experience for your wholesale users. If you run a store that focuses on wholesaling, then you can’t rely on traditional shop pages.
Using WooCommerce alongside the Wholesale Suite provides you with all the tools you need to create wholesale order forms. The Wholesale Order Form plugin, in particular, can help you create order forms that are a joy to use.
To recap, you can create a wholesale order form online by observing the following four steps:
- Select which Wholesale Suite plugins to use
- Configure the Wholesale Order Form Plugin
- Tweak your order form settings
- Set Permissions for your order form
Do you have any questions about how to create a wholesale order form online? Let’s talk about them in the comments section below!

