When you’re first starting out your online business, configuring your pricing can be particularly challenging. As an e-commerce owner, there’s a high likelihood that you’ll want to vary your product prices – and not just for different items. Perhaps you want to set up WooCommerce multiple prices per product to give your customers more options and enhance profitability.
For example, you may want to charge more for a shirt that comes in size large than the one that comes in size small. Fortunately, there is a way to do so that is quick and easy!
In this post, we’ll introduce you to wholesale pricing and discuss the reasons why you may want to add multiple levels of pricing to your products. Then we’ll walk you through how to add multiple prices to WooCommerce products. Let’s get started!
Why You Might Want To Set Up WooCommerce Multiple Prices Per Product
When you’re running an e-commerce store, you may have some products with unique pricing requirements. For example, if you have an individual item that comes in variations, such as different colors and/or sizes, you might not necessarily want all versions of it priced the same.
If that’s the case, it makes sense to utilize the WooCommerce multiple prices per product feature. In a nutshell, this is when you set up different prices for a single item in your store based on certain qualities. Doing so can help you account for factors such as the increase in shipping costs due to size and weight or the costs of manufacturing certain materials.
Another scenario in which you might use multiple prices per product is if you have bundled products. For example, if you allow your customers to buy in bulk, percentage-based pricing can come in handy.
Wholesale pricing for products can be challenging for many e-commerce owners. However, making sure you nail your pricing strategy is essential because it can affect the success of your wholesale business.
Fortunately, with the right tools, you can add multiple levels of wholesale pricing based on the user role. For example, you can offer special pricing on products for certain shoppers. In other words, you can offer one price to retail customers and another to wholesale customers.
How To Add Multiple Prices In WooCommerce (In 4 Steps)
Now that we understand more about wholesale pricing and the reasons to leverage multiple prices per product, let’s take a look at how to apply it to your own store in WooCommerce.
Step 1: Add your product attributes
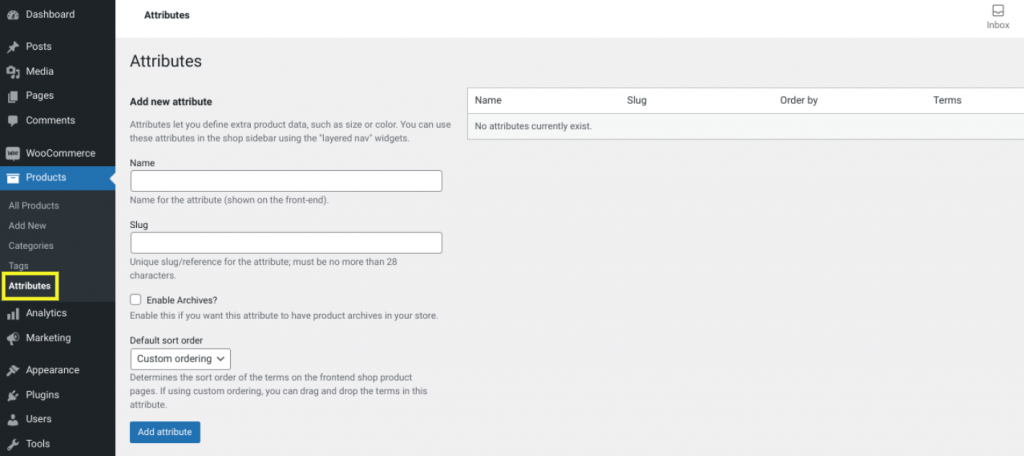
The first step to adding WooCommerce multiple prices per product is to set up attributes. By default, WooCommerce offers two attributes: Global and Local. Global attributes can be used for any type of product in your store, whereas Local attributes are for specific items.
To get started, navigate to Products > Attributes from your WordPress dashboard:
You can enter a title for the attribute. For example, you can name it “size” if you want to add the WooCommerce multiple prices per product setting for different sizes of an item. Next, click on Add attribute to save your changes.
The attribute will then be added to the right side of your screen. You can click on the Edit link to modify it at any time.
Step 2: Set your attribute values
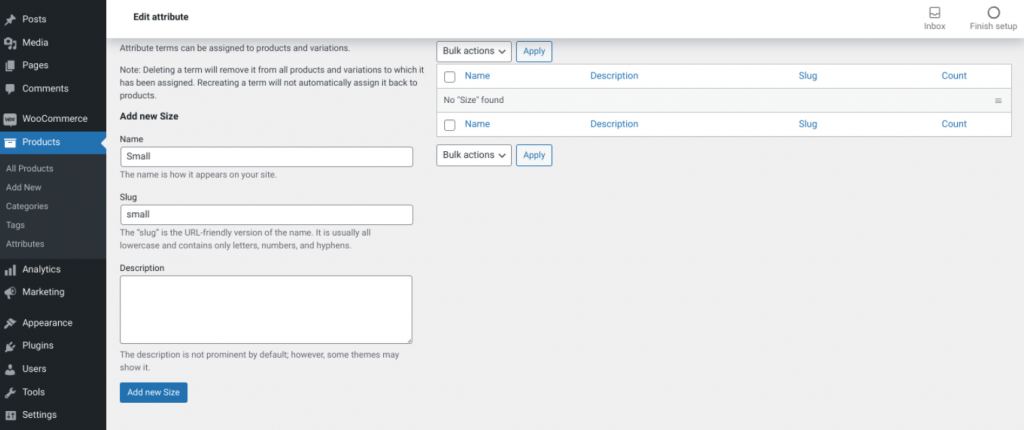
Once you create your product attribute, the next step is to add your values. This is what your customers will select when they are buying your item. So, in this example, where the attribute is size, the values will be Small, Medium, or Large.
From the Attributes screen, click on the attribute name (in this case, Size). Now, you can enter an attribute value:
For each value that you create, you can add a name, slug, and description. When you’re done, select Add new Size (or whatever your product attribute is called). You can repeat this for each product attribute value you want to use.
Step 3: Add your attributes and values to your product
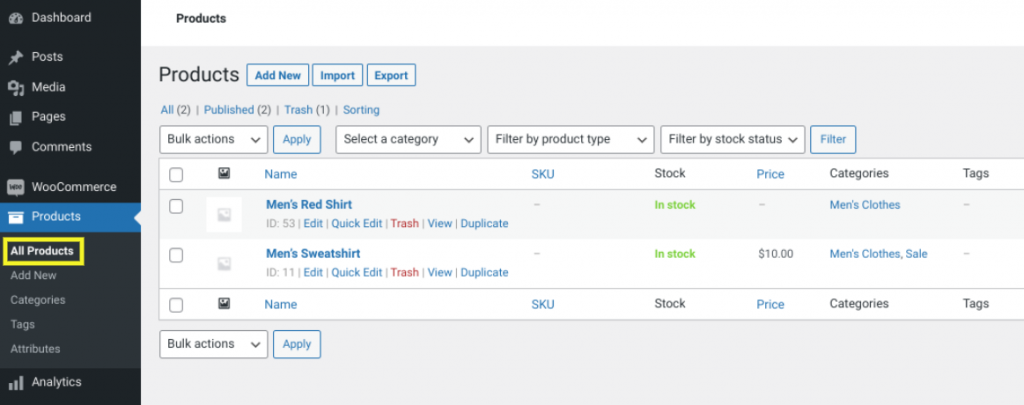
Once you’ve created your product attribute and values for it, the next step is to add it your WooCommerce product. To do so, navigate to Products > All Products from your dashboard:
Click on the name of the product you want to add the attribute to. For this example, we’ll be using the men’s sweatshirt as our product.
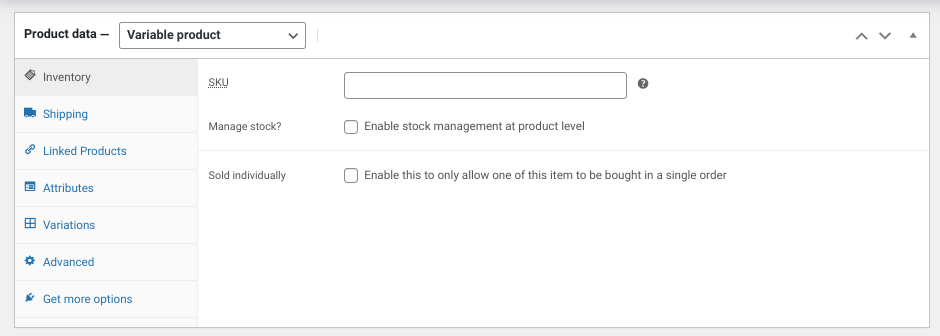
After you click on the product, scroll down to the Product Data section. From the drop-down menu, select Variable product:
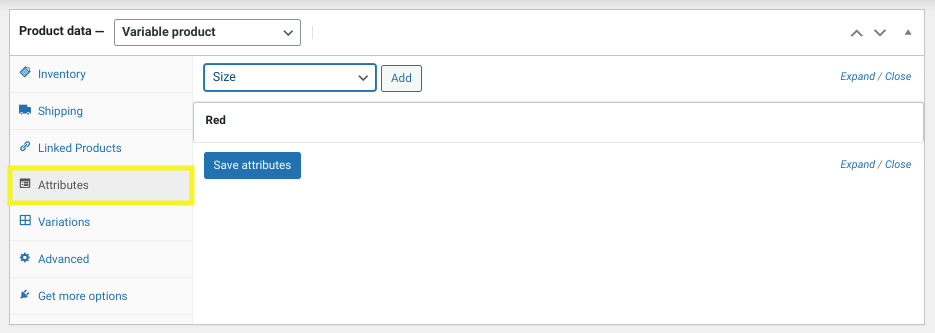
Next, click on the Attributes tab. Here, you can select the product attribute that you just created (in our case, that will be Size:
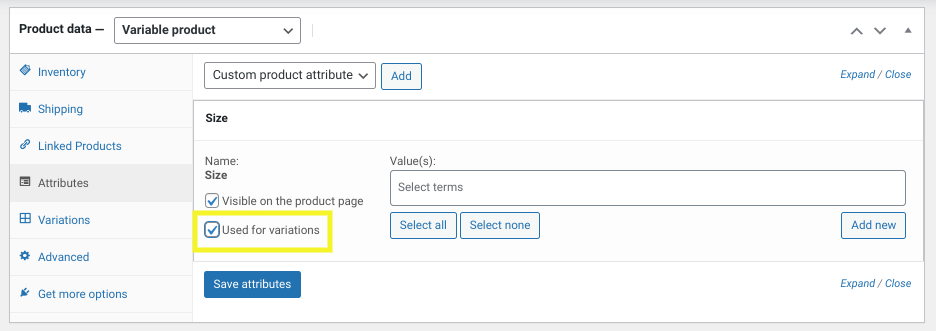
Click on the Add button. Next, select the Used for variations box:
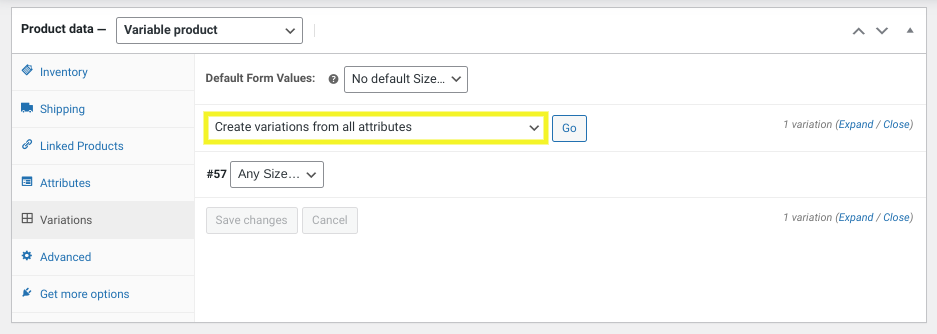
Add all of the attribute values, then click on the Save attributes button when you’re done. Now, browse the Variations tab. From the drop-down menu, click on Create variations from all attributes:
Once you click on the Go button, you’ll be asked if you’re sure you want to proceed. Select the OK button. Your variations should now be listed.
Step 4: Add the prices to the product attribute variations
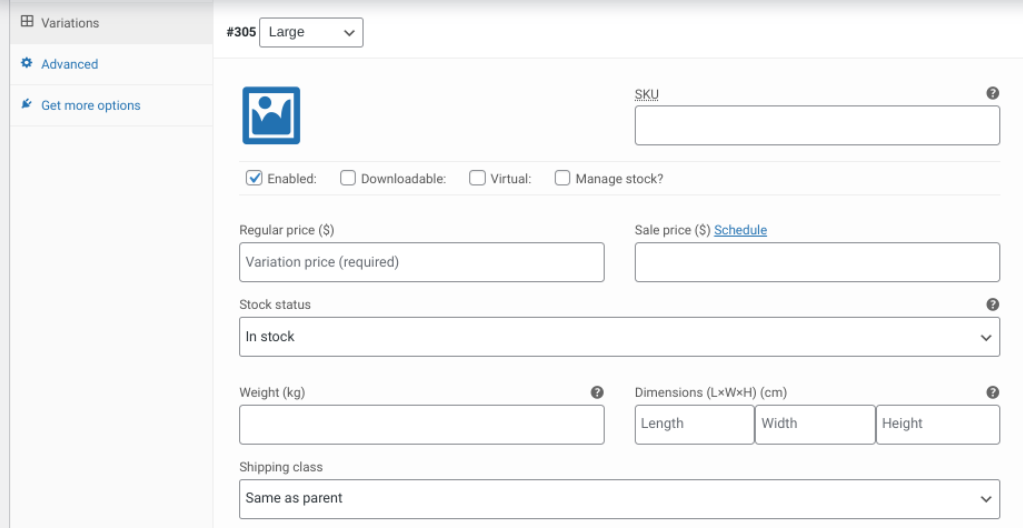
Now that you’ve added the product attribute variations, you can apply the appropriate price to each one. To do so, you can simply click on the name of the variation to expand that section:
Once you enter the price, click on Save Changes. Remember to repeat this for each of the variations.
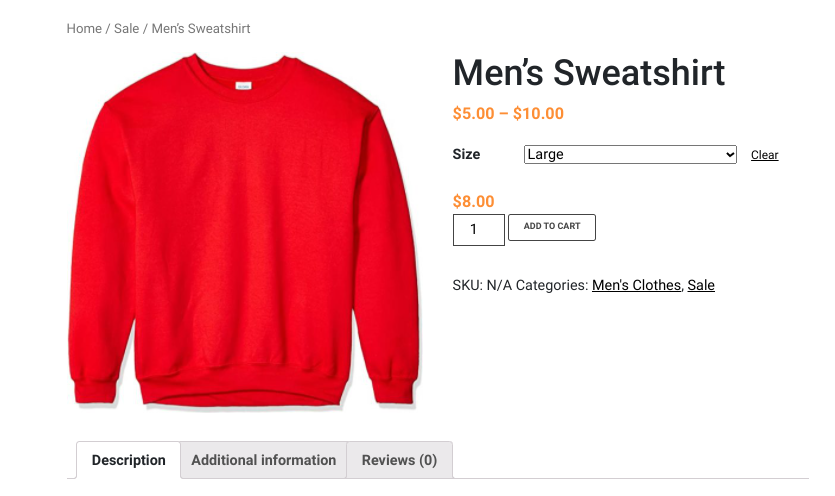
Now, if you visit your store on the front end of your site, you’ll be able to see that the variations are available from the drop-down menu, and the appropriate price will be applied once you select it:
That’s it! You can repeat these steps for however many attributes you want to add and for as many products in your WooCommerce store.
How To Do Dynamic Pricing In WooCommerce For Wholesale With Percentage
As we mentioned earlier, if you have a wholesale business, you may also want to use percentage-based pricing. This is easy to do in WooCommerce when you use our Wholesale Suite plugin:

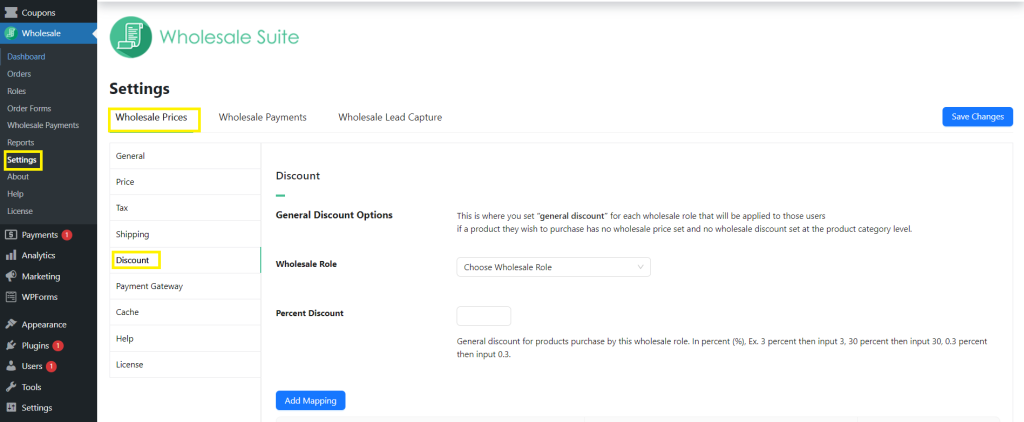
Once installed and activated, you can navigate to Wholesale > Settings > Wholesale Prices > Discount:
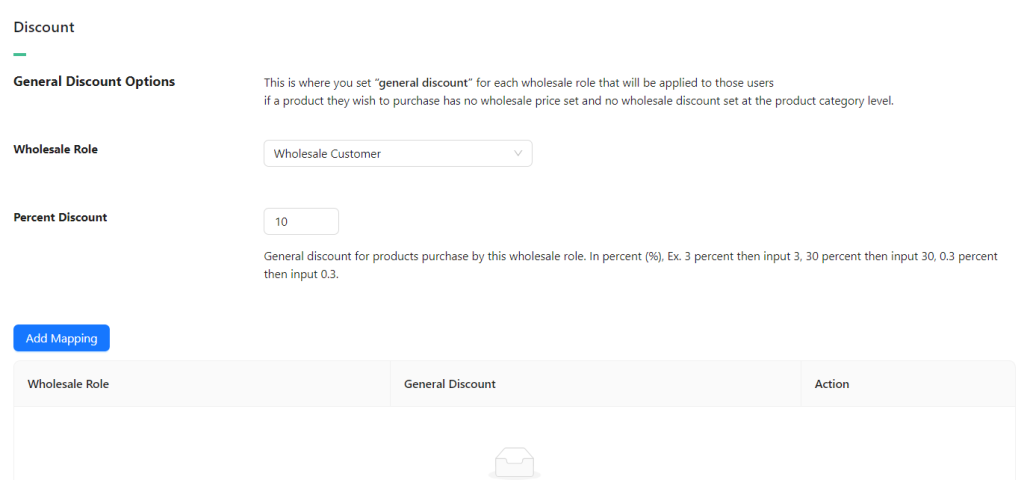
From the drop-down menu, you can select a Wholesale Role, such as Wholesale Customer. Then you can enter the percentage discount you want to use. By default, this will apply to all of the products in your store. In the example below, we’re mapping a 10% general product discount for the Wholesale Customer user role:
However, if you want to exclude a product, you can check out our guide on how to exclude a wholesale product from percentage-based pricing. When you’re done, click on Add Mapping. Remember to select the Save Changes button at the bottom of the screen.
Conclusion
If you’re managing an online store, there are a variety of reasons to set WooCommerce multiple prices per product. For example, you can use this functionality to apply a different price for various sizes of a piece of clothing or charge more for certain materials and colors.
As we discussed in this post, you can give multiple prices per product in four simple steps:
- Create your product attributes
- Set your attribute values
- Add the attributes and their values to your product
- Add the prices to the product attribute variations
If you want to take it a step further by applying dynamic pricing to your wholesale products, you can do so with Wholesale Prices Premium.
Do you have any questions about setting up WooCommerce multiple prices per product? Let us know in the comments section below!

