There may be times when you want to make only certain products available to specific customers. When this is the case, it helps to know how to create WooCommerce role-based products.
In a nutshell, doing so enables you to implement particular restrictions on products and control their visibility and prices so that they are only available to specified users. For example, perhaps you only want your wholesale items to be visible to wholesale customers, rather than retail shoppers.
In this post, we’ll start by explaining what role-based products mean and the benefits of creating a store that leverages them. Then, we’ll walk you through five simple steps to develop role-based products in WooCommerce. Let’s get started!
An Introduction To WooCommerce Role-Based Products
Many e-commerce stores only have one type of customer. However, when you’re running a business such as a wholesale operation, that’s not necessarily the case.
Perhaps you also have a rewards program with varying prices for different types of customers and members. If so, it’s essential to have a flexible solution for pricing, promoting, and selling your products.
With WooCommerce role-based products, only certain clients or users will be able to see the items that are available. This personalized shopping experience can help expedite the checkout process and, in turn, drive sales. It’s also good if you charge groups different prices so that there’s no confusion between them.
WordPress comes with a fully customizable user role system that lets you create various roles based on access levels and permissions. Paired with a plugin, you can take advantage of these user roles by controlling which product strategies you use.
For example, for each role, you can:
- Set different product prices
- Apply certain discounts and coupons
- Change product visibility
- Restrict payment gateway and shipping method options
The benefit of doing this is that you can create more targeted promotions and offerings for each type of customer. This can help drive sales and increase conversions.
How To Create WooCommerce Role-Based Products (In 5 Steps)
Once you have your products in your WooCommerce store, the next step is to create your customer roles, apply product pricing, and adjust the product visibility. Then, you can implement additional restrictions, such as payment gateways and shipping options. Let’s take a look at how to create WooCommerce role-based products in five steps.
Step 1: Purchase and install Wholesale Suite
WooCommerce is a powerful e-commerce platform. However, its built-in functionality doesn’t make customizing and extending the functionality of your store the easiest, especially when it comes to implementing role-based products and restrictions.
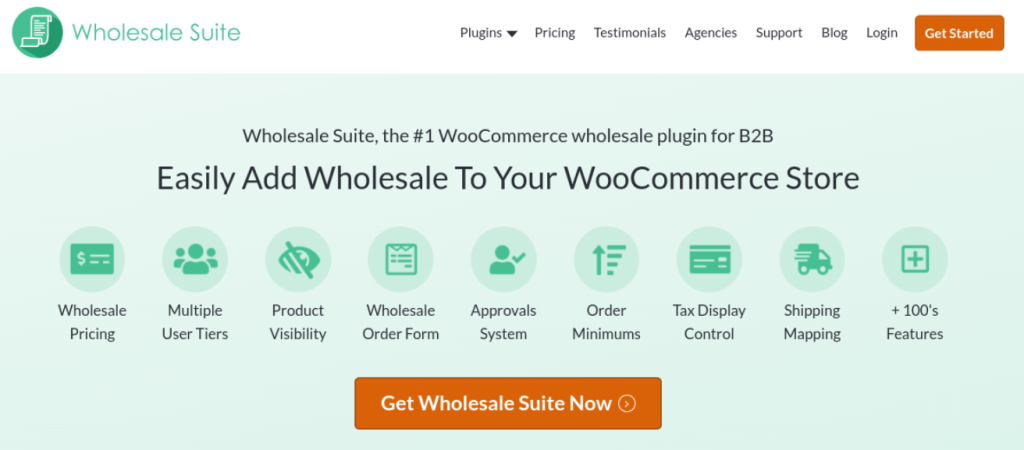
Fortunately, Wholesale Suite can help you do it all:
This premium collection of tools enables you to handle everything from wholesale pricing to custom user roles and payment gateways. You can use it to quickly create WooCommerce role-based products and customize them in many ways.
To get started, you can navigate to our website and click on Get Wholesale Suite Now.
Then, you can choose your bundle and complete the checkout process. You can access the plugin downloads from your dashboard, then install them on your WordPress site like any other extension.
Step 2: Create your user roles
In case you’re unfamiliar, user roles in WordPress refer to what individual users can see and do on your website. For example, administrators have full access and permissions.
When used in the context of WooCommerce, the concept is similar. Certain roles are allowed to see certain products, use otherwise restricted gateways, or leverage other privileges that aren’t granted to other customers. For example, a loyalty program member versus a non-member, or a wholesale versus retail customer.
By default, WooCommerce creates Customer and Shop Manager roles. However, you’ll want to add additional custom ones, which you can do with our plugin.
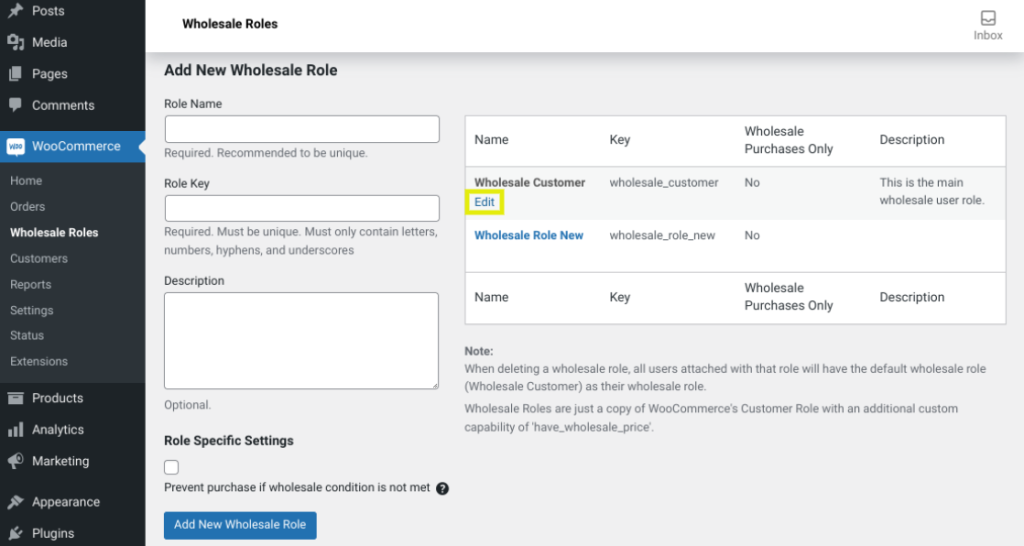
Once you have the plugin installed, navigate to WooCommerce > Wholesale Roles. You can click on Edit under Wholesale Customer to modify it:
To add more roles, you can click on Add New Wholesale Role. Then, simply enter the required details in the form on the left-hand side of the screen.
At the bottom of the screen, you can also click to enable Role Specific Settings. This will allow you to prevent purchases of products if certain conditions are not met.
Step 3: Apply role-based pricing to your products
With WooCommerce role-based pricing, you can customize the value of the items in your stores for different types of customers or users. This is incredibly beneficial when running a wholesale business or creating a membership or loyalty program that includes varying levels.
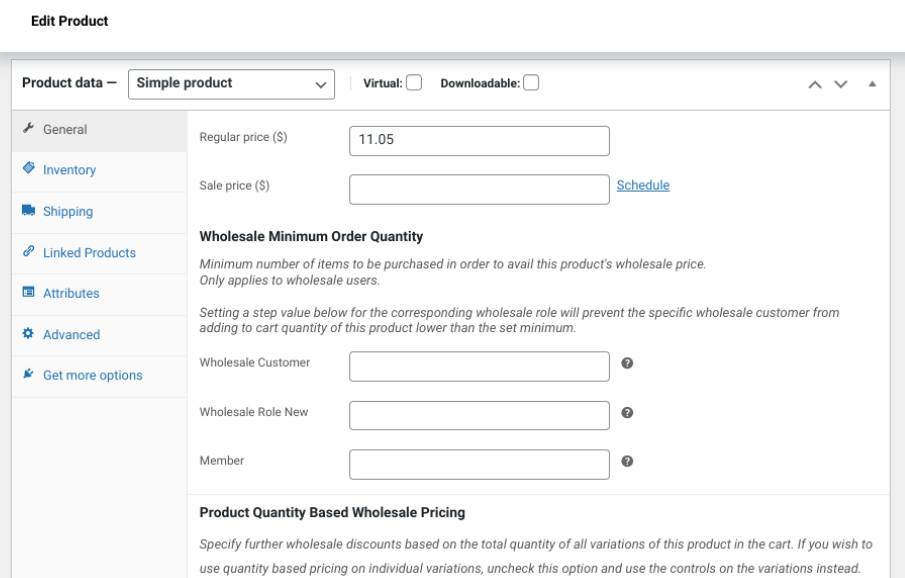
To get started creating WooCommerce role-based products, navigate to your WooCommerce > Products list, then click on the Edit link below the item you want to apply role-based pricing to. Next, browse to Product data > General and locate the Wholesale section:
You can set different prices for each custom wholesale user role you have set up. Also, you can specify your product quantity requirements based on the pricing.
Step 4: Configure role-based product visibility settings
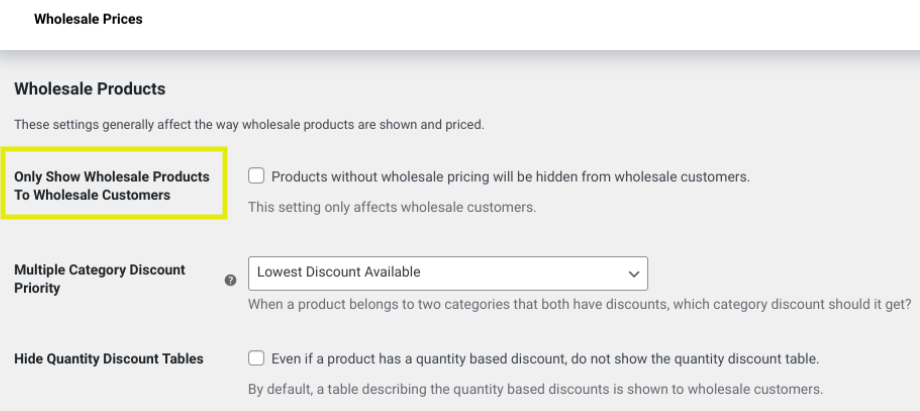
Once you configure your role-based pricing for products, you can also implement product visibility based on different roles. There are a few ways to change product visibility. For example, you can apply it to all wholesale products using the general settings.
Simply browse to WooCommerce > Settings > Wholesale Prices. Under the Wholesale Products section, you can select the Only Show Wholesale Products To Wholesale Customers option:
If you want to change product visibility based on a certain WooCommerce role, you can do so by going to Products > All Products and specifying which roles should have access to each product. Note that you’ll first need to have created all the role types you want to use.
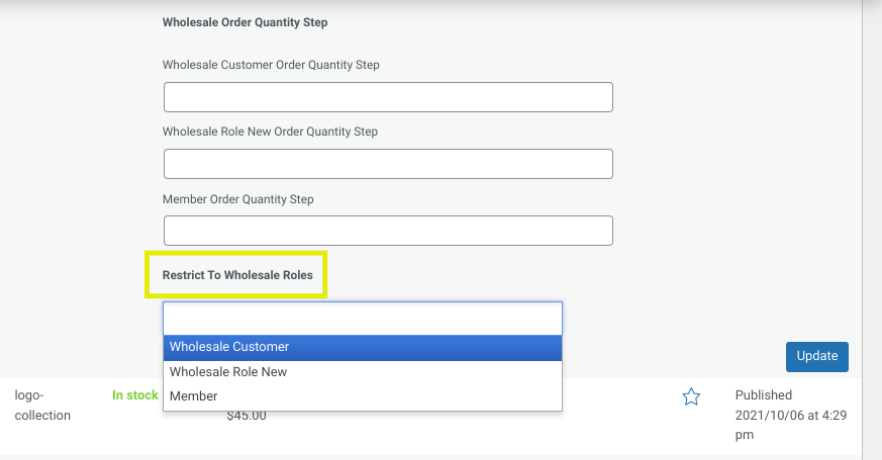
Click on the Quick Edit link for the product you want to create role-based visibility for. Here, you can select who you want to restrict visibility to:
When you’re done, you can click on Update to save your changes. You can repeat this process for as many products as you want to adjust the visibility for based on roles.
Step 5: Apply payment gateway and shipping method restrictions
You can take a few additional steps to further create and configure your WooCommerce role-based products. Two of the most useful are to implement payment gateway and shipping restrictions.
For example, perhaps you want to disable certain payment gateways for specific users, such as allowing bank transfers for larger customers, such as wholesale customers, but not for everyday retail shoppers.
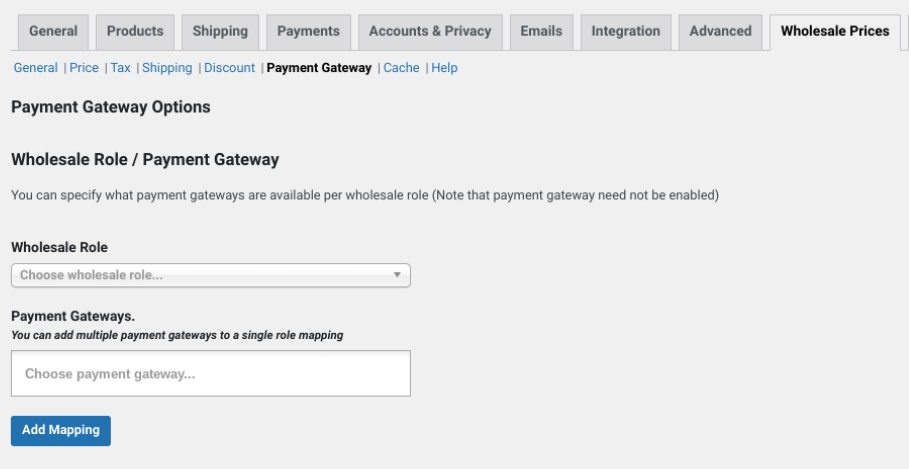
Once your role is created and your payment options are set up in WooCommerce, you can navigate to WooCommerce > Settings > Wholesale Prices > Payment Gateway to map your user roles:
You can select the role you want to map from the list, then click on the Choose payment gateway field to access your payment options. You can add as many as you wish. When you’re done, click on Add Mapping.
You can also set up role-based shipping based on customers. To do that, you’ll first need to set up shipping zones if you haven’t already.
From an existing shipping zone, you can click on Add shipping method, then choose from flat rate, free shipping, or local pickup. You can also add a customized name and set the rate.
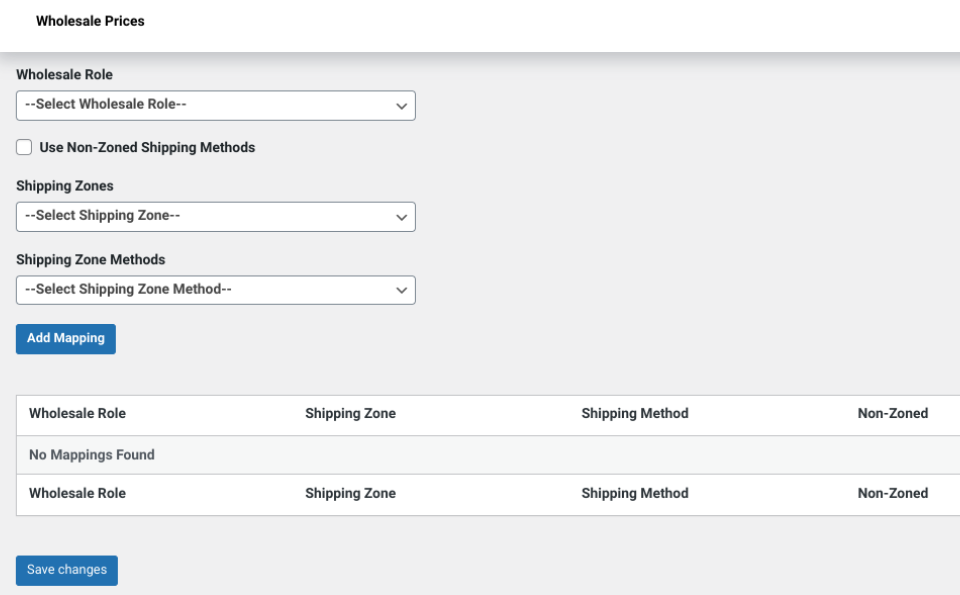
With your roles and shipping zones created, you can map them to one another by navigating to WooCommerce > Settings > Wholesale Prices > Shipping:
Here, you can customize a variety of settings. For example, you can enable free shipping for wholesale users. You can also restrict shipping methods by selecting the user role and mapping it to specific shipping zones.
Conclusion
Creating role-based products in WooCommerce lets you restrict certain items from specific user groups. This can help you establish a more personalized, efficient shopping experience for every type of customer you have. However, to implement a complete solution, you’ll need to pair WooCommerce with a third-party plugin.
Wholesale Suite provides you with complete control of your online wholesale operations. This powerful all-in-one solution allows you to manage wholesale pricing, tailor product visibility, streamline the ordering process, and more. As we’ve explored in this post, you can use Wholesale Suite to create role-based products in WooCommerce in five simple steps:
- Install Wholesuite Suite
- Create your roles
- Apply role-based pricing to your products
- Configure role-based product visibility settings
- Apply payment gateway and shipping method restrictions
Do you have any questions about creating WooCommerce role-based products? Let us know in the comments section below!

