You’re probably familiar with most of the default WordPress user roles. Those roles work perfectly for a blog, but if you plan to run a WooCommerce store, you’re going to need access to more options and the ability to set up your own roles. Fortunately, it’s easy to add new WooCommerce user roles using plugins like Wholesale Suite.
By creating additional WooCommerce user roles, you can serve the needs of your customers better and encourage them to convert. In this post, we’ll discuss why WooCommerce user roles and permissions are crucial to e-commerce success. We’ll then show you how to maximize your appeal by creating additional user types and offering some exclusive role-based perks.
So, let’s get right into it!
An Introduction To WooCommerce User Roles and Permissions (And Why They’re Important)
Granting people access to your store can be a risky move. Malicious third parties often register with websites in an attempt to gain increased privileges. If successful, they could use these privileges to perform malicious actions, such as uploading malware or posting spam comments.
In addition, not everyone is a WooCommerce expert. If you assign elevated privileges to every single user, there’s a chance that legitimate customers may accidentally damage your site.
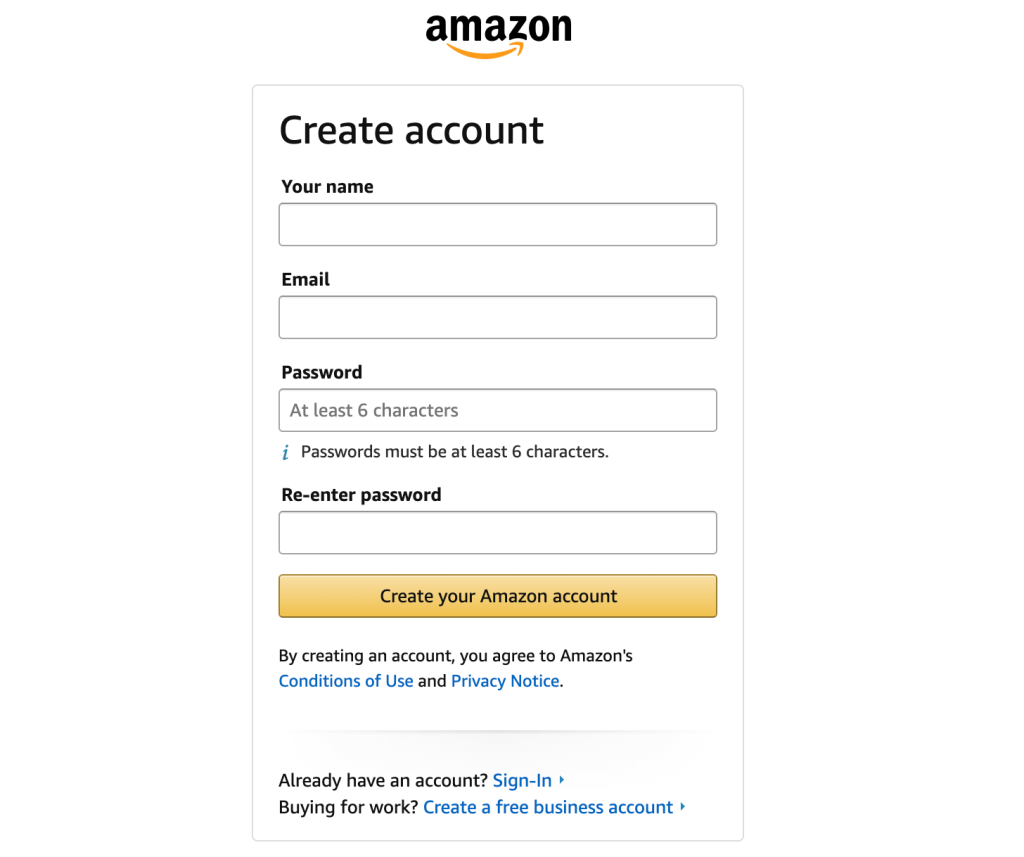
There is an easy answer to this problem: disable user registrations. However, this isn’t feasible for the majority of online stores. Many of the best-known e-commerce brands enable customers to create an account:
User registrations
User registration is an effective way to encourage subsequent purchases. After investing time and effort into the signup process, customers may feel more inclined to pay you repeat visits.
You can also auto-fill information for subsequent purchases, such as completing the Address field. This can improve the checkout experience and reduce cart abandonment rates.
As part of the registration process, you’ll typically collect the customer’s contact details. You can then target this person with email marketing and personalized content such as ads.
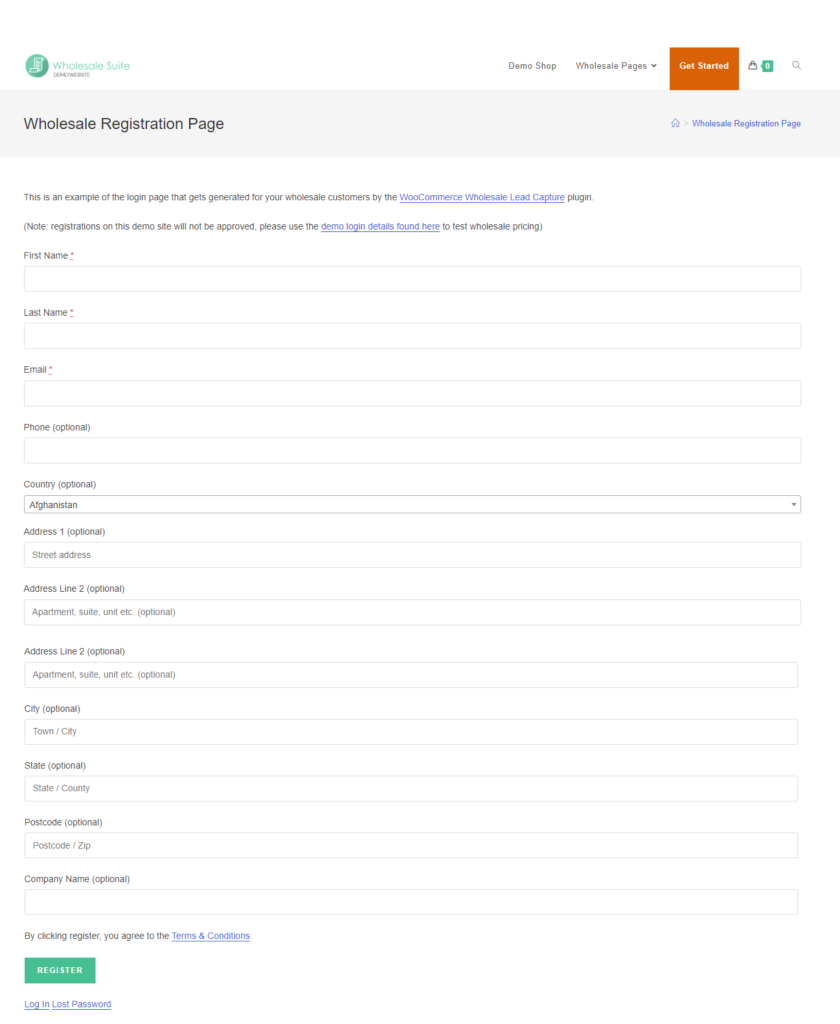
Registrations can be a valuable addition to your e-commerce store. WooCommerce wholesale businesses can leverage plugins like Wholesale Lead Capture to create tailored registration forms for B2B buyers.
Understanding The Default WooCommerce User Roles
WordPress has six default user roles: super admin, admin, editor, author, and contributor. When you install WooCommerce, you’ll gain two additional roles.
By default, WooCommerce assigns the Customer role to any visitor who creates an account. This role has the least number of permissions. Customers can edit their own account information and profile, and view past or current orders. They can also post comments.
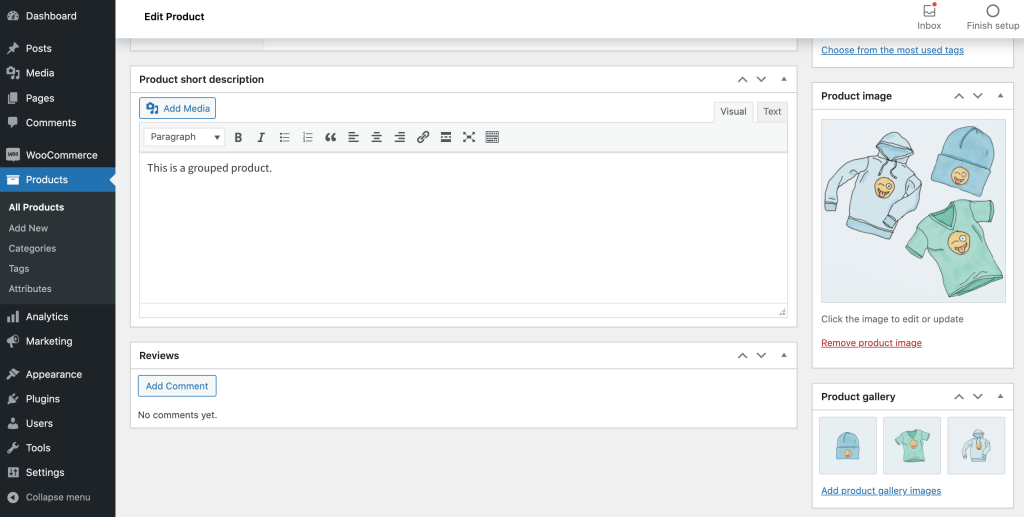
WooCommerce also adds a Shop Manager role. Individuals with this role can edit all of the settings within your store and access your WooCommerce reports. They can also add new products and edit existing ones:
However, Shop Managers cannot access your site’s back-end functionality. This includes adding plugins or themes, and editing your site’s settings. Therefore, this role is perfect for anyone who’s responsible for stock management, but doesn’t have any WordPress experience.
Why You Should Have Multiple WooCommerce User Roles
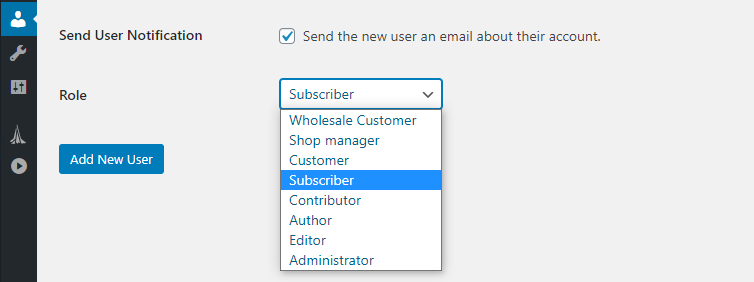
As we’ve discussed, WooCommerce adds two new user roles to WordPress when you activate the plugin. Those two roles are ‘customer’ and ‘shop manager’ (that’s you!):
The two default WooCommerce user roles provide a good foundation, but they’re not enough for a complex online store. That goes particularly once you add complex features such as coupons and wholesale discounts into the mix.
Imagine, for example, that you want to target wholesale customers and provide them with special prices. The best way to do that while still retaining original pricing would be to set up an additional WooCommerce customer role for those buyers.
There are a lot of ways you can set up new WordPress and WooCommerce user roles. If you’re a roll-up-your-sleeves kind of person, you can do it manually. However, there’s little reason to use that approach when you can opt for a plugin instead.
For the next section, we’ll show you how to add new user roles to your store using the WooCommerce Wholesale Prices plugin. It only takes a few minutes, and it’s a whole lot easier than messing with WordPress core files.
How To Add More WooCommerce User Roles
While many online stores sell directly to customers, you might also be able to sell to wholesalers. These are organizations that purchase products in bulk, with the intention to sell them to outlets or retailers.
A wholesaler can sell your products to lots of different companies. This can help build brand awareness, without you having to invest time and resources into maintaining relationships with lots of smaller organizations.
Therefore, you may want to consider creating a Wholesale Customer role on your site. Let’s take a look at the process.
Step 1: Install Wholesale Prices
Adding new customer roles using the WooCommerce Wholesale Prices plugin is remarkably easy. The first thing you need to do is to install the plugin, of course:
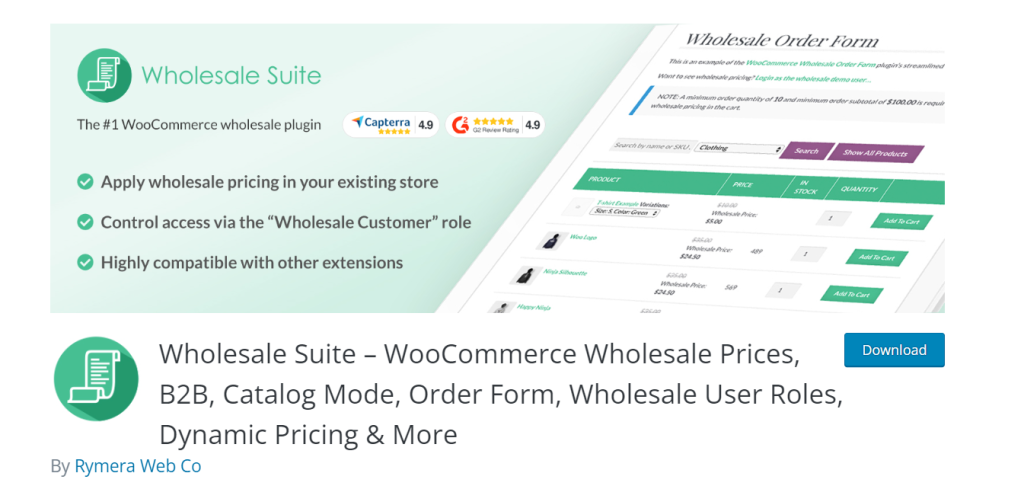
You can follow along the tutorial using the free version of the plugin. Keep in mind that with that version, you can only have one additional WooCommerce user role, though.
If you want to set up multiple custom roles, you’ll need to use the plugin’s premium add-on. The full Wholesale Suite includes plenty of other useful features, such as lead capture and order forms for your store.
Step 2: Navigate to Wholesale Roles
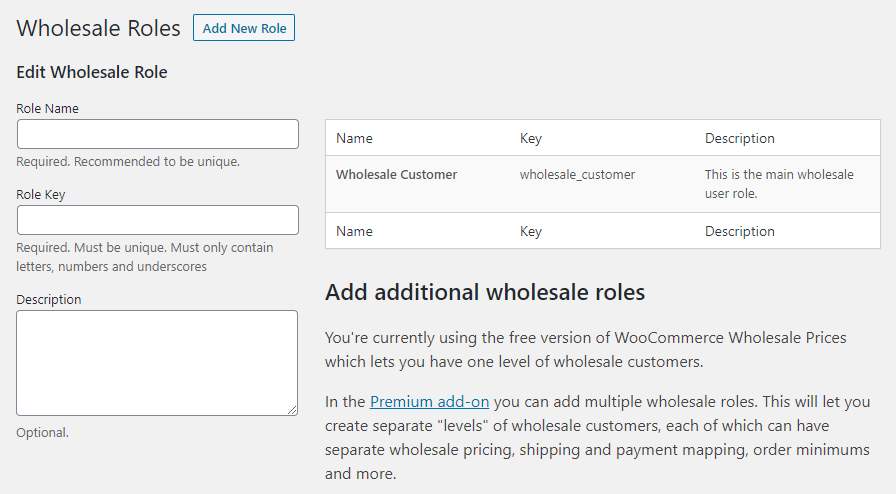
In any case, once you install the plugin, go to your dashboard and into the WooCommerce > Wholesale Roles tab:
Out of the box, the plugin comes with its own custom WooCommerce user role for you, called Wholesale Customer. As you can see, each role includes a name, a ‘key’, and a description.
The user role’s key and description are for internal identification purposes. That key should be a combination of characters that’s unique within your WordPress database and that enables you to quickly identify the role.
Let’s say, for example, you want to add a role for ‘advanced’ wholesale customers. You could set the name to Advanced Wholesale Customer, its key to advanced_wholesale_customer and any description you want:
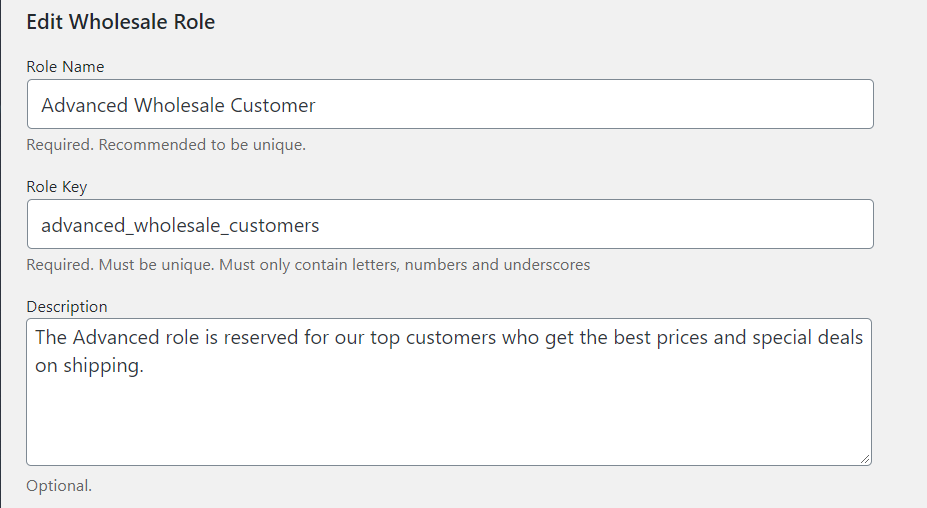
Keep in mind that user role descriptions are optional. However, we recommend that you include them, particularly if you’re going to set up multiple WooCommerce user roles. That way, you’ll never forget what each role’s purpose is.
Since you already have a custom WooCommerce user role, though, you won’t be able to add any additional ones without using the premium version of the plugin.
What you can do is edit the default Wholesale Customer role to better suit your store’s needs. To do that, click on the Edit button under the role’s name:
Now, the plugin will enable you to edit that role’s name and its description. The role’s key however, can’t be changed:
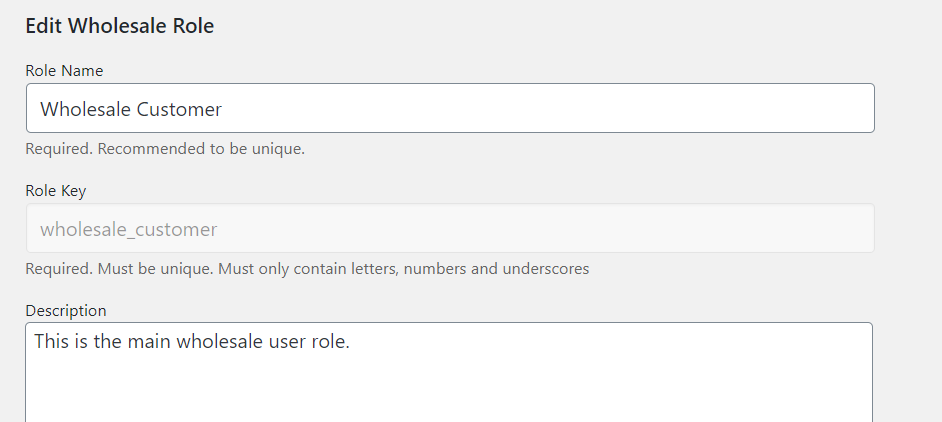
You have full control over what type of roles you want to use for your WooCommerce site. If you run a subscription website, for example, you can create a role for premium members, and that’s just one idea.
How to Create Exclusive Role-Based Coupon Codes (In 2 Steps)
WooCommerce coupons can be another powerful way to drive conversions. By making discounts exclusive to certain user roles, you can encourage customers to create accounts with your store, or even upgrade their existing subscription. With this in mind, let’s see how you can create role-based discounts for your audience.
Step 1: Create a coupon
You can create exclusive coupons using the free Advanced Coupons plugin. This plugin enables you to restrict coupons based on a range of factors, including cart conditions, cart subtotal, and user role:
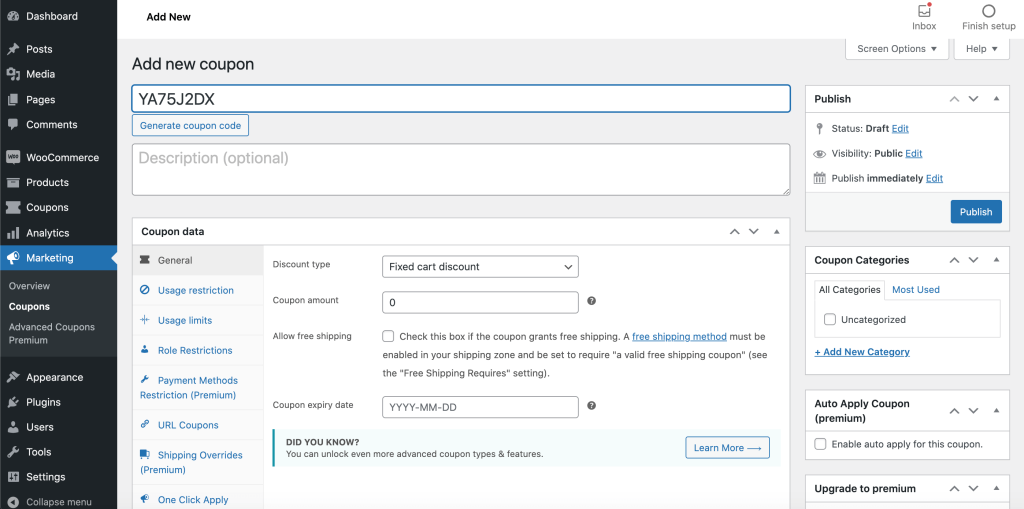
After activating this plugin, navigate to Coupons > Add New. You can either create your coupon manually, or task Advanced Coupons with auto-generating a coupon code:
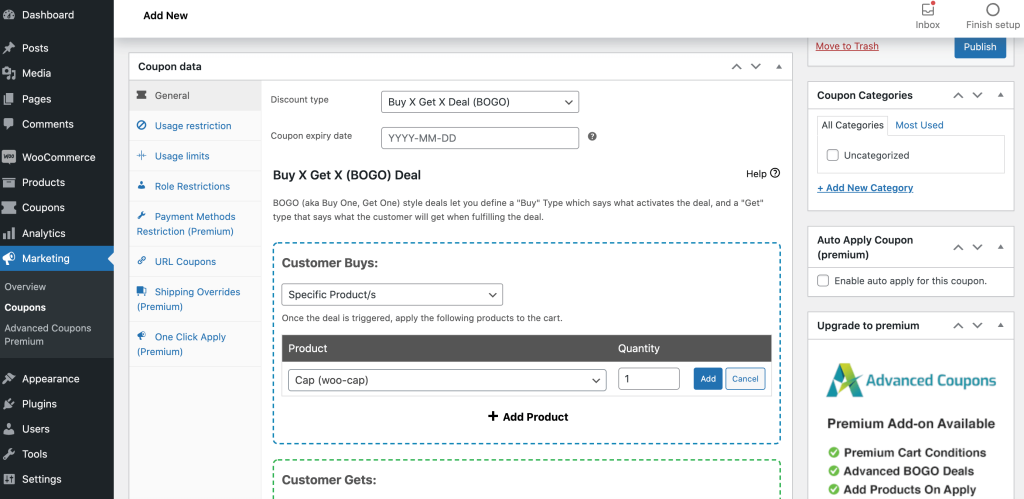
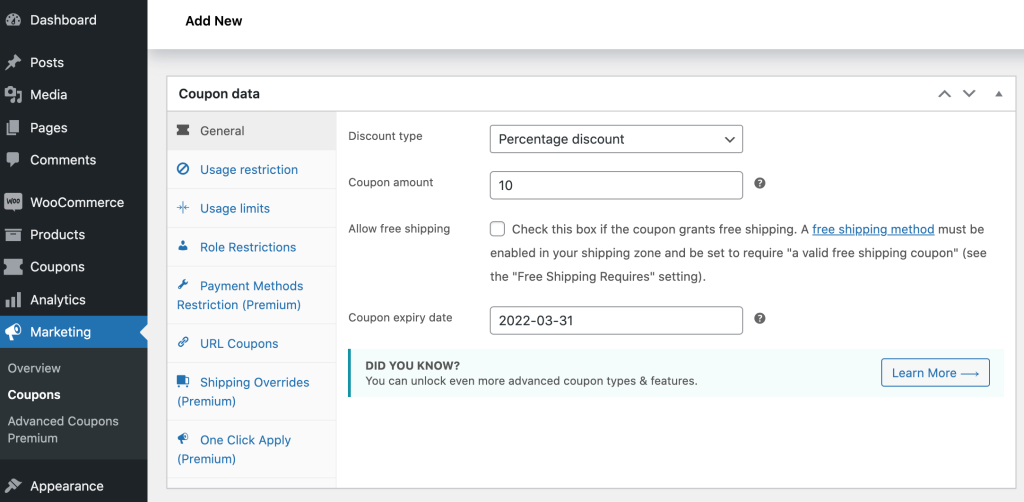
Next, open the Discount Type dropdown and specify the discount or perk associated with this code. This might be a fixed price discount, a global percentage discount, or a Buy One Get One Free (BOGO) offer:
You can also set an expiry date. This prevents customers from using this coupon indefinitely. To set this time limit, use the Coupon expiry date field:
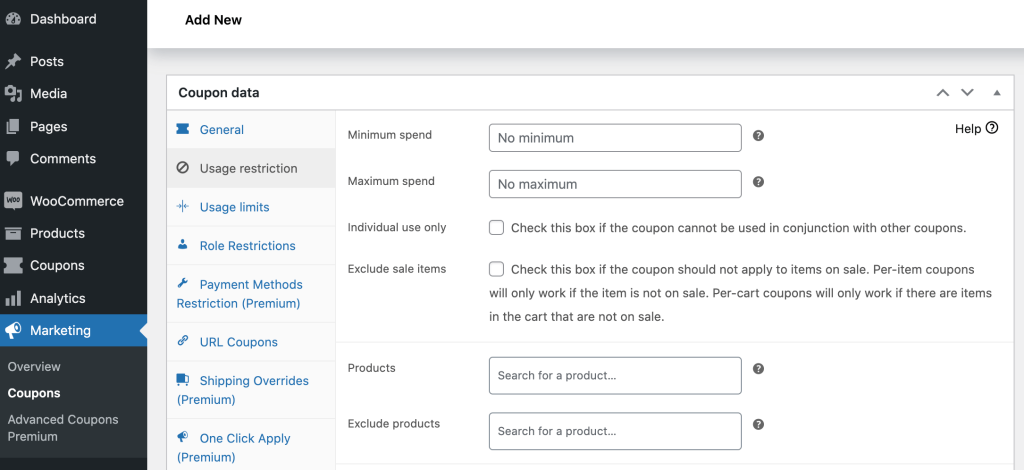
Then, select the Usage restriction tab. Here, you can set some restrictions for this coupon, including a minimum spend, or excluding items that are already on sale:
You can also prevent customers from using the same coupon multiple times. To do this, select the Usage limits tab and enter a value into the Usage limit per user field.
Step 2: Set up WooCommerce user role coupons
Advanced Coupons has lots of additional settings that are well worth exploring. However, we’ve already covered all of the main changes you’ll need to make to create a basic coupon.
Additionally, you can restrict this code to specific user roles. For example, you might decide to disable WooCommerce coupons for wholesale customers, since they’re already entitled to a bulk discount.
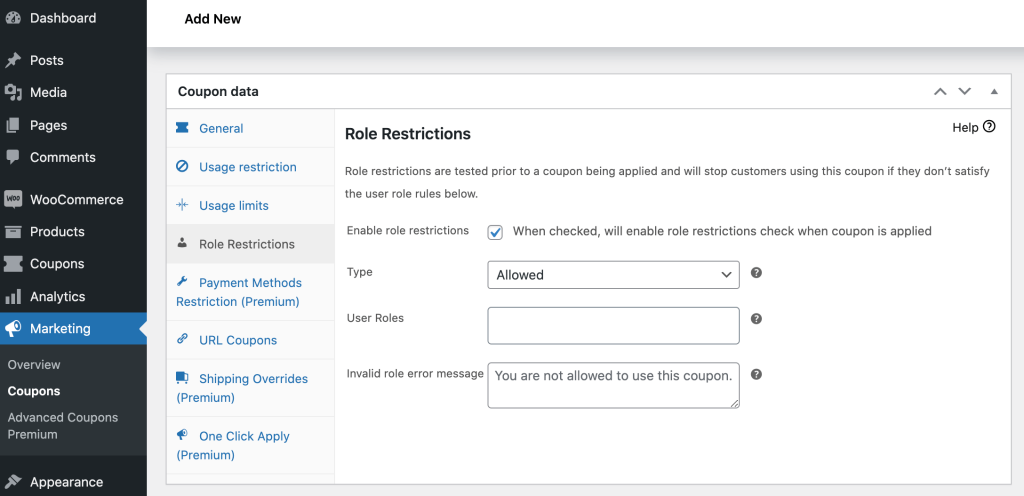
To start, navigate to the Role Restrictions tab. Then, select the Enable role restrictions checkbox:
You can now use the subsequent controls to specify the roles that can use this coupon. To provide a good experience for all of your customers, you may also want to enter an Invalid role error message. WooCommerce will display this text whenever someone tries to use a coupon from an incompatible user account.
Conclusion
The more WooCommerce user roles you add to your website, the more control you can have over discounts and pricing tiers. If you have a lot of wholesale customers, for example, you’ll want to set up different user roles for different levels of ‘big’ fish. That way, you can give your best customers the best prices.
If you’re using the free version of the WooCommerce Wholesale Prices plugin, you can set up one additional customer role. With the premium version, you can create as many WooCommerce user roles as you want or need. Here’s how you can do it in two easy steps:
Additionally, we discussed how you can create role-based coupons using Advanced Coupons in two easy steps. This allows you to offer exclusive discounts to specific user roles, enticing them to make larger purchases. We’ve also shared how you can disable coupon usage for wholesale customers to prevent coupon misuse within this segment of your customer base.
Let’s recap the steps below:
- Install Advanced Coupons and create a new coupon
- Modify coupon “Role Restrictions” to enable or disable coupon usage
Do you have any questions about how to add new WooCommerce user roles to your store? Let’s talk about them in the comments section below!






Thanks for sharing this information, it is great.
You’re welcome Marty! Glad it helped :)
Thank you for the information
You’re very welcome BA Hadley!
Thanks for these posts, they are really informative.
You’re welcome Tomas!
Helpful info
Cheers Randy!
Great guide on adding WooCommerce user roles! Quick question: How does Wholesale Suite handle user role conflicts if I already have roles set up? Thanks!
Hi Saiful, Wholesale Suite manages it’s own roles as there’s a lot of complexity for product visibility and the various levels of pricing. The best way is to create them via the Wholesale->Roles menu and reassign. Hope this helps!
I want a freenium version
Great information thanks!
Cheers Shellie!
Very informative!
Thanks Brandy! Glad you liked it!