
If you ask wholesale applicants for a resale certificate, a tax document or a trade reference, you can collect it in the registration form itself. This article shows you how to add a file upload field, and where to find the file once an applicant submits it. That second part is the one most people get stuck on, because the file does not appear in the Leads list.
What you’ll need
- WooCommerce Wholesale Lead Capture, active on your store
- An administrator account, so you can open the Wholesale Lead Capture settings and a user’s profile
Add a file upload field to the registration form
- Go to WooCommerce > Wholesale > Settings and open the Wholesale Lead Capture tab.
- Select Registration Form. The table lists every field on the form, with its Field Name, Field ID, Field Type, and whether it is Required and Enabled.
- Select Add Custom Field. A drawer opens on the right, and Field ID is prefixed with
wwlc_cf_automatically. - Give the field a name your applicants will understand, for example Resale certificate, and set Field Type to File.
- Set Allowed File Types to the extensions you accept, separated by commas, for example
pdf,jpg,png. - Set Maximum Allowed File Size to the largest file you will take, in megabytes.
- Save the field, then save the settings page.
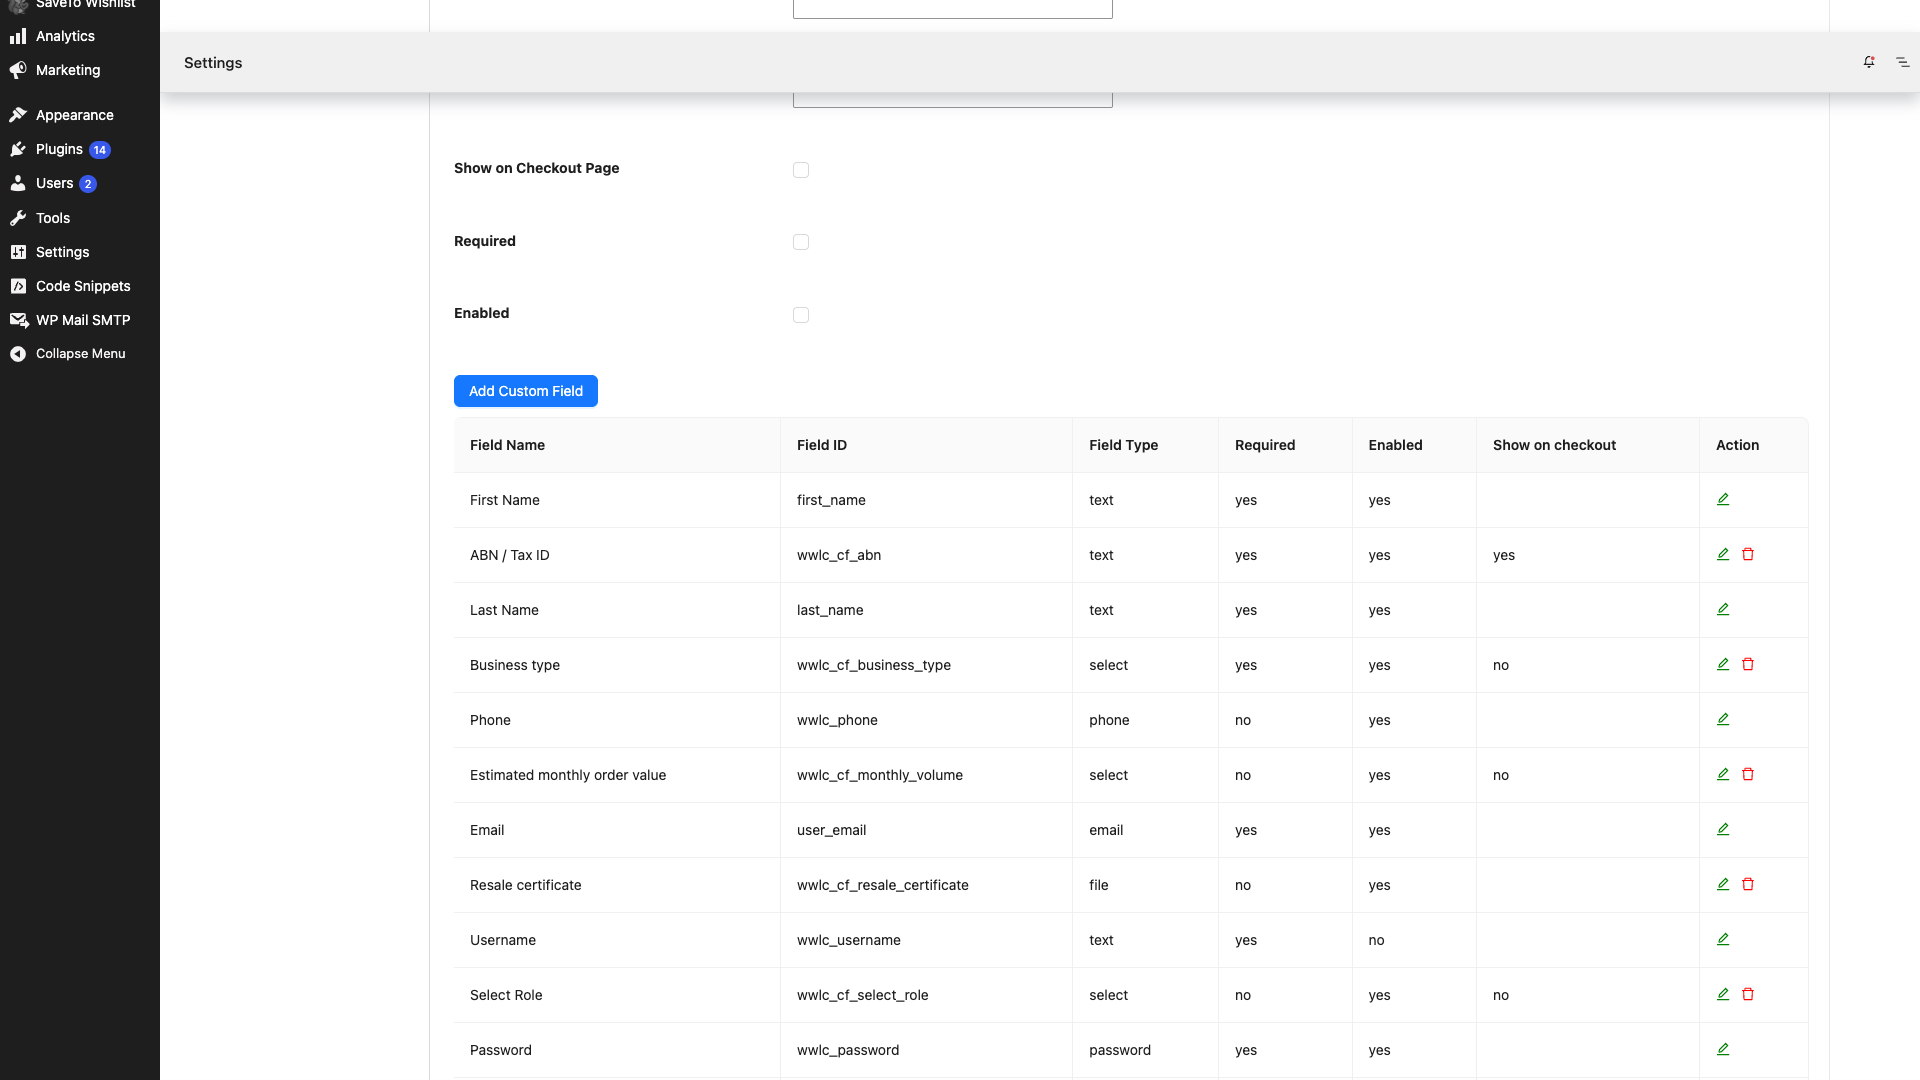
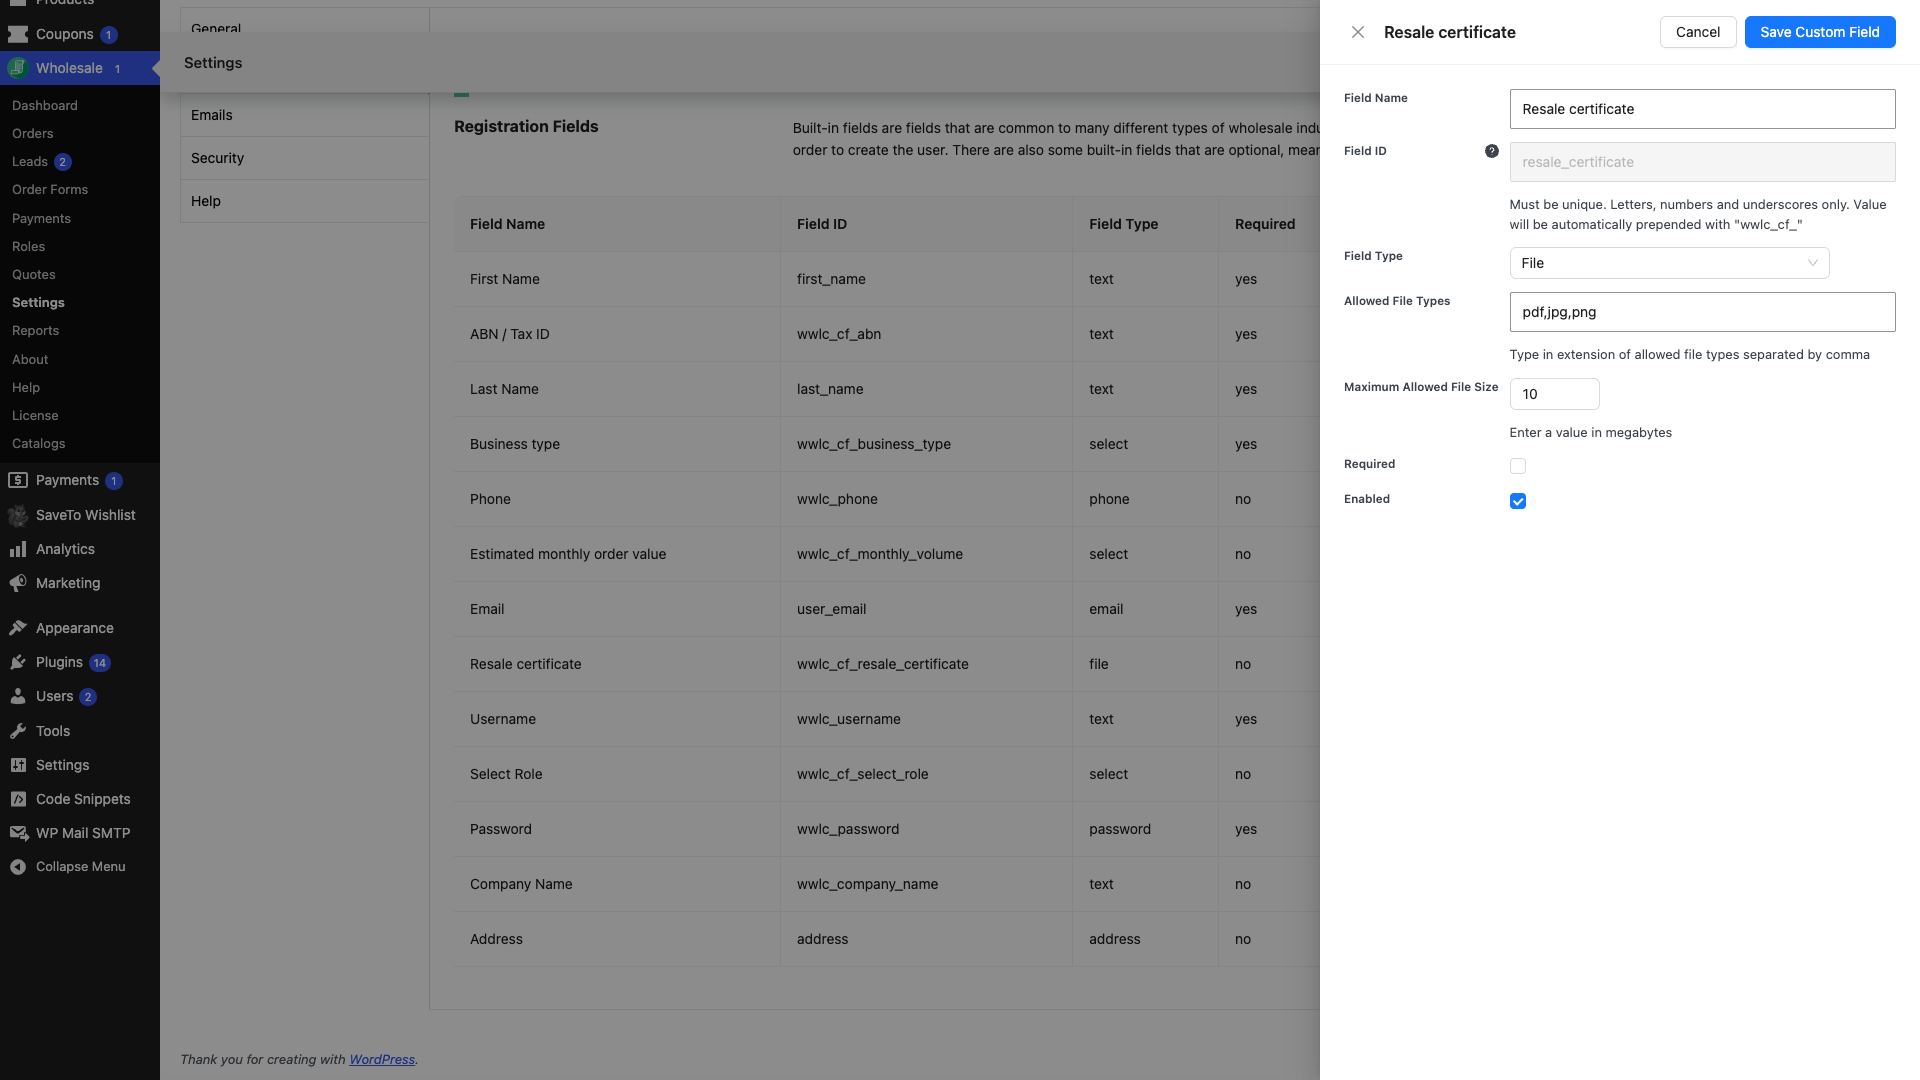
A few things worth knowing about the field itself:
- The file types and size limit are enforced on your server, not just in the browser, so an applicant cannot get around them by renaming a file.
- The plugin checks the real file type as well as the extension. A file renamed to a permitted extension is still rejected.
- Show on checkout does not apply to file fields. They appear on the registration form only.
Where to find a file an applicant submitted
Uploaded files are attached to the applicant’s user account, not to a row in the Leads list. To see one, open the user and scroll to the Wholesale Lead Information section of their profile.
- Go to Users and select the applicant, or open them from Wholesale > Leads.
- Scroll to Wholesale Lead Information. Each custom field appears here as its own row, labelled with the field name you chose.
- The file upload row shows the file the applicant submitted. When nothing was submitted it shows an empty file picker, which you can use to attach a document yourself.
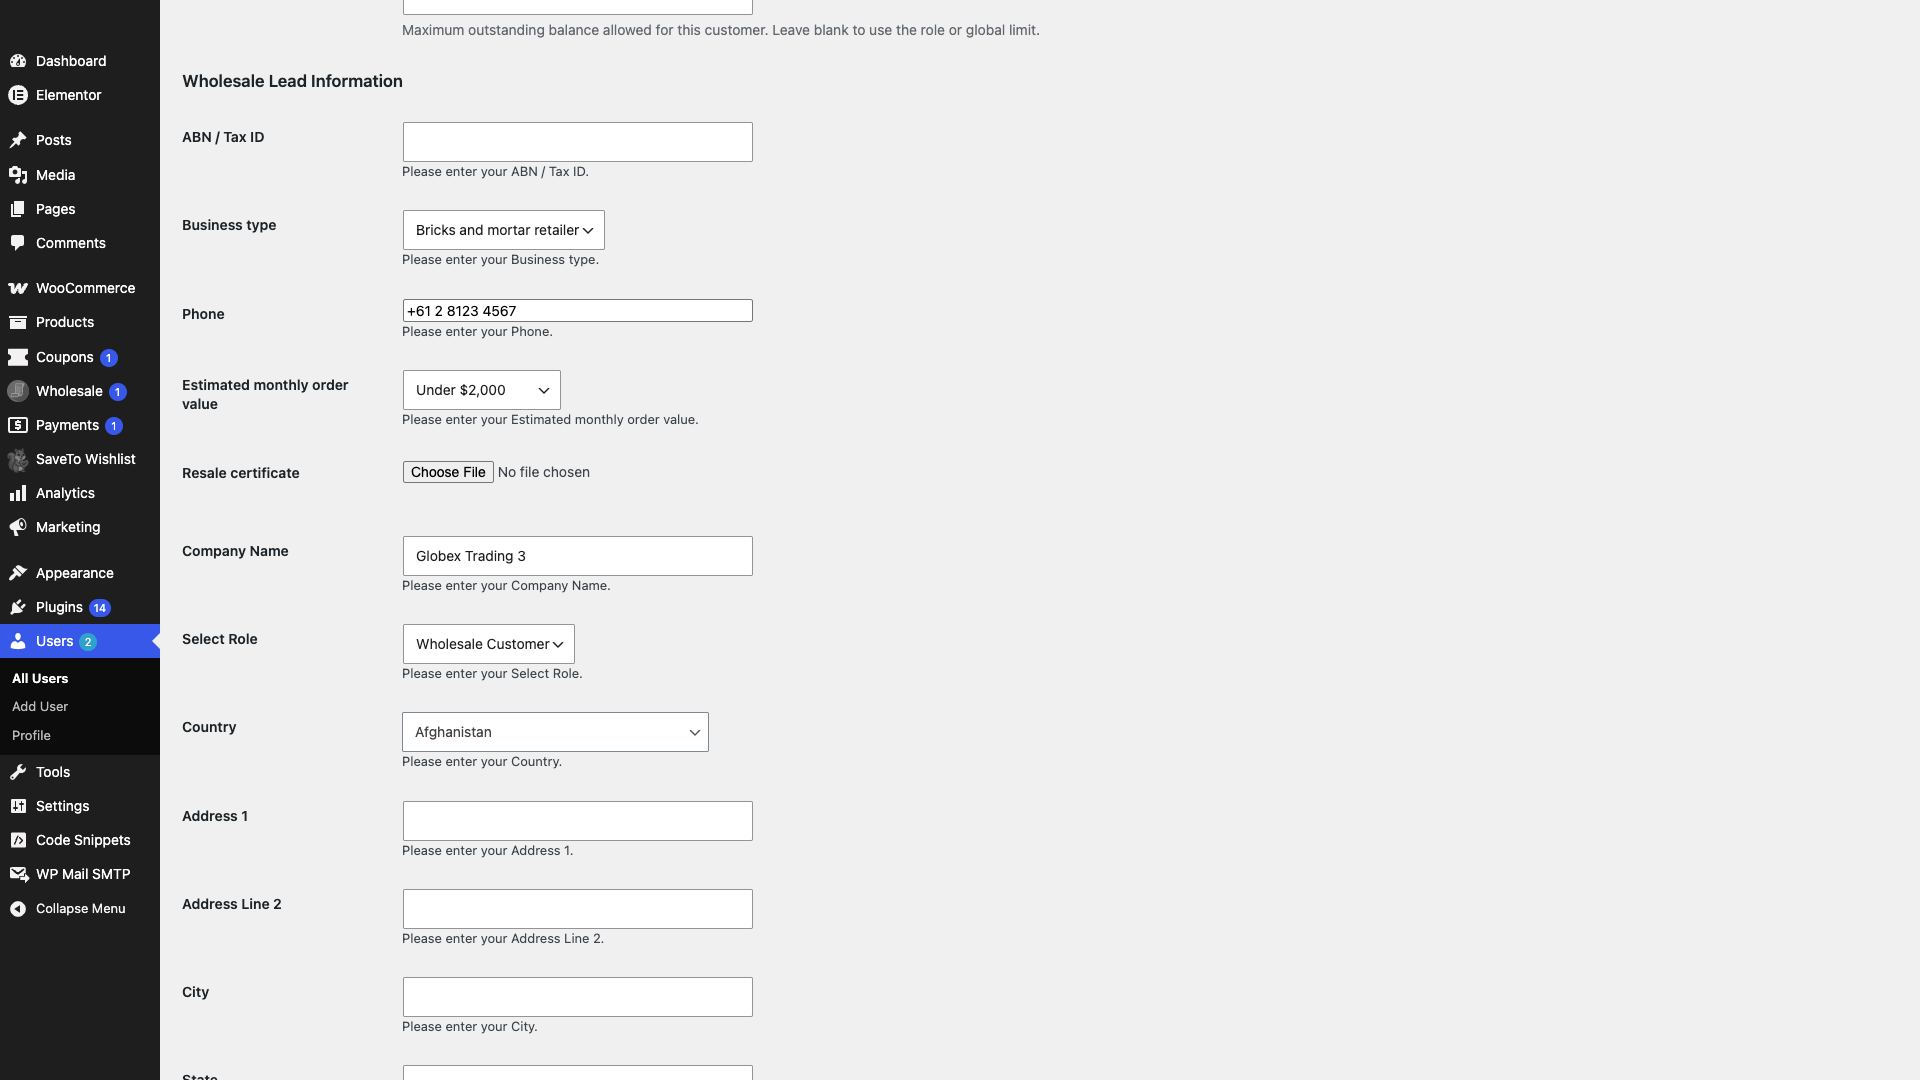
Because the file is stored against the user, it stays with that account after you approve the lead. Deleting the user removes their file as well.
Troubleshooting
The applicant says the upload was rejected
Check the file types you allowed on the field. The plugin verifies the real file type, so a document saved with the wrong extension, for example a .png renamed to .pdf, is refused with a message that the format is not supported. Widen the allowed types on the field if the format is one you want to accept.
I cannot find the file for a lead
Open the applicant’s user profile and look under Wholesale Lead Information. The Leads list does not show file fields, and the file is not sent as an email attachment, so the profile is the place to look.
The field does not appear on the registration form
Check that the field is Enabled in the Registration Form table, and that you saved the settings page after adding it.
Frequently asked questions
Can an applicant upload more than one file to a single field?
No. Each file field holds one file. Add a second field if you need a second document.
Can I upload a document on the applicant’s behalf?
Yes. The file row on their profile accepts an upload, which is useful when someone emails you the document instead of attaching it to the form.
Are uploaded files public?
Files are stored in your site’s uploads area. Treat the URL as sensitive and do not share it outside your team.
Need help?
If you have a question or run into any issues, we’re here to help.
- Premium users: Open a support ticket
- Free users: Visit our community forum