
Ask any wholesale buyer how they prefer to pay, and you will hear the same answer: on net payment terms, not upfront. B2B customers are used to receiving goods first and settling the invoice 30, 60, or 90 days later. When your WooCommerce store cannot offer that, you quietly lose wholesale deals to suppliers who can.
The catch is that WooCommerce has no built-in way to offer net payment terms, and chasing unpaid invoices by hand is a headache in itself. This guide covers what net payment terms are, when it makes sense to offer them, and how to implement net payment terms in WooCommerce without manual follow-up.
What Are Net Payment Terms?
Net payment terms allow a customer to pay for an order within a set window after receiving it, rather than upfront at checkout. The most common terms are net 30, net 60, and net 90, where the number is how many days the buyer has to pay from the invoice date. In accounting language, this is a form of trade credit: you are effectively issuing a short-term, interest-free loan to your buyer.

This is standard practice in wholesale. Because wholesale customers buy in bulk and reorder regularly, they expect a degree of trade credit, just as contractors and suppliers extend it to each other. Offering net payment terms signals that you treat them as a long-term partner, not a one-off sale. It is no surprise that roughly 43% of B2B transactions rely on some form of trade credit.
Net 30/60/90: Which Should You Offer?
The right term depends on how much cash flow flexibility you can absorb and how much trust you have built with the customer. Here is the quick version:
- Net 30: The default starting point. It is short enough to protect your cash flow and generous enough to satisfy most wholesale buyers, which makes it a good fit for newer accounts.
- Net 60: A middle ground for established customers with a solid payment history, or for larger orders where the buyer needs time to sell through inventory.
- Net 90: Usually reserved for your best, highest-volume accounts. The longest net payment term carries the most risk, so keep it for relationships you trust.
You do not have to offer the same net payment terms to everyone. Many stores open new accounts on net 30 and extend the window as a customer proves reliable.
When To Offer Net Payment Terms
Net payment terms are a powerful way to win and keep wholesale customers, but they put your cash on the line. Before you turn them on, weigh these four factors:
- Your cash flow: You are paying the order amount upfront until the due date. Make sure you have the liquidity to keep operating while invoices are outstanding.
- Average order value: Net payment terms tend to pay off on larger orders, where the convenience wins bigger deals, and the margin absorbs the wait.
- The customer relationship: Offer your most flexible terms to buyers with a track record. Clear communication on due dates matters as much as the terms themselves.
- Risk tolerance: Longer terms mean more exposure to late or missed payments. Decide upfront how you will handle overdue invoices, and set sensible wholesale credit limits backed by a credit approval process before you extend terms to anyone. You can even auto-offer a structured payment plan once a net-term invoice goes overdue.
That last point deserves emphasis, because late payment is the rule rather than the exception in B2B. One analysis of over 20 million invoices found that 64% of small businesses end up waiting on late invoice payments, and broader research has pegged the share of overdue B2B invoiced sales at around half. Going in with a plan for overdue accounts is not pessimism; it is just realistic.
What we have seen: The stores that struggle with net payment terms are not the ones that offer them, they are the ones that track them in a spreadsheet. Late payments slip through, follow-up is inconsistent, and a buyer eventually says “I already paid” with no clear record to check. Automating the invoice and the due-date charge is what keeps net payment terms from becoming a collections job.
How To Offer Net Payment Terms In WooCommerce
WooCommerce does not offer net payment terms out of the box, so you will need a plugin or integration. Here are three ways to do it, from the most automated to the most hands-on.
Method 1: Use Wholesale Payments (recommended)
Wholesale Payments, the newest addition to Wholesale Suite, lets you offer net 30/60/90 and custom payment plans directly in WooCommerce, with no third-party accounting tool required. It is built for exactly this job, so the net payment terms are tied to the order rather than in a separate system.
Its standout feature solves the follow-up problem from above: it can automatically charge the customer on the due date. At checkout, Stripe securely saves the buyer’s payment details. When the net-term due date arrives, the saved card is charged automatically and the order is marked paid in both Stripe and your store. If a payment fails, Stripe retries, and you can see all upcoming auto-charges from your dashboard. For the full walkthrough, see our guides on setting up WooCommerce pay later plans and sending automatic invoices.
Key considerations to review before offering net 30/60/90
While offering net 30/60/90 payment terms has its advantages, it may not be suitable for all types of businesses. No worries, we’re here to help you determine if it’s the right move for you! It’s also worth taking time to build a credit approval process to vet buyers before you grant anyone net terms. Below, we’ve outlined key factors to consider before implementing WooCommerce pay later options in your e-commerce store:
- Customer base: Net 30/60 payments would particularly benefit businesses that cater to wholesale customers. Take a good look at the clients you’re serving and evaluate their payment preferences.
- Customer relationships: Likewise, it’s crucial to assess the state of your customer relationships. Providing net payment terms requires clear communication from both parties, ensuring there’s a transparent understanding of payment expectations and deadlines.
- Average order value: Offering net payment terms may be more beneficial for businesses with higher order values, as larger transaction amounts mitigate the risks associated with deferred payments.
- Cash flow sustainability: Will offering extended payment terms affect your ability to sustain your operations? Before offering net payment terms, it’s important to assess if your business has enough liquidity to support this payment option.
Method 2: Use WooCommerce Invoice Gateway
If you’d rather collect payment through your accounting software, WooCommerce Invoice Gateway lets customers check out without paying on the spot and sends an invoice once the order is complete. You can set your net terms on that invoice and process it through tools like Xero, QuickBooks, Reckon, or MYOB. It’s a good fit if your bookkeeping already lives in one of those systems, though collection and follow-up stay manual.

If your books live in QuickBooks, you can take the manual work out of that follow-up. LedgerPort syncs your WooCommerce orders into QuickBooks Online automatically, so invoice-based wholesale orders show up as real receivables instead of rows in a spreadsheet. That means QuickBooks’ A/R aging reports track who owes you what and when — and your bookkeeper isn’t reconstructing net-terms sales from order exports at month-end.
Method 3: Use a service that buys your invoices
Some services let you offer net terms while paying you upfront, then collect from the buyer themselves and absorb the risk of non-payment. Rumbleship is one such service that integrates with Wholesale Suite: you choose the terms to offer, and it vets buyers and makes you whole on the spot. The trade-off is the service’s fees, but it removes delinquency risk entirely.
For most WooCommerce stores that want net terms handled natively and collected on time, Wholesale Payments is the simplest path. The other two are solid alternatives if you have a specific accounting workflow or want to offload payment risk.
How To Enable WooCommerce Pay Later And Offer Net 30/60 In Your Store
WooCommerce, by default, does not have an inherent feature to enable net payment terms. Fortunately, you can easily set up net 30/60/90 payments and create customized payment plans with plugins like Wholesale Payments!
Wholesale Payments, our newest addition to Wholesale Suite, empowers business owners like you to offer payment installments to your WooCommerce store. It provides unparalleled flexibility to create custom payment plans tailored to your business’ specific needs.
In this tutorial, we’ll assume you’ve already installed and set up the plugin. Setting up net 30/60/90 payments takes a few steps, so let’s begin!
1. Connect your Stripe account to Wholesale Payments
The first step to setting up WooCommerce pay later options for your store is to connect your Stripe account to Wholesale Payments. This integration allows you to send out invoices to your customers seamlessly. It also gives your wholesale customers the flexibility to choose their preferred payment method when paying for their invoices.
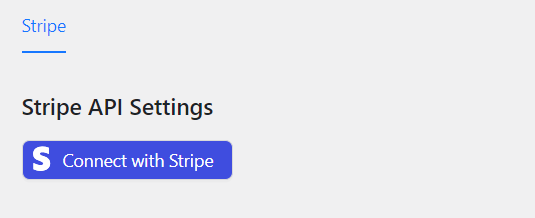
After installing Wholesale Payments, go to your WordPress dashboard and click Wholesale > Wholesale Payments. Then, click “Connect with Stripe”. This will direct you to the Wholesale Payments integration page. If you already have a Stripe account, simply enter your account details to connect it.
Alternatively, if you don’t have an existing Stripe account, you can easily create one right within Wholesale Payments. This saves you time and ensures seamless integration. Simply fill out your business details on the page to set up a new account.
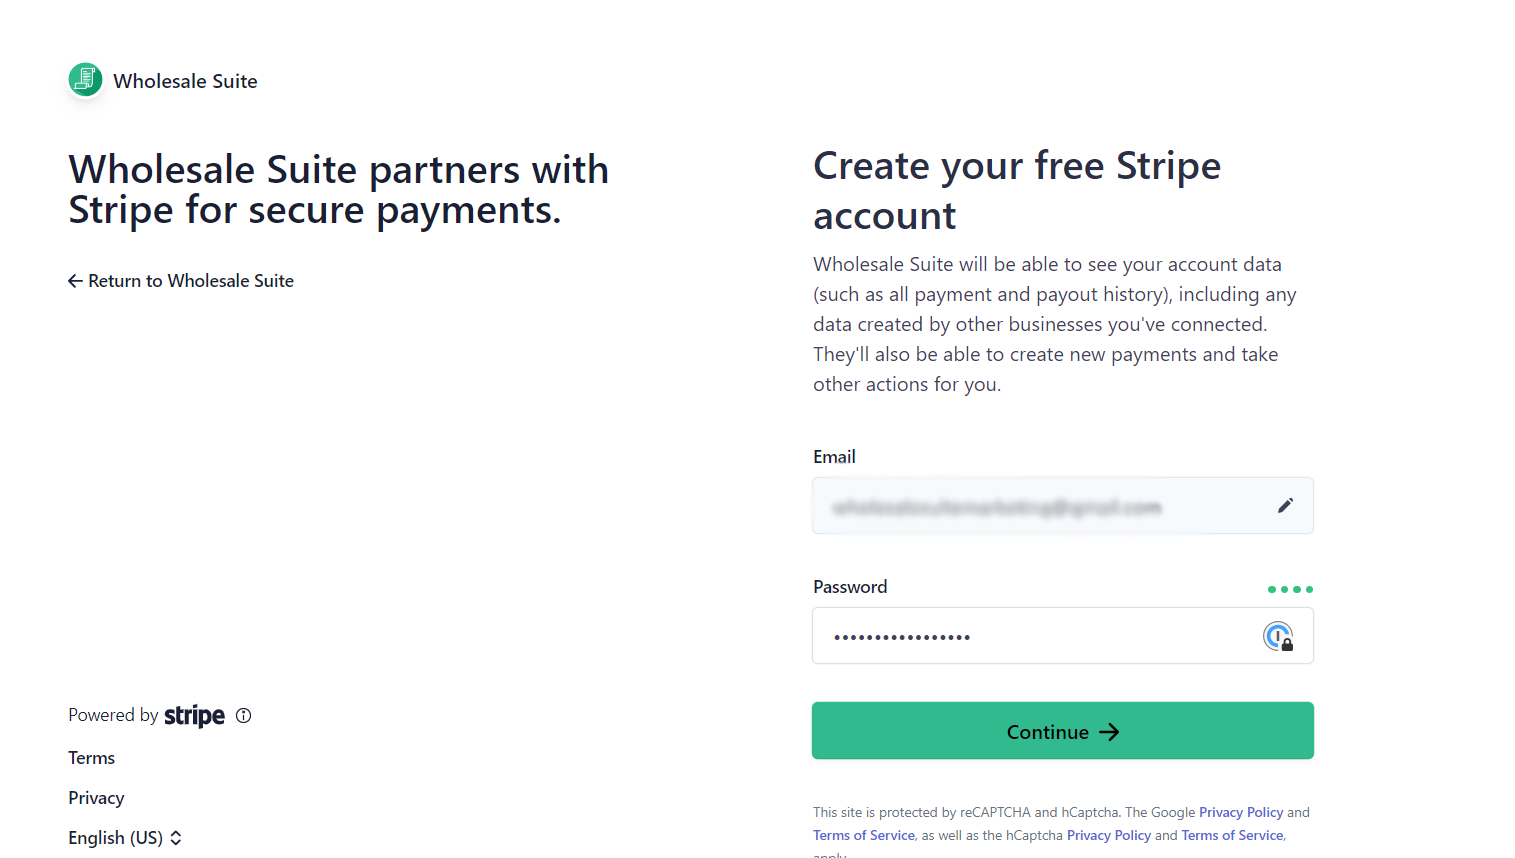
After filling out the required details, a Stripe account will automatically be created for you.
2. Add Wholesale Payments to your WooCommerce Payment Methods
The next thing you need to do is to enable Wholesale Payments on your WooCommerce store. To do this, simply navigate to WooCommerce > Settings > Payments. In the Payments settings, locate Wholesale Payments from the list of available payment methods. Toggle the switch to enable Wholesale Payments and make it accessible to your valued customers.
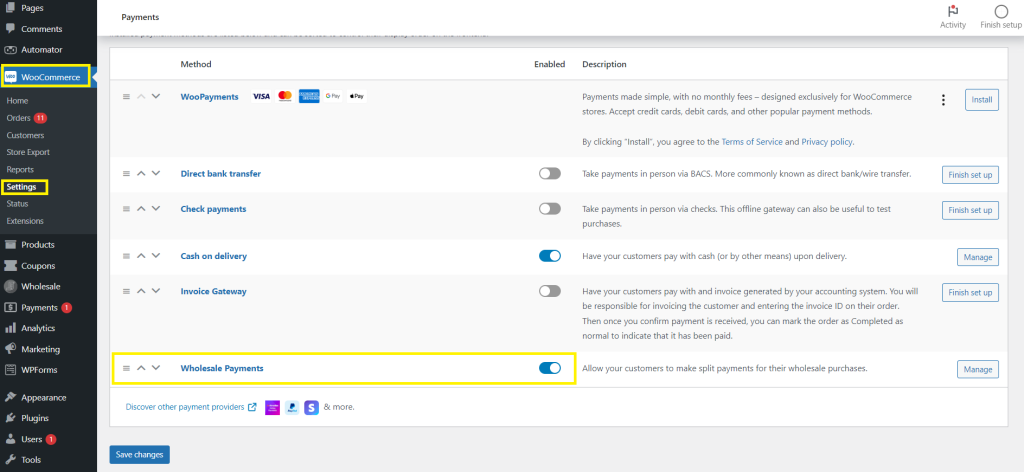
Don’t forget to save your changes!
3. Enable net 30/60/90 payment plans
Now that Wholesale Payments is all set up on your WooCommerce store, can now enable your desired payment terms! To do this, navigate to Wholesale > Payments > Payment Plans.
Immediately, you’ll notice default payment plans already set up for you. These are pre-configured and can be enabled anytime, depending on the options you want to provide your customers.

To enable NET 30 payment terms, simply select the “Net 30” option from the available payment plans. You’ll also have the option to customize the payment plan name and description to align with your preferences. Once you’re satisfied with your selections, click “Save Changes” to create your first payment plan.

Similarly, to enable Net 60 payment terms, select the “Net 60” option, adjust the plan details as needed, and then save your changes.

4. Edit your payment plans (optional)
Upon saving your changes, your newly created payment plans are automatically enabled by default. This is how it will look on your dashboard:

To modify the settings of a specific payment plan, navigate back to the “Payment Plans” section within Wholesale Payments and hover over the payment plan you wish to edit. Then, click the “Edit” button in the right corner of the plan.
You can also choose to restrict the plan’s availability to specific wholesale user roles, providing tailored purchasing experiences for different customer segments. Likewise, you can also enable Auto Charge Invoices if you wish to charge your customers automatically on their next due date.

Note: You can create as many wholesale user roles as you want using Wholesale Prices Premium, another powerful plugin part of Wholesale Suite. This tool allows you to manage wholesale pricing in your WooCommerce store, tweak product visibility for wholesale customers, and create discounts for your B2B clients.
Don’t forget to hit “Save” once you’re satisfied with your changes!
Here’s how your configurations will appear for your customers:
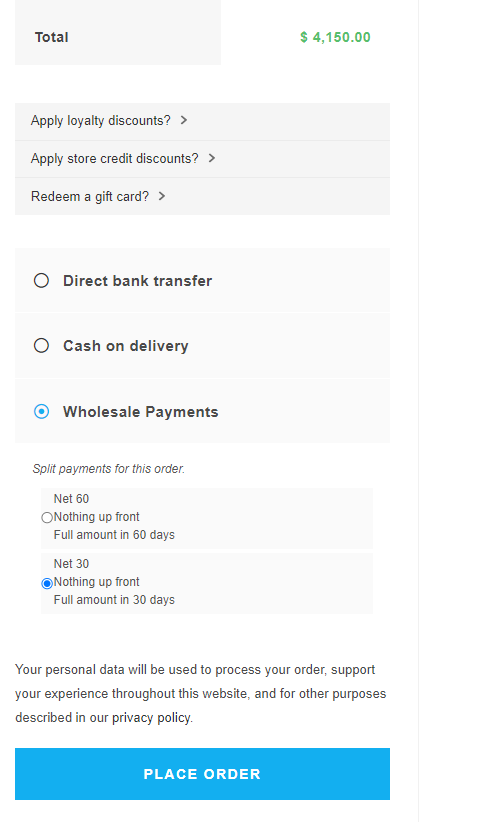
Immediately upon placing an order, your customer will receive an invoice detailing the amount due and its corresponding due date. With Wholesale Payments, they have the flexibility to choose among their preferred payment methods (such as ACH Direct Debit or credit cards), ensuring convenience with the checkout experience.
Offer Net Payment Terms The Easy Way
Net payment terms are table stakes for serious wholesale selling, but they only work in your favor when the collection side runs itself. Decide which terms fit each customer, then let your store handle the invoicing and the due-date charge so net terms grow your B2B sales instead of your admin pile.
- What are net payment terms?
- Net 30/60/90: which should you offer?
- When to offer net payment terms
- How to offer net payment terms in WooCommerce
Ready to offer net payment terms without chasing invoices? Get Wholesale Payments and let your store charge net-term invoices automatically on the due date.
Frequently Asked Questions
What does net 30 mean?
Net 30 means the customer has 30 days from the invoice date to pay in full. The buyer receives the goods first and settles the invoice within that window. Net 60 and net 90 work the same way with 60- and 90-day windows.
How do I offer net payment terms in WooCommerce?
WooCommerce has no built-in net-terms feature, so you use a plugin. Wholesale Payments lets you offer net 30/60/90 and custom plans natively and charge the saved card automatically on the due date. Alternatives include WooCommerce Invoice Gateway or an invoice-buying service like Rumbleship.
Can I automatically charge customers when their net term is due?
Yes. With Wholesale Payments, Stripe saves the customer’s card at checkout and the system charges it automatically on the due date, marking the order paid. Failed payments are retried, and upcoming auto-charges are visible in your dashboard, so you don’t have to chase invoices manually.
Net 30/60/90: Which should I offer?
Start new accounts on net 30 to protect your cash flow, and extend net 60 or net 90 to established, high-volume customers you trust. You don’t have to offer everyone the same terms, so match the window to the relationship and the order size.